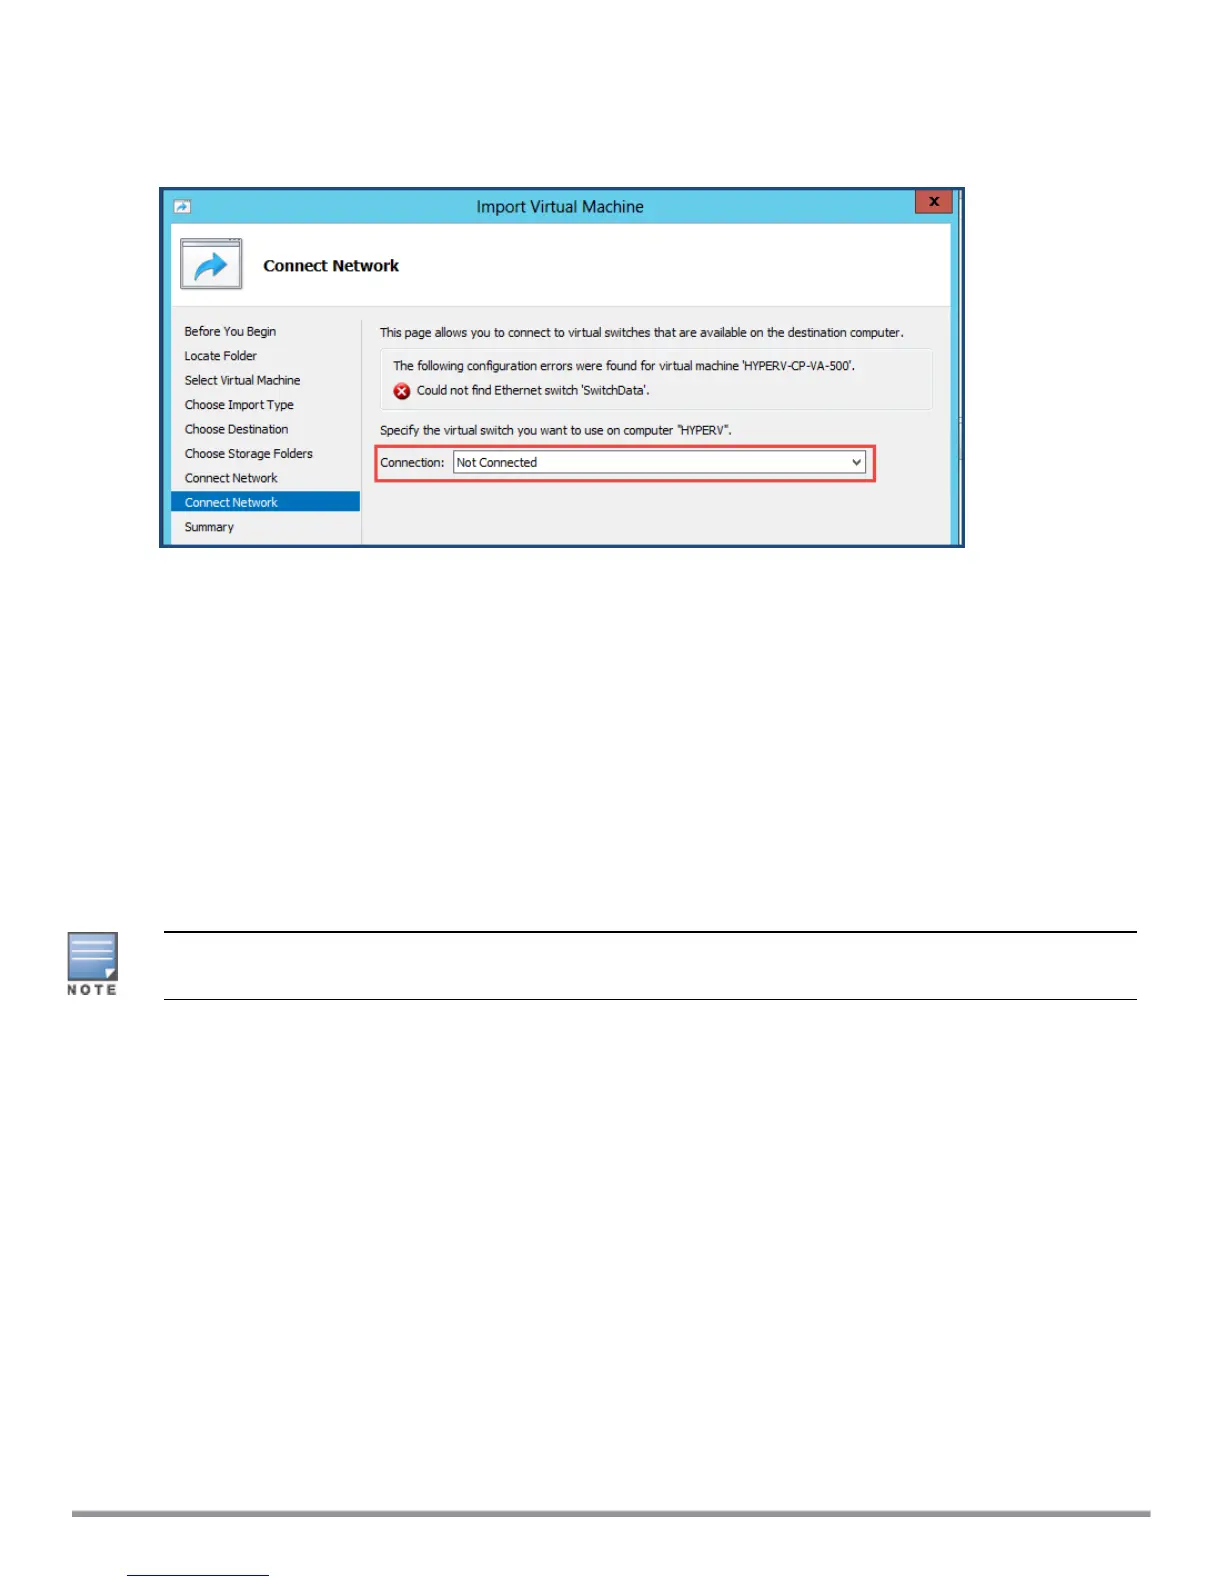
The following screen will be displayed to allow you to (optionally) specify the Data interface of the
ClearPass Policy Manager virtual appliance.
Figure 34 Specifying the Data Interface (Optional)
12. You can choose to either specify the virtual switch that will be used for the Data interface or bypass this
dialog.
a. To specify the virtual switch that will be used for the Data interface, from the Connection drop-down,
choose the virtual switch that will be used for the Data interface, then click Next.
b. To bypass this configuration option, leave Not connected selected in the Connection drop-down, then
click Next.
The Completing Import Wizard screen opens. This screen provides a summary of the import virtual
appliance configuration that you specified.
13. Review the settings displayed in the Summary page, and if they are correct, click Finish.
This completes the procedure to import the virtual appliance.
Adding a Hard Disk to a Virtual Machine
Do not create the virtual hard disk in a folder that is marked for encryption. Virtual hard disks are stored as .vhd files.
Hyper-V does not support the use of storage media if Encrypting File System (EFS) has been used to encrypt the .vhd
file. However, you can use files stored on a volume that uses Windows BitLocker Drive Encryption.
To add a hard disk to a virtual machine:
1. Open Hyper-V Manager.
2. In the Results pane, under Virtual Machines, select the virtual appliance that you want to configure.
3. In the Action pane, under the name of the virtual appliance, click Settings.
The Settings page opens.
43 ClearPass 6.7 Getting Started Guide
 Loading...