a. Configure the disk format, type, and size based on the requirements for your virtual appliance.
4. Power on and configure the virtual appliance.
Instructions for these procedures are provided in the following sections.
Importing the Virtual Machine
Microsoft Hyper-V gives you the ability to import virtual appliances that have not been previously exported.
This is extremely helpful in situations where a host OS becomes corrupted, or if the most recent good backup
of a virtual appliance is a file-level backup of the host.
To import the virtual appliance:
1. Download the software image from the Download Software >ClearPass > Policy Manager >
<Current_Release_Number> > Hyper-V folder on the Aruba Support Center and unzip it to a folder on
your server to extract the files.
2. To extract the files, unzip the files to a folder on your server.
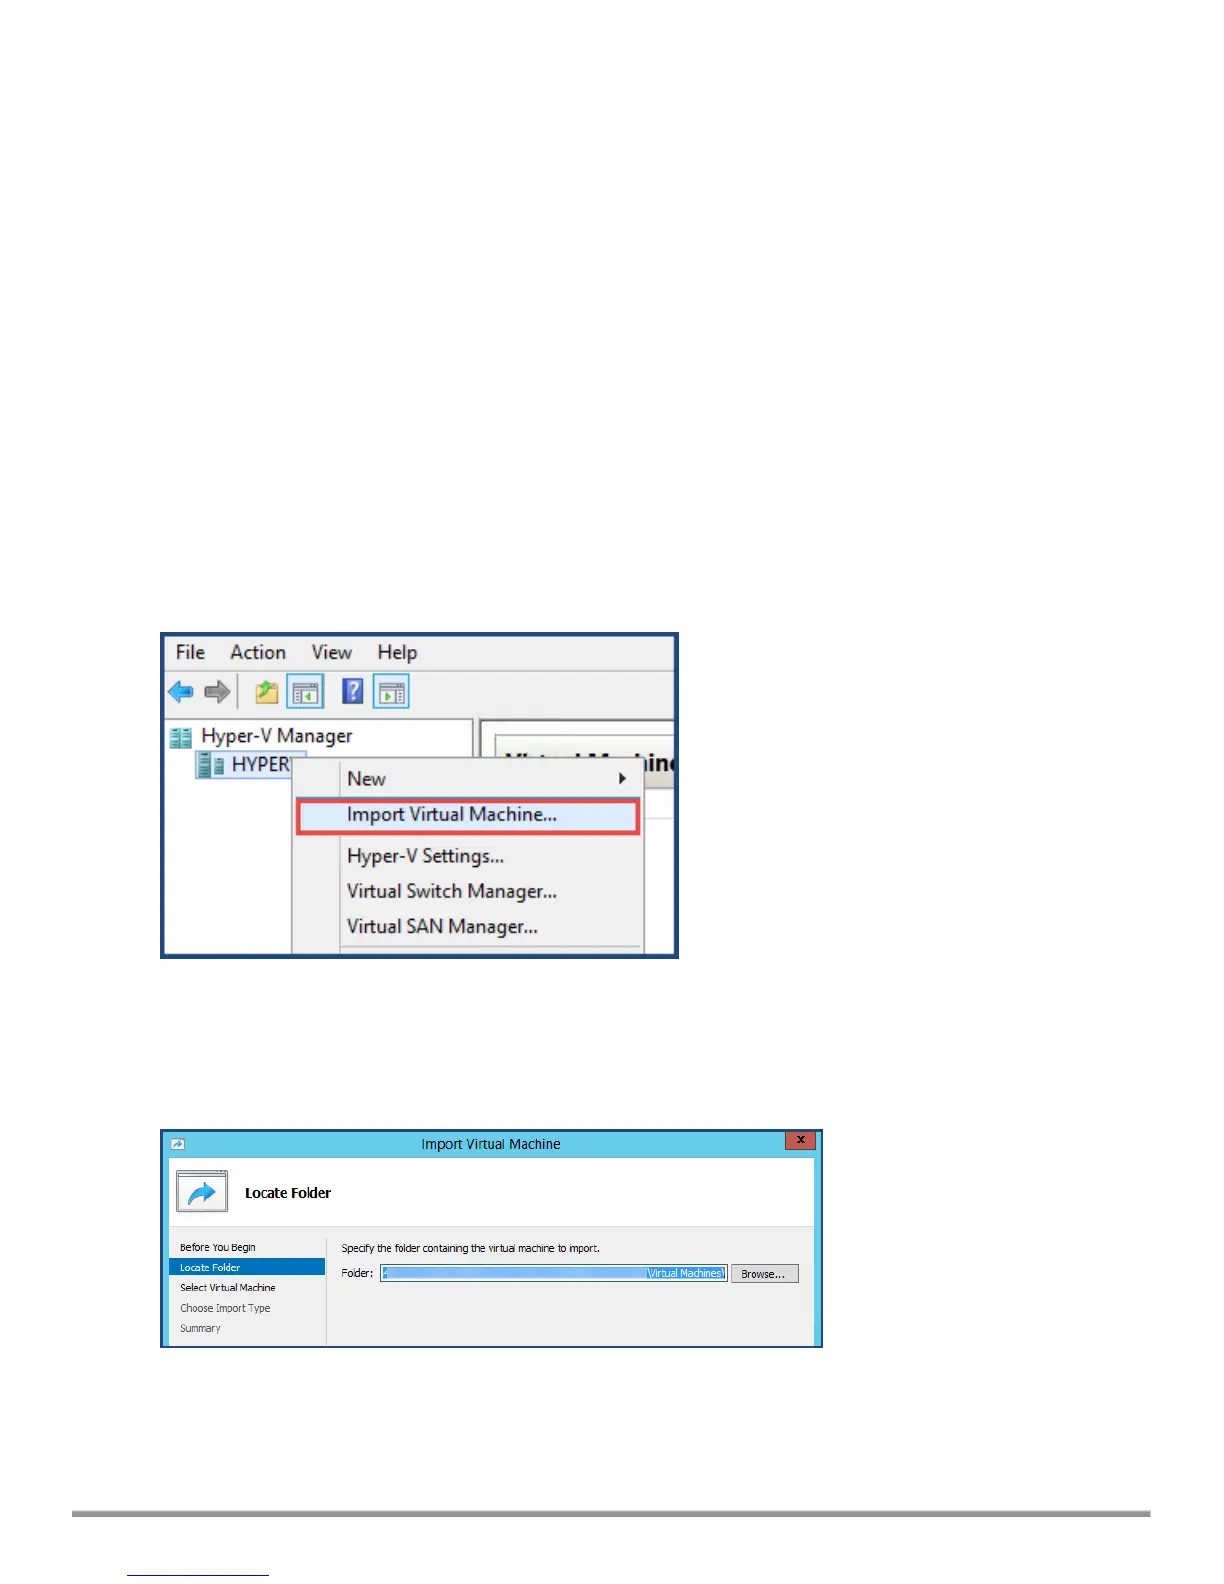
3. Open up the Hyper-V Manager Console.
4. From the Hyper-V Manager, select the name of the Hyper-V server, then right-click and select Import
Virtual Machine.
Figure 27 Selecting the "Import Virtual Machine" Option
The Before You Begin dialog opens.
5. Click Next.
The Locate Folder dialog opens.
Figure 28 Locating the Folder
6. In the Locate Folder step, select the folder you unzipped in Step 2, then click Next.
The Select Virtual Machine dialog opens.
ClearPass 6.7 Getting Started Guide 40
 Loading...