Aruba Instant On AP12 Access Point | Installation Guide 7
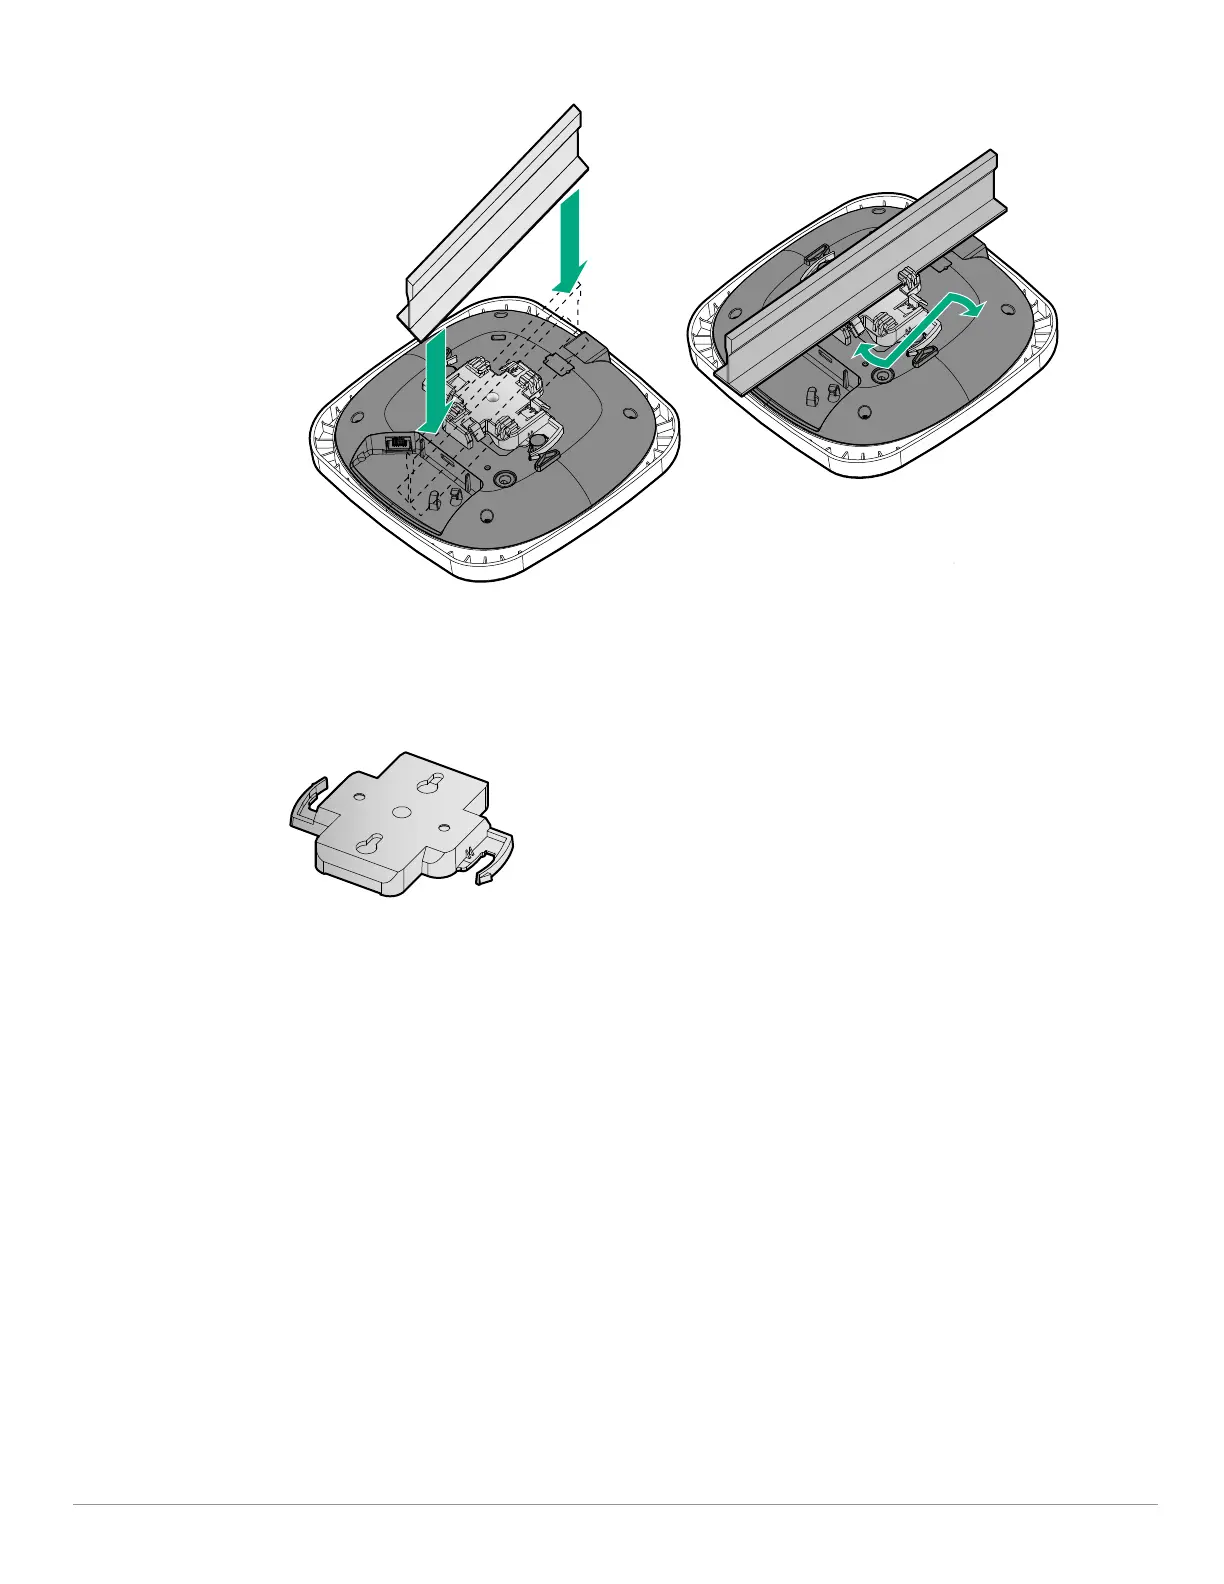
Figure 7 Mounting the AP to a 9/16” Ceiling Rail
Using the Wall/Ceiling Mount Bracket
Figure 8 Wall/Ceiling Mount Bracket
There are two ways to use the wall/ceiling mount bracket to mount the AP to a solid surface:
Bracket-to-Solid Surface Option (Install the bracket to a solid surface and then attach the AP)
AP-to-Bracket Option (Attach the bracket to the AP and then attach it to a wall)
Bracket-to-Solid Surface Option
1. Attach the plastic mount bracket to any solid surface, such as a wall or ceiling, as shown in Figure 9.
a. Install any necessary wall anchors. Wall anchors are not included in the package.
b. Align the screw holes in the mount bracket with the previously installed anchors or demarcated screw
points.
c. Insert two screws to secure the mount bracket. Screws are not included in the package.
 Loading...