Operating Manual - digiMIX18 Digital Mixer
10
SAVE: To save a mixer preset, rst press the save button, then use the touchscreen to select one of the four preset types. Next, select
a preset number to use, then press the preset name box, type in a preset name, press enter, then press Save on the touchscreen to
write to memory. Use UpPage and DownPage to navigate to the next available group of presets.
LOAD: To load a mixer preset, press the load button, then in the touchscreen window select the type of preset to load, then select
one of the available presets and press the touchscreen load button.
To delete a mixer preset, press the load button, select a preset to delete, then press the touchscreen delete button.
COPY: To copy current settings from one channel to another, press the Copy button on the mixer or the Copy Channel button
from the touchscreen system page. The resulting touchscreen window will display all inputs and outputs, the currently selected
channel will be ashing. This is the channel that will be copied from, and can be changed by selecting any other channel using the
touchscreen or control surface select buttons.
Next, press the <Copy to: Select> button on the touchscreen and select the channel(s) you want settings to be copied to. Next, press
the touchscreen <Copy> button to complete the copying process.
►
TIP: All channel DSP functions are individually listed across the bottom of the touchscreen. Each function can be checked or
unchecked to include or exclude from being copied. Only the checked parameters will be copied.
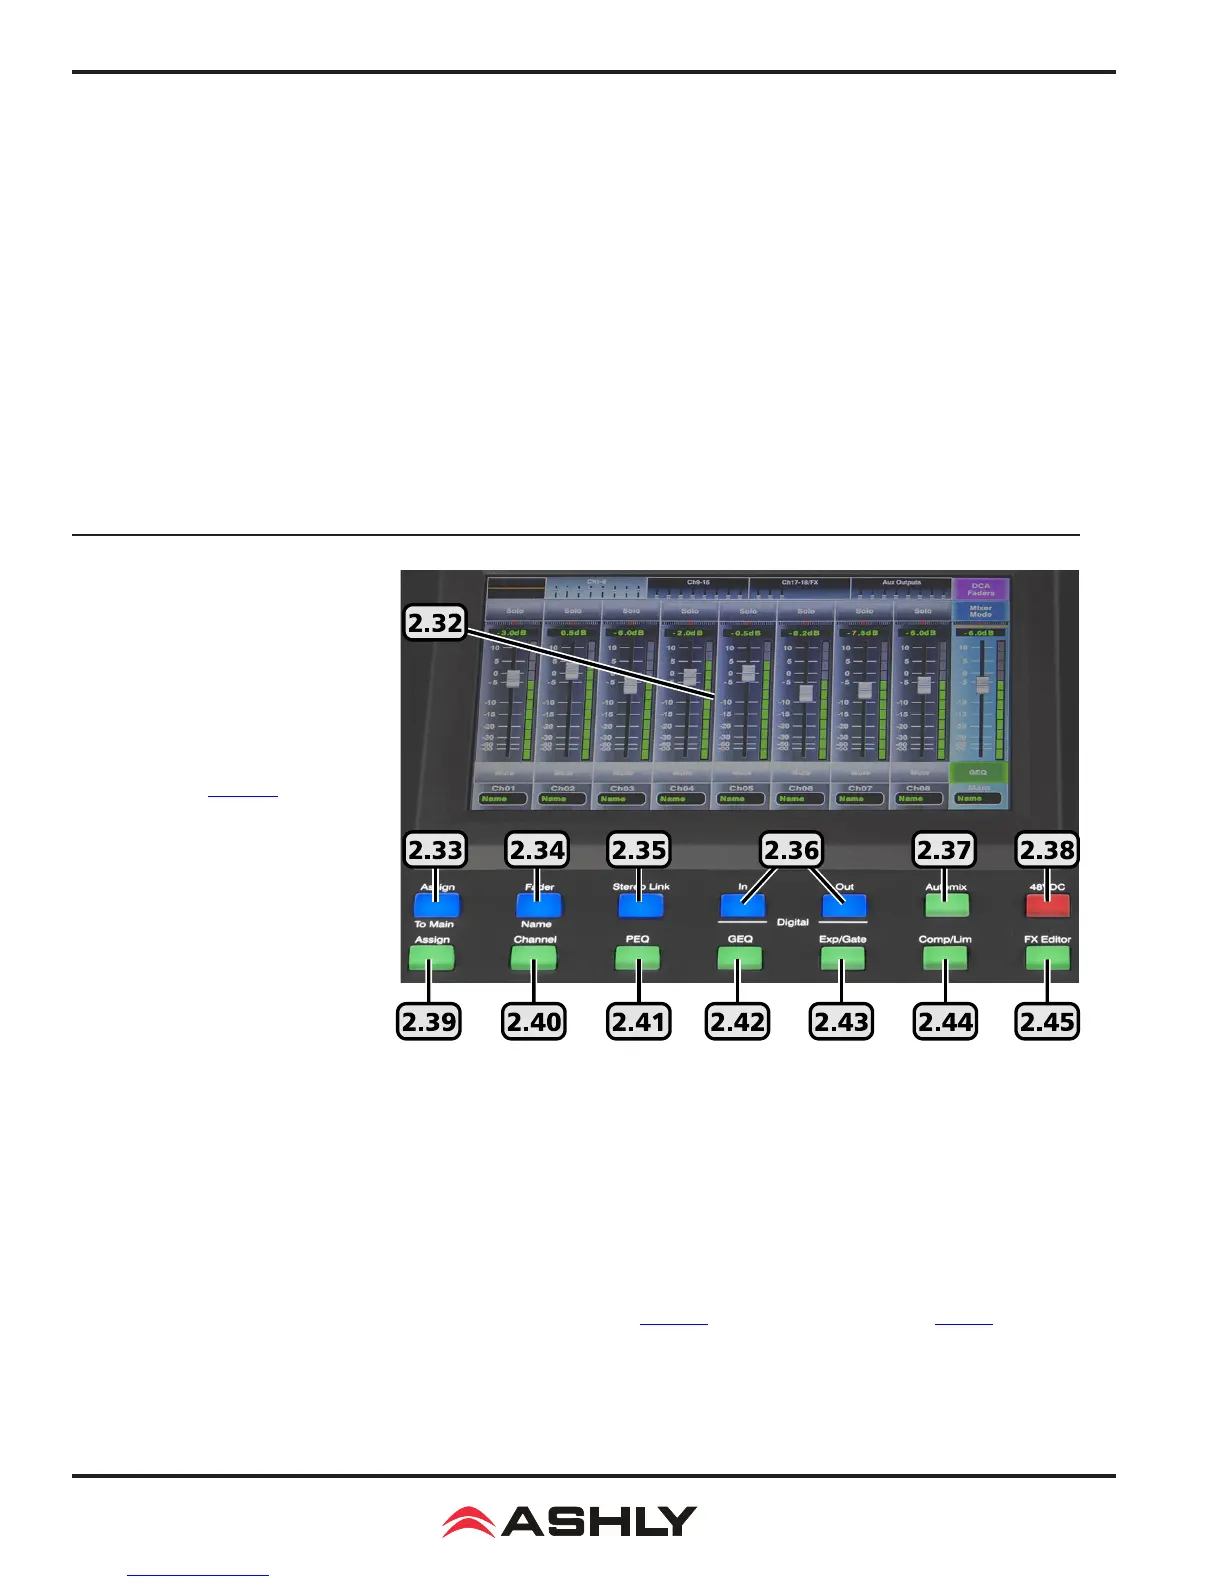
2.32 The Touchscreen Display
Most mixer functions can be adjusted
using either the touchscreen or the
buttons/knobs. Some functions can only
be adjusted using the touchscreen.
Level and fader controls are adjusted
by either dragging the control, or by
rst selecting it then turning the adjust
parameter knob (sec. 2.27).
In Mixer Mode, touch any channel fader
to select it. The currently selected input
channel, FX, or aux1-8 fader will appear
along the left side. Parameters include
channel name and number, fader level,
plus mute, solo, and auto-mixer status. In
mixer mode, the main L/R output fader is
always shown along the right side.
►
TIP: The unlabeled touch-box above
the solo function shows the current PEQ
curve for the selected channel. Touch
this box to access all DSP functions for the selected channel.
►
TIP: Above the PEQ box is a smaller unlabeled box which turns bright green when the mixer is connected to the iPad app or
digiMIX utility app on a computer. It turns black when the connection is lost.
►
TIP: The channel name can be edited by pressing and holding the "Name" text box below any long fader until a keyboard appears
on screen. Type in the new name and press enter to complete. To escape out of the keyboard without changing anything, press the
keyboard icon in the lower right corner.
2.33 Assign to Main
This button is used to assign the currently selected input channel or FX1-2 to the main L/R mix, and becomes lit when assigned. As-
signment status can also be edited using the touchscreen Assign window (sec. 2.39), or the Sends Mixer button (sec. 2.9).
2.34 Fader Name
Press this button to name the currently selected input or output channel using the pop-up touchscreen QWERTY keyboard.