27
Operating Manual - digiMIX18 Digital Mixer
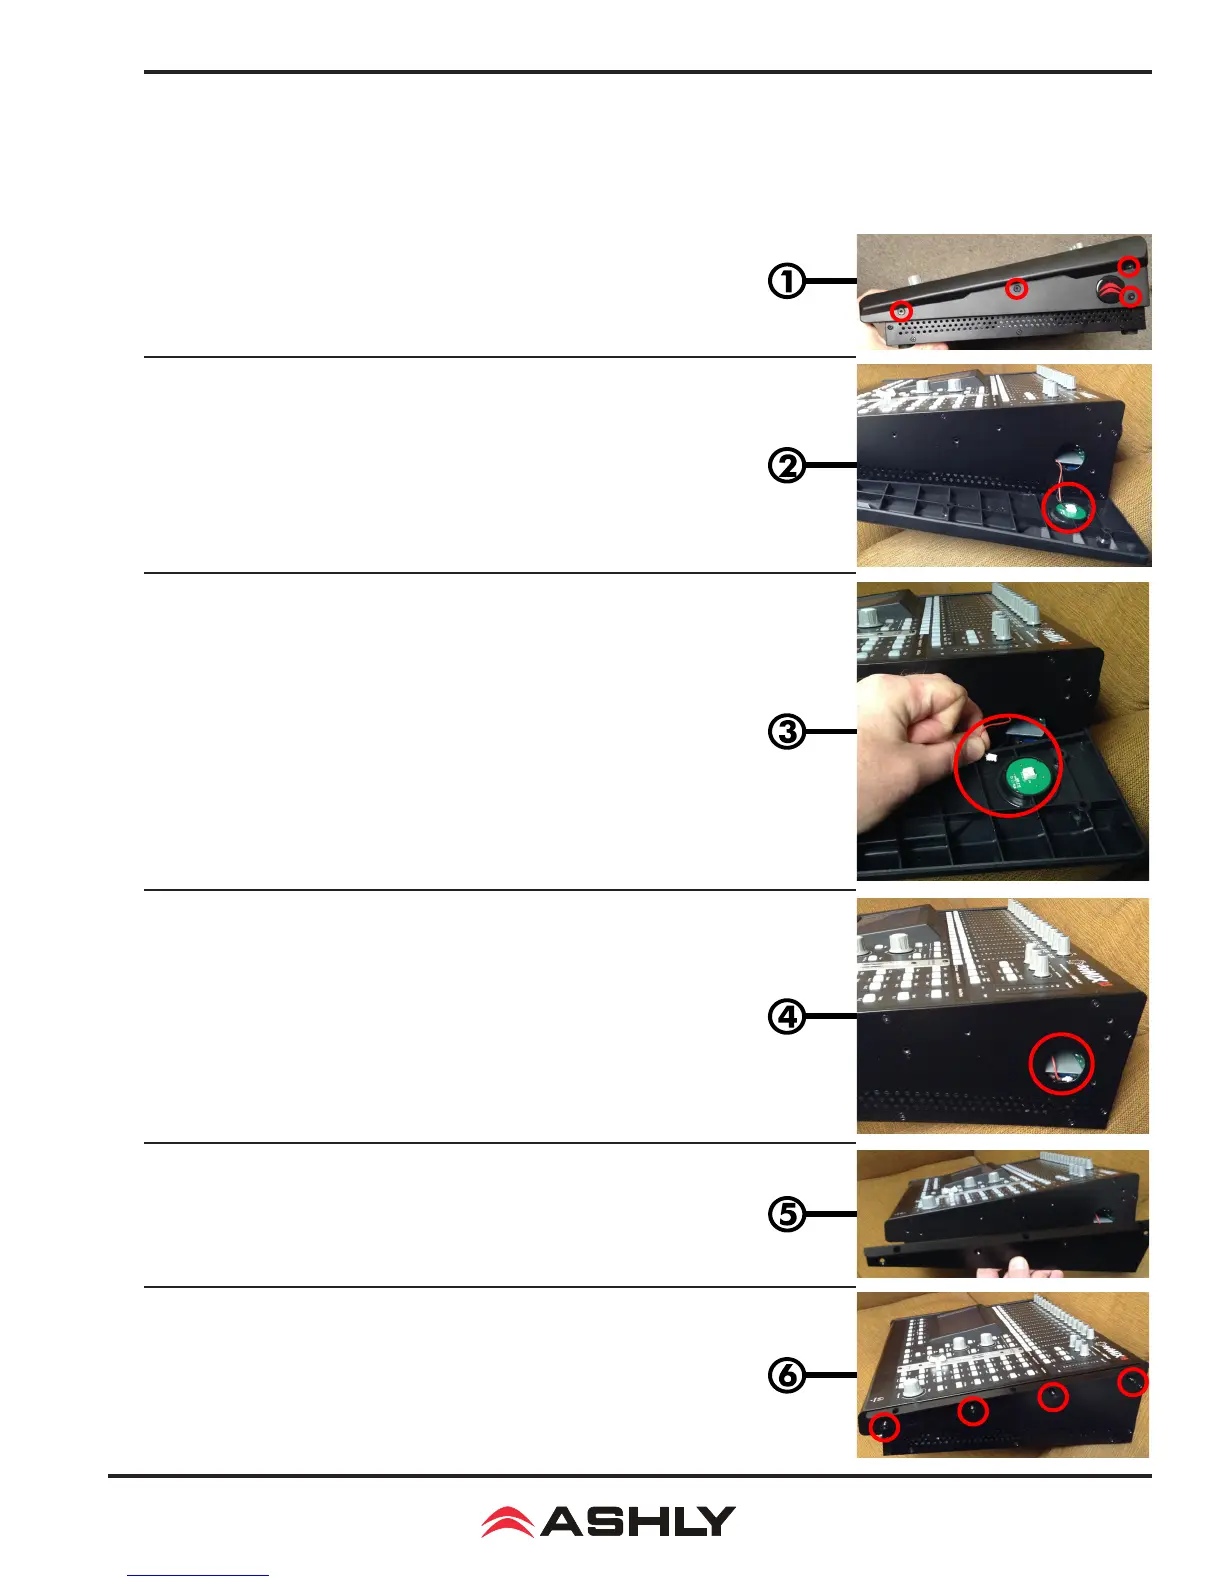
8 RACK EAR INSTALLATION
The digiMIX18 comes with rack ears that replace the molded plastic side pieces, allowing the mixer to be mounted to a standard 19"
equipment rack. Each plastic side is fastened with four 2.5mm Allen head screws. Before removing the plastic sides and installing the
rack ears, unplug the AC cord from the back of the mixer.
Step 1: Start with the removal of one plastic side. Unscrew the four 2.5mm Allen
head screws shown circled in the image to the right.
Step 2: The plastic sides have an illuminated Ashly logo embedded in the molded
plastic. This must be disconnected before the side can be completely removed.
Step 3: Gently disconnect the wire assembly header that powers the illuminated
Ashly logo. Pull apart by holding the white plastic header rather than the pulling
on the wires. Observe connector polarity when reconnecting later, and note that
the connector is indexed and can only be inserted one way.
Step 4: Carefully tuck the wire header connector assembly back inside the chassis
before attaching the rack ears.
Step 5: One rack ear is provided in the original shipping container for each side of
the mixer. Use the same screws removed in step #1 to attach the rack ears.
Step 6: Fasten the rack ear to the chassis using the four screws as shown.
Repeat this procedure for the other side. Store the removed plastic sides in the
mixer's original box for re-using later if necessary.