Operating Manual - digiMIX18 Digital Mixer
6
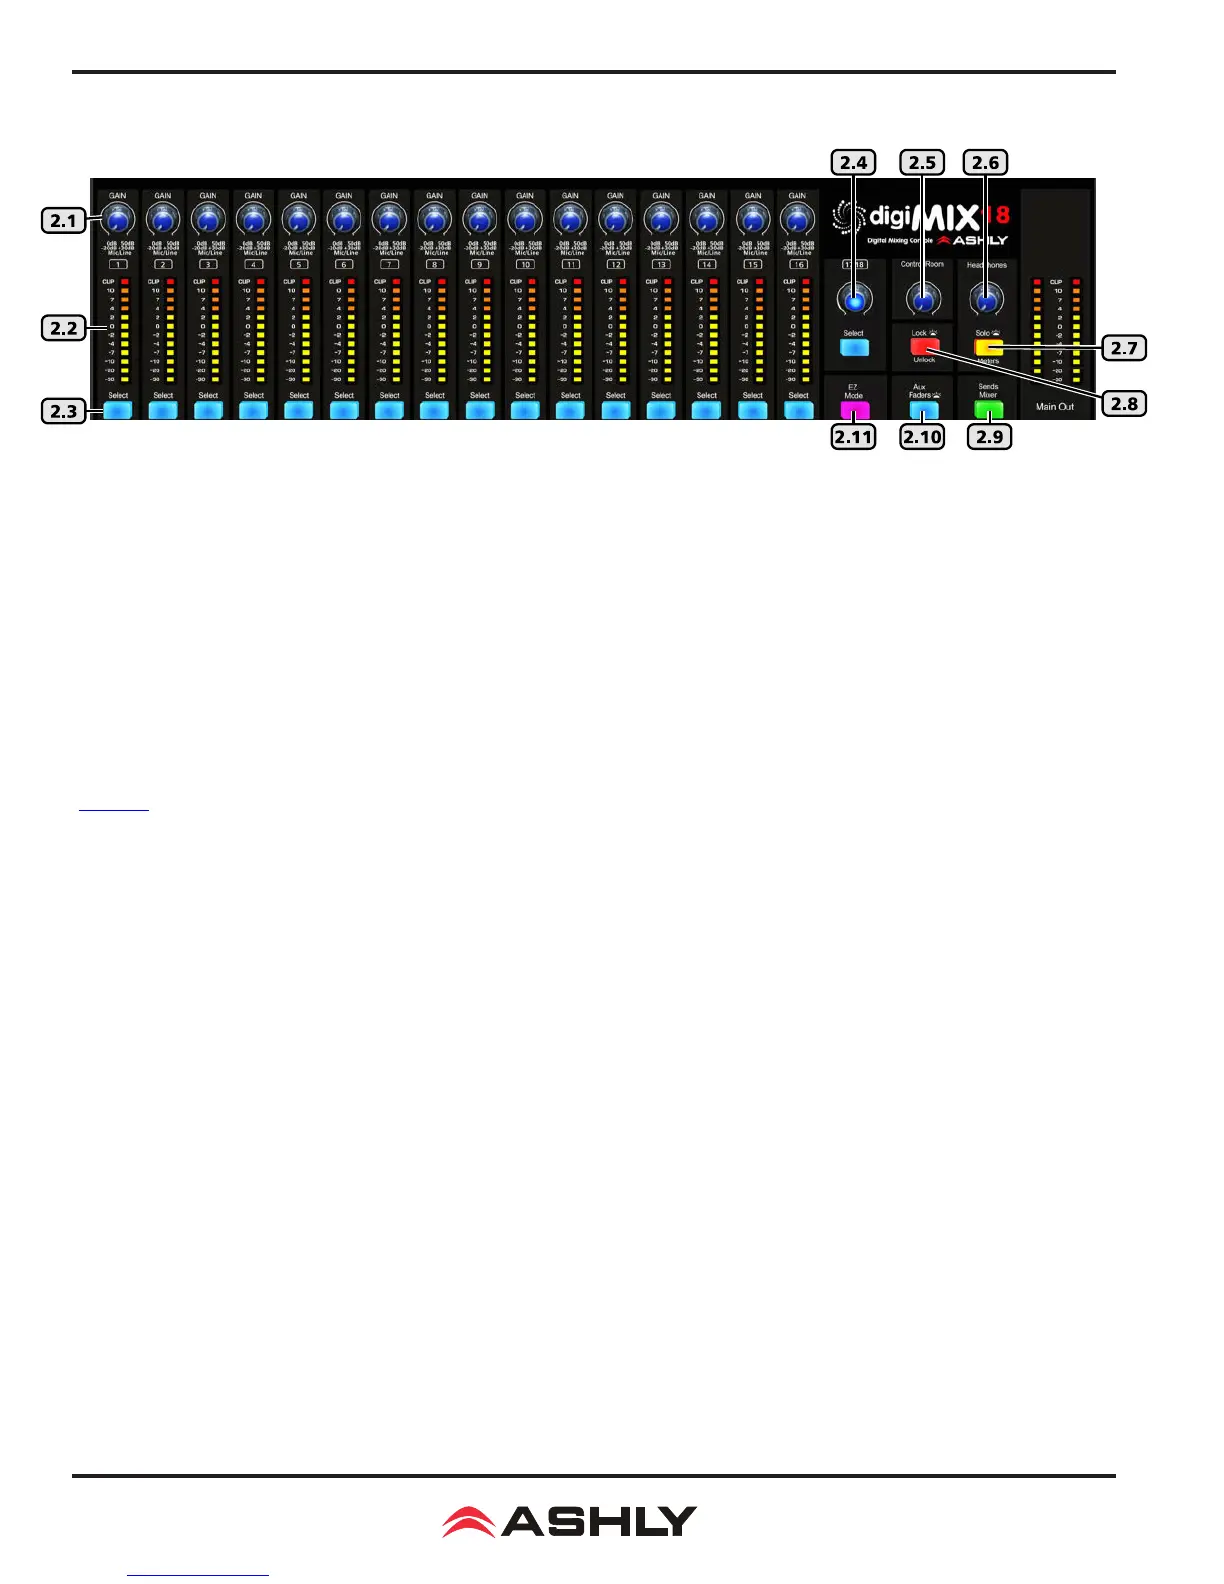
2 MIXER CONTROLS
2.1 Input Trim
This controls the gain of the analog mic or line input preamplier. For analog inputs, this is the most important control for set-
ting up proper gain structure in the mixer. Properly set, it helps to avoid clipping and maintains low noise. A good rule is that
with typical input signal present on a channel, adjust the trim control to allow 20dB headroom between the expected signal's
peak level and when it clips. In other words, normal signal peaks should be around "0" on the meter. Set this control rst and
then leave it alone unless the input source changes. Do not use the trim control to adjust mix volume later on, use the channel's
fader control instead.
2.2 Input/Output LEDs
Input LEDs indicate the signal level of each input in dBu, after the preamplier stage but pre-fader. Output LEDs indicate signal
level at the output. They can alternately indicate every channel's current fader position by pressing the Faders/Meters button
(sec. 2.23).
2.3 Select Button
Every input, main L/R output, aux1-8, and FX1-2 have a dedicated select button. All routing assignment, DSP, sends functions,
and motorized fader activity are applied only to the selected channel. This allows the user to quickly change from one channel
to the next from any mixer function.
2.4 Ch17-18 Stereo Line Input
This level control and select button always control ch17-18 stereo line level inputs. Ch17-18 are always stereo linked and
can
be assigned or sent to main L/R, aux1-8, and FX1-2
. Using the left (mono) input sends signal to both channels.
2.5 Control Room Level Control
This adjusts the level of the control room outputs. Control room outputs always use the post-fader signal from the main L/R outputs.
2.6 Headphones Level Control
Plug headphones in the front or back of the mixer for monitoring the main L/R outputs or the selected solo channels. Use the
Headphones Level control to adjust volume.
2.7 Solo/Meters Button
Press this button to toggle the main L/R output LED bars between indicating main L/R signal level, or stereo solo level.
2.8 Lock/Unlock Button
Press this button to lock/unlock the mixer with a password. Passwords are up to four characters and are case sensitive. (sec 5.4)