11
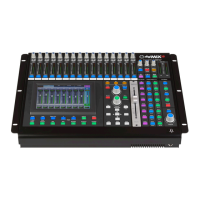
Operating Manual - digiMIX18 Digital Mixer
2.35 Stereo Link
The stereo link button is used to link two adjacent input channels or aux outputs together so that all level, DSP, and assignment
parameters are equally applied to both channels. Channel pairs can only be linked where the odd numbered channel is rst,
i.e. 1-2, 3-4, aux1-2, aux3-4, etc. When stereo linking a pair of channels, the mixer automatically routes the odd numbered
channel to the left output and the even numbered channel to the right output and they will be heard in stereo. To see the vari-
ous ways that stereo linking and panning operate when routed to main L/R or when using linked aux outputs, see section 4.7.
2.36 Digital In/Out
The optional Dante-3018 or USB-3018 digital audio module must be installed before using this feature. These buttons open the
digital audio assignment screen to enable mixer channels for digital audio use. See section 7 for complete details.
2.37 Automix
Press this button to individually assign inputs 1-16 for automix, and to enable the automixer. See section for complete details.
2.38 48VDC Phantom Power
Press the 48VDC button to assign +48V phantom power to any of input channels 1-16.
2.39 Assign
Press the assign button to view or change where the currently selected input or FX is routed to in the mixer. The selected channel
is always shown on the left side of the assign window. Inputs can be assigned or sent to main L/R, aux1-8, and FX1-2.
Assigned outputs appear blue when selected. Signal level sent to aux1-8 and FX1-2 buses must be adjusted individually using
the touchscreen parameter adjust fader on the right side of the display, or by using the adjust parameter knob (sec. 2.27). There
are also several quick links to other mixer functions from the assign window.
2.40 Channel
Press the channel button to view and access all DSP settings for the currently selected input, main L/R, FX1-2, or aux1-8 output.
The currently selected channel (or linked channels) is always shown on the left side of the touchscreen display.
Every DSP function has a dedicated On/Off button on the touchscreen.
Input channel DSP functions include stereo pan, polarity invert, channel delay up to 300ms, stereo link, expander/gate, PEQ,
and compressor/limiter. Main L/R and aux1-8 outputs do not have expander/gate function.
Channel DSP settings can be saved
or loaded as a DSP channel preset (sec. 2.31).
2.41 PEQ
Press the PEQ button to engage the 6-band EQ for the currently selected input, main L/R, FX1-2, or aux1-8 output.
The PEQ has four parametric lters with adjustable frequency, bandwidth (Q), and gain. Any of these four can also be set as
shelving lters by pressing their <Type> icon on the touchscreen. Two additional lters complete the PEQ section, a tuneable
hi-pass (HPF) and low-pass (LPF), each offering 20 different slope types. For tips on using the PEQ see section 4.2.
Press the Bypass button (sec. 2.25), or the touchscreen ON button to compare signal with and without PEQ.
Press the Flat
button (sec. 2.28) or the touchscreen Flat EQ button to return all PEQ lters to their 0dB gain and default starting parameters
2.42 GEQ
The GEQ 31-band graphic equalizer is only available on the main L/R and aux1-8 outputs. It is not available on inputs or FX1-2.
Select and drag individual lter faders up/down on the touchscreen, or use the left-right buttons on the touchscreen, or use the
system left/right buttons on the mixer front panel (sec. 2.30) to select frequency, then use the system up/down buttons to adjust
lter level. Up to 48 different GEQ presets can be saved to memory and loaded later for use with specic rooms or loudspeakers.
Press the Bypass button (sec. 2.25), or the touchscreen ON button to compare signal with and without GEQ. Press the at
button (sec. 2.28) or the touchscreen at EQ button to return all GEQ lters to 0dB.
2.43 Exp/Gate
Press this button to engage the noise gate/expander for the selected channel. This function will silence or reduce the level
of an input or FX signal when it falls below a user dened threshold. Controls include on/off, threshold, attack time, release
time, and ratio. Innite ratio silences all signal below the threshold (noise gate), while using a lower ratio allows some
signal below the threshold to pass (downward expansion). Press the at button to return the expander/gate parameters to
their default settings. See section 4.4 for tips on using an expander/gate.