13
Operating Manual - digiMIX18 Digital Mixer
3.6 Aux1-8 Outputs*
These eight phone jacks are pseudo-balanced outputs for aux1-8 (sec. 2.12). They have single-ended signal with balanced impedance.
* If plugging a digiMIX18 output into a powered speaker or other mixer input, phantom power must be turned off on that input.
3.7 Control Room Output
The balanced stereo control room outputs use the same signal as the main L/R outputs, but with a separate volume control.
3.8 Headphone Jack
There is a stereo headphone jack on the front and back of the mixer, controlled by the headphones level control.
3.9 AC Inlet
This is used to connect the mixer to AC mains using the detachable AC cord provided with the unit.
3.10 Power Switch
This switch turns on power to the mixer. Turn-on time is about 15 seconds.
3.11 Ethernet Control Jack
The Ethernet jack is used for connecting the mixer to a network for remote iPad control (sec. 9), or for using the "digiMIX18
Preset Utility" software (sec. 6.2). Ashly recommends using the USB control jack for the rmware update software.
3.12 USB Control Jack
The USB Control jack (recommended for rmware update) is an alternative to the Ethernet jack for "digiMIX18 Firmware Utility"
and "digiMIX18 Preset Utility" software. A specic USB device driver may need to be installed on your computer rst (sec. 6.1).
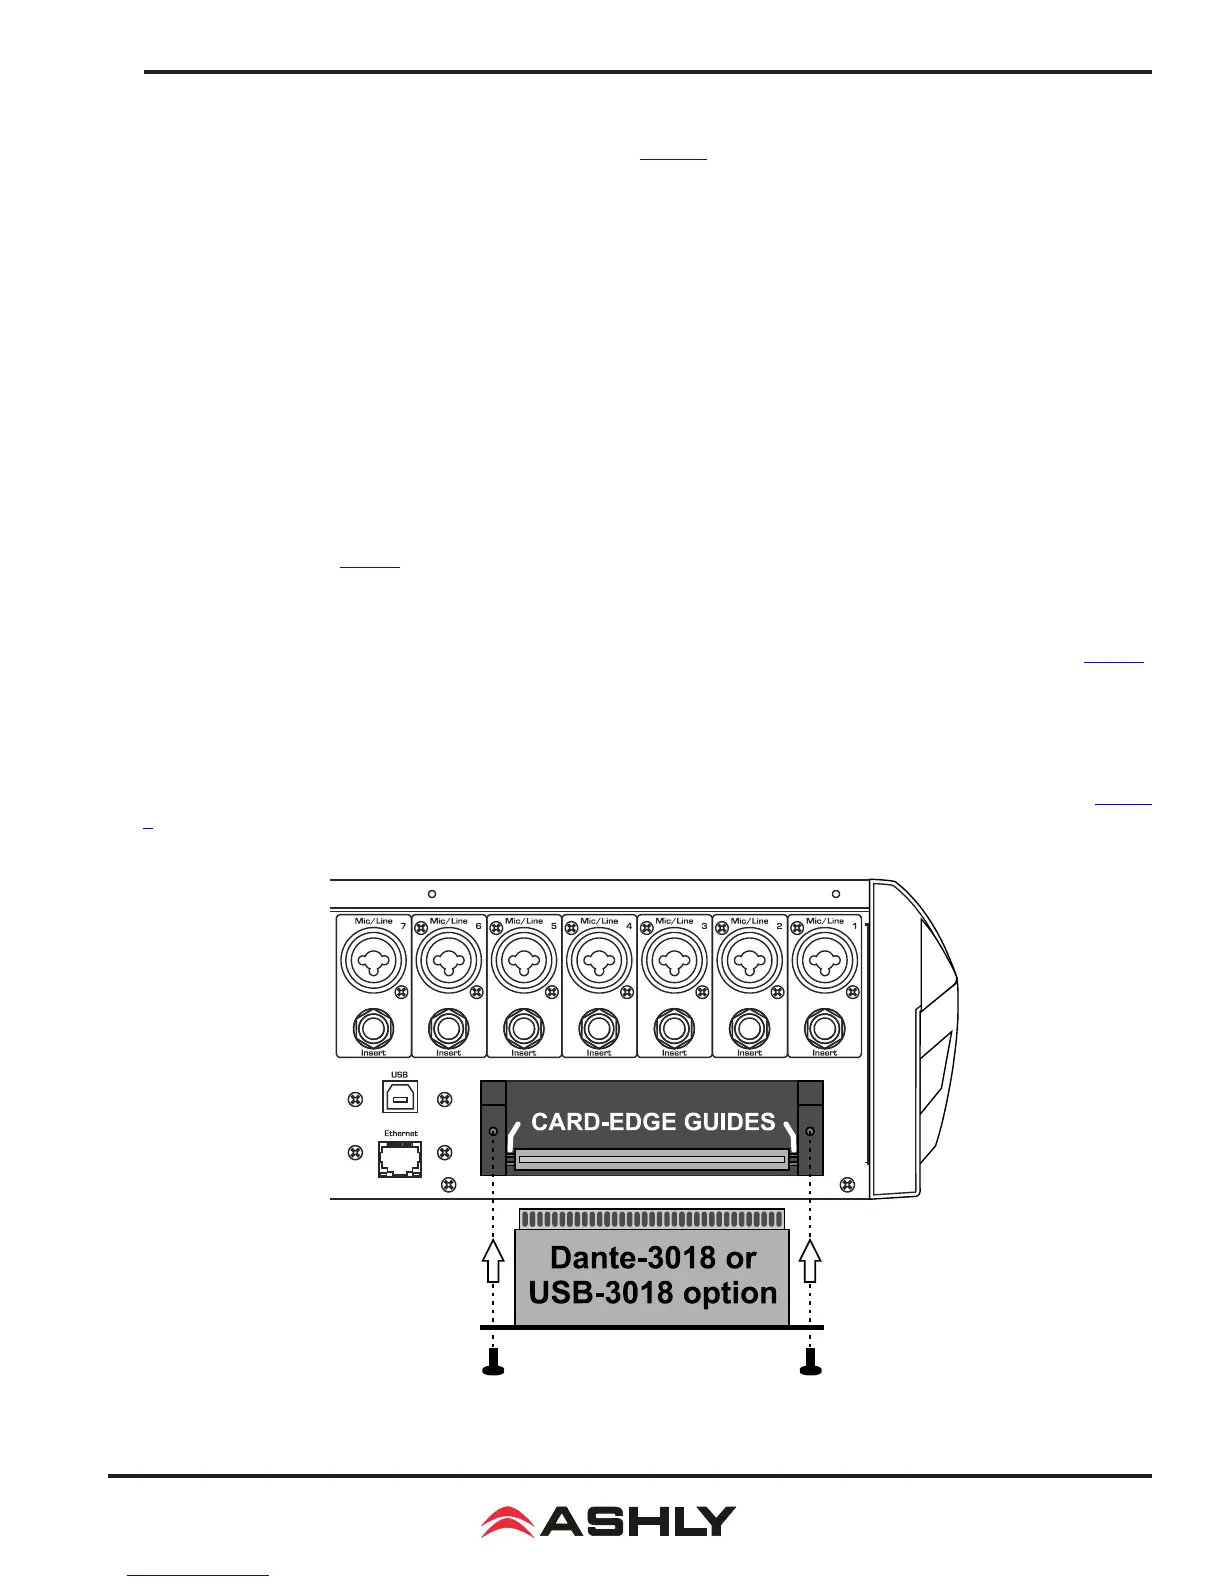
3.13 Digital Audio Module Option
Ashly offers optional eld installable Dante-3018 or multi-track USB-3018 audio modules for the
digiMIX18
mixer. To install
the module, rst remove the mixer from power, then remove the two screws holding the blank plate to the back panel option slot,
then carefully seat the Dante-3018 or USB-3018 module into the two card-edge guides on either side of the module slot as shown
below before nally pressing the module fully into the internal card-edge connector. Re-fasten using the two screws. See section
7 for operating details.
3.15 - Dante-3018 or USB-3018 installation on digiMIX18