4.
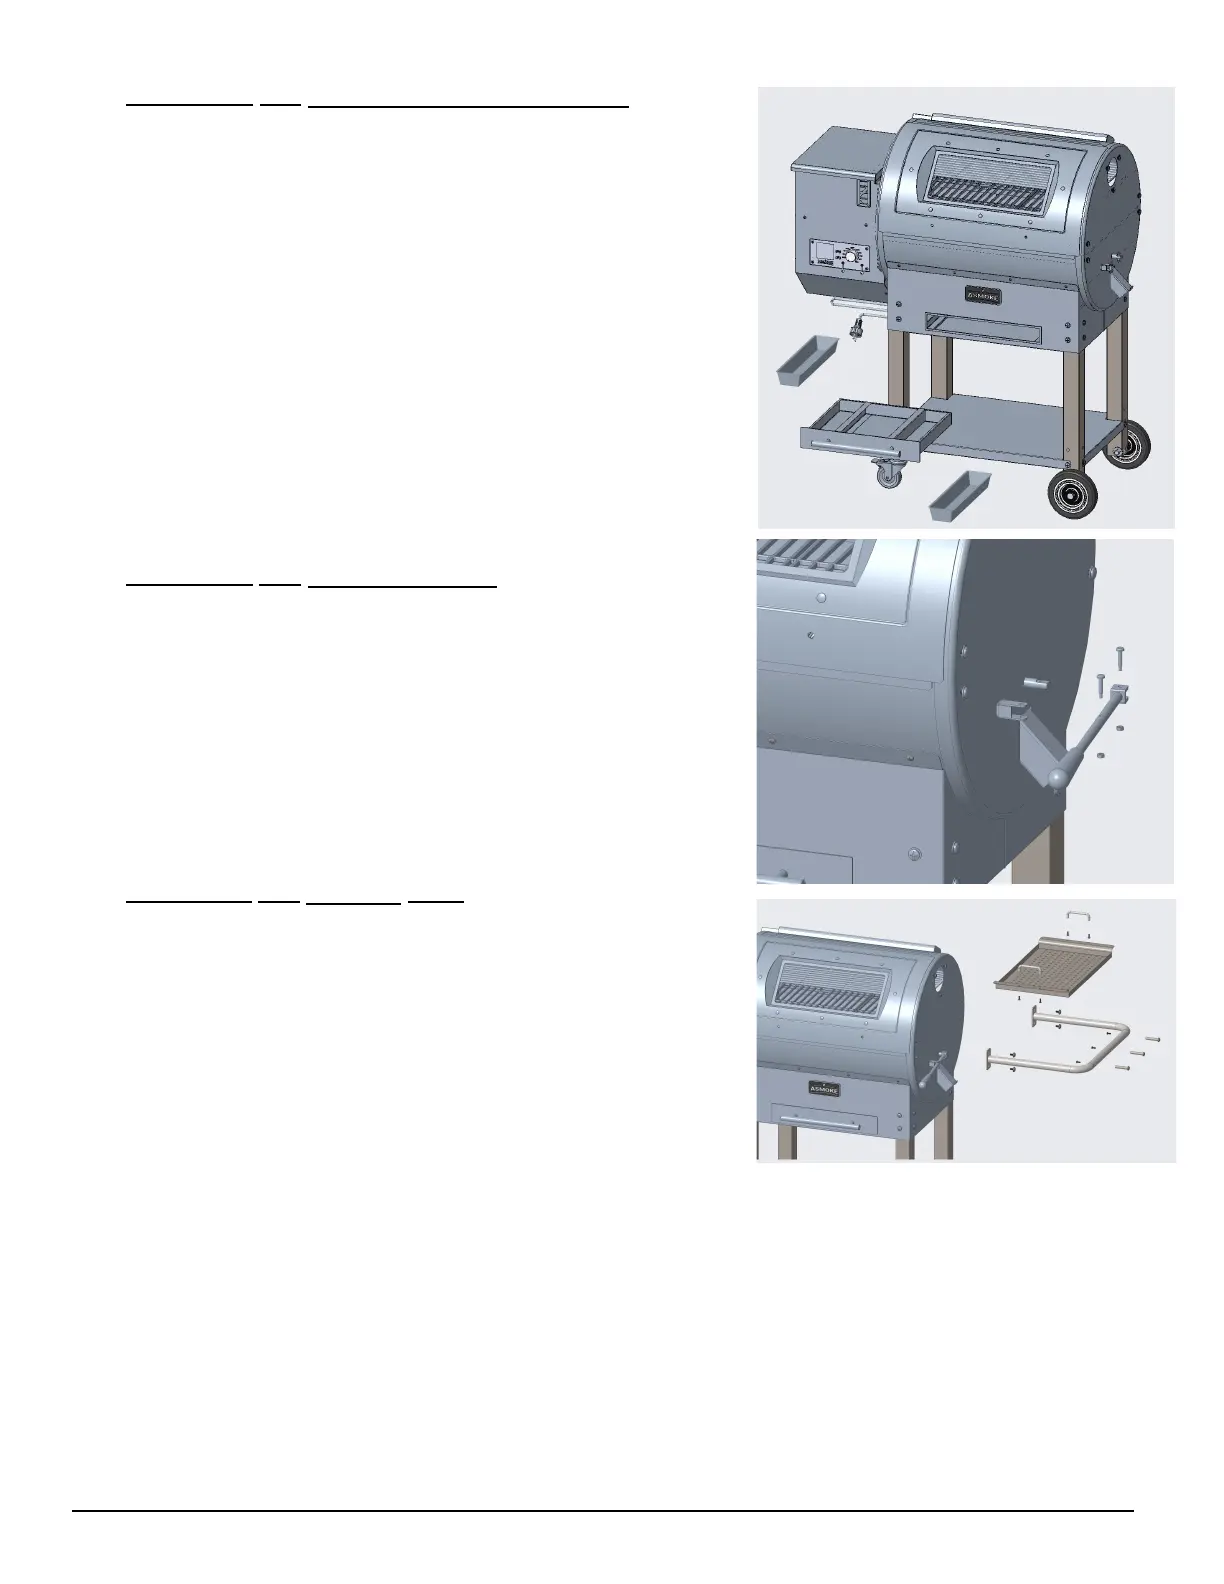
MOUNTING THE ASH BOX TO THE MAIN BODY
Parts Required:
1
x As h Box
1
x Ash Box Handle
1
x Main Body
2 x Water Pan
Installation:
•
Remove the two screws from ash box handle
Note:
The ash box needs to be placed into the main body as parallel to
the mian body as possible, without deflection, so as to avoid
obstruction when advancing. It is also recommended to put tin foil
on the surface when adding liquid seasoning.
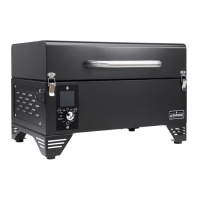
5.
INSTALLING THE SEARING HANDLE
Parts Required:
1
x Main body
1
x Searing handle
Installation:
8
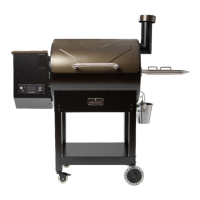
6
INSTALLING THE SERVING TRAY
Parts Required:
2
x
Serving Tray Handle
1
x Serving Tray
1
x Serving Tray Bracket
3 x Pin
Installation:
•
Dismantle pre-assembled screws and gaskets for installing
brackets from the side panel of cylinder.
•
Fix the bracket of storage tray to the side panel of cylinder,using
four sets of screw sub-assemblies unloaded from the side panel
of cylinder.
•
Dismantle the pre-assembled screws on the handle of storage
tray, and install the handle to the storage tray. Place the storage
tray on the bracket.
•
Dismantle the pre-assembled screws, gaskets from the towel
pin,and fix the towel pin to the bracket of storage tray.
NOTE:
Avoid using the bracket of storage tray to move or lift the grill. The
weight of grill will lead to the bracket to bend or break, which is
not covered by warranty.
•
Secure handle on the ash box with the two removed scews
•
Put the water pans into the space on both sides of the ash box
•
Remove the two step screws from main body
•
Secure the searing handle on the main body with the two
removed screws and nuts.