EasyManua.ls Logo

Assa Abloy Norton 6300 Series User Manual

Assa Abloy Norton 6300 Series
15 pages
To Next Page IconTo Next Page
Page #1 background imageLoading...
Page #1 background image
Copyright © 2017 Yale Security Inc., an ASSA ABLOY Group company. All rights reserved.
Reproduction in whole or in part without the express written permission of Yale Security Inc. is prohibited.
80-9363-0003-020 Rev 8 11/17
6300 Series Push Side
Full Feature Low Energy Operator
Installation and Instruction Manual
• 3/16” Hex Wrench
• Small blade screwdriver
• Screwdriver (Phillips size 2 and size 3)
Tape ruler
• Power drill
• Center punch
Wire stripper
• #7 drill 1/4-20 tap (metal frame / door install)
• 3/16” drill (for self-drilling/self-tapping)
Tools required:
Use screw pack and hardware provided to mount operator.
ETL certified; conforms to ANSI/UL standard
325 for automatic closing doors and UL10C
Positive Pressure Fire Test for Door Assemblies.
Certified to ANSI/BHMA A156.19 for Low Energy
Door Operators.
WARNING: To reduce the risk of injury to person,
use this operator only with Pedestrian Swing doors.
For Indoor Use Only.
pour la version francaise voir
www.nortondoorcontrols.com
6330 Push Side
1
2
5
4
6
3
7
Page 1
Item No.
Description
1
Push Body Sub-Assembly (6330LAP)
2
Power Supply/Board Sub-Assy (6300CM)
3
Cover (6300 COV)
4
Back Plate Board (6300BPB)
5 & 6
End Cap Kit (6300END)
7
Push Arm Package (6330-1)
(up to 130° opening)

Other manuals for Assa Abloy Norton 6300 Series

Question and Answer IconNeed help?

Do you have a question about the Assa Abloy Norton 6300 Series and is the answer not in the manual?

Assa Abloy Norton 6300 Series Specifications

General IconGeneral
CategoryDoor Opening System
Power Supply120V AC, 60Hz
Max Door WidthUp to 48"
Control OptionsPush Button, Motion Sensor, Key Switch, Access Control
MountingSurface

Summary

Important Safety Instructions

Door Preparation and Technical Data

Frame Reinforcing Requirements

Specifies required frame reinforcing based on material and gauge.

Operator Technical Specifications

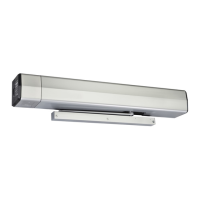
Details electrical, door size, weight, and angle specifications.

Certifications and Standards

Conforms to safety standards for automatic closing and low energy doors.

Back Plate Mounting and Board Installation

Mounting the Push Side Back Plate

Detailed steps for marking, drilling, and securing the back plate to the frame.

Installing the Back Plate Board

Positioning the board, using retaining clips, and securing it to the back plate.

Body and Power Supply Assembly Installation

Installing Push Side Body Assembly

Attaching the body assembly to the back plate and connecting wiring.

Installing Power Supply and Board

Mounting the power supply bracket and connecting harnesses.

Orienting Back Plate Ribbon Harness

Connecting Harness to Assemblies

Attaching the 10-pin harness to the board and back plate, noting orientation.

End Cap and Arm Installation

Installing Push Side End Caps

Securing end caps with screws and connecting switches.

Installing Push Side Arm

Attaching the main arm to the pinion square and connecting arm tube components.

Adjusting Closing Force

Manual and Latch Region Force

Adjusting closing force using the tube nut and referencing latch region features.

Initial Setup and Indicators

Connecting Building Power

Wiring the 120VAC power supply to the unit's terminals.

Control Board LED Indicators

Understanding the meaning of POWER, STATUS, and CLOSE position LEDs.

Wiring Output Devices

Connecting external devices to the 24VDC outputs and dry contact relays.

Setting Application and Positions

Configuring Door Application Type

Setting the PUSH/PULL ARM dip switch for door opening direction.

Setting Door Open/Closed Positions

Using CLOSE, OPEN, and LEARN buttons to set operational positions.

Opening and Closing Adjustments

Potentiometer Adjustments

Using potentiometers for Opening, Sweep, and Latch Speeds.

Timing Requirements Tables

Tables showing minimum opening/closing times based on door specs.

Dip Switches and Input Connections

Setting Accessory Dip Switches

Explains functions like Latch Boost, Push and Go, Power Assist, Obstruction Detection, Lock Release.

Connecting External Inputs

Describes inputs like Activation, Toggle, Blow Closed, Blow Open.

Additional Inputs and Cover Installation

Additional Connector Inputs

Details Hold Open, Obstruction, Security Override, and Spare inputs.

Installing the Unit Cover

Aligning, sliding, and securing the cover onto the unit.

Troubleshooting Error Codes

RED LED Flash Error Interpretation

Interpreting red LED flashes for power, learning, motor, and temp errors.

Push Side Installation Template

Template Diagram and Measurements

Provides measurements and hole locations for frame and door mounting.

Related product manuals