EasyManua.ls Logo

ASUSTOR Drivestor 4 PRO - User Manual

ASUSTOR Drivestor 4 PRO
23 pages
Print Icon
To Next Page IconTo Next Page
Loading...
Quick Installation Guide
Applicable Models
AS3302T/AS3304T
Ver.2.3.0903 (2015-3-2)
Ver. 4.0.0201
Question and Answer IconNeed help?

Do you have a question about the ASUSTOR Drivestor 4 PRO and is the answer not in the manual?

Summary

Important Notices

Federal Communications Commission Statement

Details FCC compliance and potential interference issues, providing measures to correct interference.

CE Mark Warning

Explains CE marking compliance with EEC directives for electromagnetic compatibility and safety.

NAS Safety Precautions

Electrical Safety

Advises on safe use of the power adapter, unplugging before cleaning, and checking power input ratings.

Operation Safety

Provides guidelines for operating the NAS safely, including placement, environment, ventilation, and avoiding foreign objects.

Package Contents and Included Accessories

Included Accessories

Lists the included accessories for AS3302T and AS3304T models, such as power cord, adapter, cables, and screws.

Optional Accessories and Purchasing

Purchasing Information

Informs users where to purchase optional accessories from the ASUSTOR Accessories Store.

Hardware Installation Guide

Tools Required and Hard Disk Setup

Details the necessary tools like a Phillips screwdriver and compatible SATA hard disks for installation.

Disk Tray Removal and Access

Guides on how to remove the front panel and pull out the disk tray using the latch for hard disk installation.

Mounting Hard Drives into Tray

Explains how to mount 3.5" and 2.5" hard drives into the disk tray, including removing rails and using screws.

Inserting Tray and Securing NAS

Describes how to slide the disk tray back into the NAS and secure it using the audible click of the latch.

Reattaching Front Panel

Instructs to reattach the front panel after the hard disk installation is complete.

Power Cord Security

Provides instructions on using a cord bracket to secure the power cord, preventing detachment during NAS movement.

NAS Power Connection and On

Explains how to connect the NAS to its power supply and the steps for powering it on.

Network Connection and Power On Process

Details connecting the NAS to a router via Ethernet and pressing the power button to turn it on, noting LED indicators.

Confirming Hardware Installation

Confirms hardware installation completion when the system status LED is steady green and a beep is heard.

Software Installation Methods

Download Center Install (Windows)

Explains how to use ASUSTOR Control Center to scan the network and find NAS devices for installation on Windows.

System Initialization Options

Outlines the system initialization process, including appearance, time, date, security, and storage settings. Offers 1-Click and Custom Setup.

Download Center Install (Mac)

Guides Mac users on using ASUSTOR Control Center to discover and install NAS devices on their network.

Web Browser Installation

Details the web installation method, which involves accessing the NAS via its IP address in a web browser for initialization.

Mobile App Installation (AiMaster)

Explains how to download and use the AiMaster mobile app to scan for and connect to the NAS for installation.

AiMaster Device Discovery

Guides users on selecting their NAS from the list found by the AiMaster app for initiating the installation process.

Starting NAS Setup via AiMaster

Instructs to select "Start Initialization" within the AiMaster app to begin the NAS configuration process.

Direct Network Connection Setup

Powering Down and Sleep Modes

Power Button Actions

Explains how the power button's long press (1.5 seconds) controls shutting down or entering sleep mode.

Customizing Power Button Settings

Details how to configure the power button behavior in the NAS settings, including options for shutdown and sleep mode.

Appendix and Reference

LED Indicator Guide

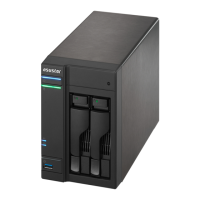
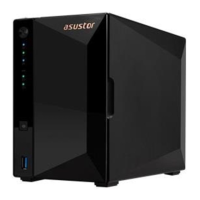
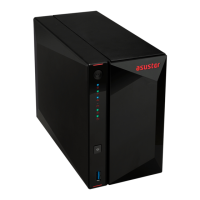
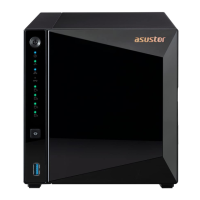
Provides a visual guide to the LED indicators on both AS3302T and AS3304T models and their meanings.

Detailed LED Statuses

Details the color, description, and state of Power, System Status, Network, USB, and Hard Disk LEDs.

Rear Panel Ports Identification

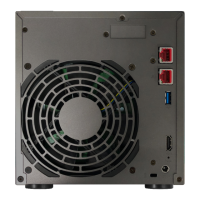
Identifies and describes the ports and features found on the rear panel of both AS3302T and AS3304T models.

Troubleshooting NAS Detection Issues

Checking Network Connectivity

Provides steps to check network connectivity, including ensuring devices are on the same LAN and checking network LEDs.

Firewall and IP Configuration

Advises disabling firewalls and adjusting computer IP settings (static IP) to facilitate NAS detection.

Static IP Setup for Troubleshooting

Details how to manually set the IP address and subnet mask on a computer to troubleshoot NAS detection issues.

Rescanning with Control Center

Instructs to open ASUSTOR Control Center after configuring static IP settings to scan for the NAS.

Support Contact and Resources

Provides contact information for ASUSTOR support and links to the support website and knowledgebase for further assistance.

Overview

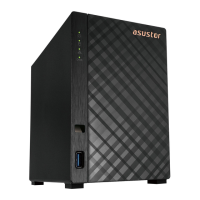
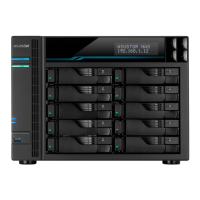
This document is a Quick Installation Guide for ASUSTOR NAS devices, specifically models AS3302T and AS3304T. It covers hardware installation, software setup, and basic troubleshooting.

Function Description

The ASUSTOR NAS (Network Attached Storage) is a personal cloud storage device designed for home and small office use. It allows users to store, share, and access data across a network. The device supports multiple hard drives for data storage and offers various software features for data management, security, and multimedia.

Important Technical Specifications

Applicable Models:

  • AS3302T (2-bay NAS)
  • AS3304T (4-bay NAS)

Package Contents (for both models, quantities vary):

  • NAS Unit (AS3302T or AS3304T)
  • Power Cord (x1)
  • Adapter (x1)
  • RJ45 Network Cable (x1)
  • Screws for use with 2.5" HDD (x8 for AS3302T, x16 for AS3304T)
  • Quick Installation Guide (x1)

Hard Disk Compatibility:

  • Supports at least one 2.5 or 3.5 inch SATA hard disk.
  • A list of compatible hard disks can be found at http://www.asustor.com/service/hd?id=hd.

LED Indicators:

  • Power LED:
    • Blue, Steadily lit: Power on
    • Orange, Flashes every 10 seconds: LED night mode
  • System Status LED:
    • Green, Flashing: Powering on
    • Green, Steadily lit: System ready
  • Network LED:
    • Blue, Steadily lit: 1 Gigabit Network port connected
    • Purple, Steadily lit: 2.5 Gigabit Network port connected
  • USB LED (front port):
    • Green, Steadily lit: USB device connected to the front of the NAS is ready for use
    • Green, Flashing: Data access in progress
  • Hard Disk LED:
    • Green, Steadily lit: Hard disk ready
    • Green, Flashing: Data access in progress
    • Red, Steadily lit: Hard disk abnormality

Rear Panel Ports:

  • USB 3.2 Gen 1 Port (x1)
  • 2.5 Gigabit RJ-45 Port (x1)
  • DC Input (x1)
  • System Fan (x1)
  • Reset Button (x1)
  • K-Lock (x1)

Power Button Functionality:

  • Press and hold for 1-2 seconds to power on.
  • Configurable to shut down or enter sleep mode when held down for 1.5 seconds (accessible via ADM: [Settings]→[Hardware]→[Power]→[Settings]).

Environmental Conditions:

  • Operating ambient temperature: 0°C to 40°C.

Usage Features

Hardware Installation:

  1. Hard Disk Installation:
    • Remove the front panel.
    • Gently pull out the disk tray using the latch.
    • For 3.5" HDD: Remove the two rails on both sides of the tray, place the HDD into the tray, align and insert the rails to secure it, then insert the tray into the NAS.
    • For 2.5" HDD: Remove the two rails, align the HDD with the 4 holes labeled "2.5" with the SATA connector facing outward, turn the tray upside down, and secure with four included M3 screws.
    • Slide the disk tray into the disk bay until it clicks into place.
    • Return the front panel.
  2. Securing the Power Cord: A provided cord bracket can be used to secure the power cord to prevent accidental detachment.
  3. Connecting and Powering On:
    • Connect the NAS to its power supply.
    • Connect the NAS to a router, switch, or hub using an Ethernet cable.
    • Press and hold the power button for 1-2 seconds until the blue power LED lights up.
    • The NAS is ready when the green system status LED stops flashing and remains steadily lit, accompanied by a "beep" from the system buzzer.

Software Installation: The guide outlines four installation methods, with details provided for "Download Center Installation" and "Installation Using a Mobile Device."

  1. Download Center Installation (Windows Users):
    • Install ASUSTOR Control Center.
    • The Control Center will scan the network for ASUSTOR NAS devices.
    • Select the NAS from the list and follow the installation wizard.
  2. Download Center Installation (Mac Users):
    • Install ASUSTOR Control Center.
    • The Control Center will scan the network for ASUSTOR NAS devices.
    • Select the NAS from the list and follow the installation wizard.
  3. Web Installation:
    • If the NAS's IP address is known, open a web browser and enter the IP address (e.g., http://192.168.1.168:8000) to begin initialization.
    • Follow the installation wizard's instructions.
  4. Installation Using a Mobile Device:
    • Download and install the "AiMaster" app from Google Play or the Apple App Store (QR codes provided in the manual).
    • Ensure the mobile device is connected to the same local network as the NAS.
    • Open AiMaster, select the [+] icon, then [Auto Discovery] to scan for the NAS.
    • Select the NAS from the list and choose [Start Initialization] to begin the configuration process.
  5. Installation Using a Direct Connection: Refer to the Troubleshooting section for instructions.

System Initialization: The initialization process covers settings for appearance (Light/Dark mode), time and date, security, storage volume, registration, and app installation. Users can choose between "1-Click Setup" (optimized settings) or "Custom Setup" (manual configuration).

Shutting Down the NAS:

  • Hold down the power button for 1.5 seconds. The NAS will either shut down or enter sleep mode based on the configured settings in ADM.

Maintenance Features

Safety Precautions:

  • Electrical Safety: Unplug before cleaning, use only the bundled power adapter, ensure correct power input rating.
  • Operation Safety: Do not place in wet locations, place on a flat and stable surface, use within 0°C to 40°C ambient temperature, do not block air vents, do not insert objects or spill liquid into vents.
  • Disposal: Do not dispose of in municipal waste; follow local regulations for electronic product disposal.

Troubleshooting (Cannot detect NAS using ASUSTOR Control Center):

  1. Network Connection Check:
    • Ensure the computer and NAS are on the same local area network.
    • Check if the network LED indicator is lit. If not, try connecting the Ethernet cable to another port or using a different cable.
  2. Firewall Check: Temporarily disable any firewalls on the computer and re-scan for the NAS.
  3. Direct Connection (if still undetectable):
    • Connect the NAS directly to the computer using the provided RJ-45 network cable.
    • Change the computer's IP settings:
      • Go to [Start] → [Control Panel] → [Network and Sharing Center].
      • Click [Change adapter settings] on the left panel.
      • Right-click on [Local Area Connection] and select [Properties].
      • In the [Networking] tab, select [Internet Protocol Version 4 (TCP/IPv4)] and click [Properties].
      • In the [General] tab, select [Use the following IP address].
      • Set [IP address] to 169.254.1.10.
      • Set [Subnet mask] to 255.255.0.0.
      • Click [OK].
    • Open ASUSTOR Control Center to scan for the NAS again.
  4. Further Support: If problems persist, contact a local ASUSTOR dealer or ASUSTOR Customer Service (http://support.asustor.com) or browse the ASUSTOR Knowledgebase.

Regulatory Compliance:

  • FCC Statement: Complies with FCC Rules Part 15, Class A digital device.
  • CE Mark Warning: Complies with EEC directives 2004/108/EC "Electromagnetic compatibility" and IEC60950-1:2005 (2nd Edition)+A1:2009 "Information technology equipment-Safety."

ASUSTOR Drivestor 4 PRO Specifications

General IconGeneral
BrandASUSTOR
ModelDrivestor 4 PRO
CategoryStorage
LanguageEnglish

Related product manuals