TH-1040-CT Page 2 of 6
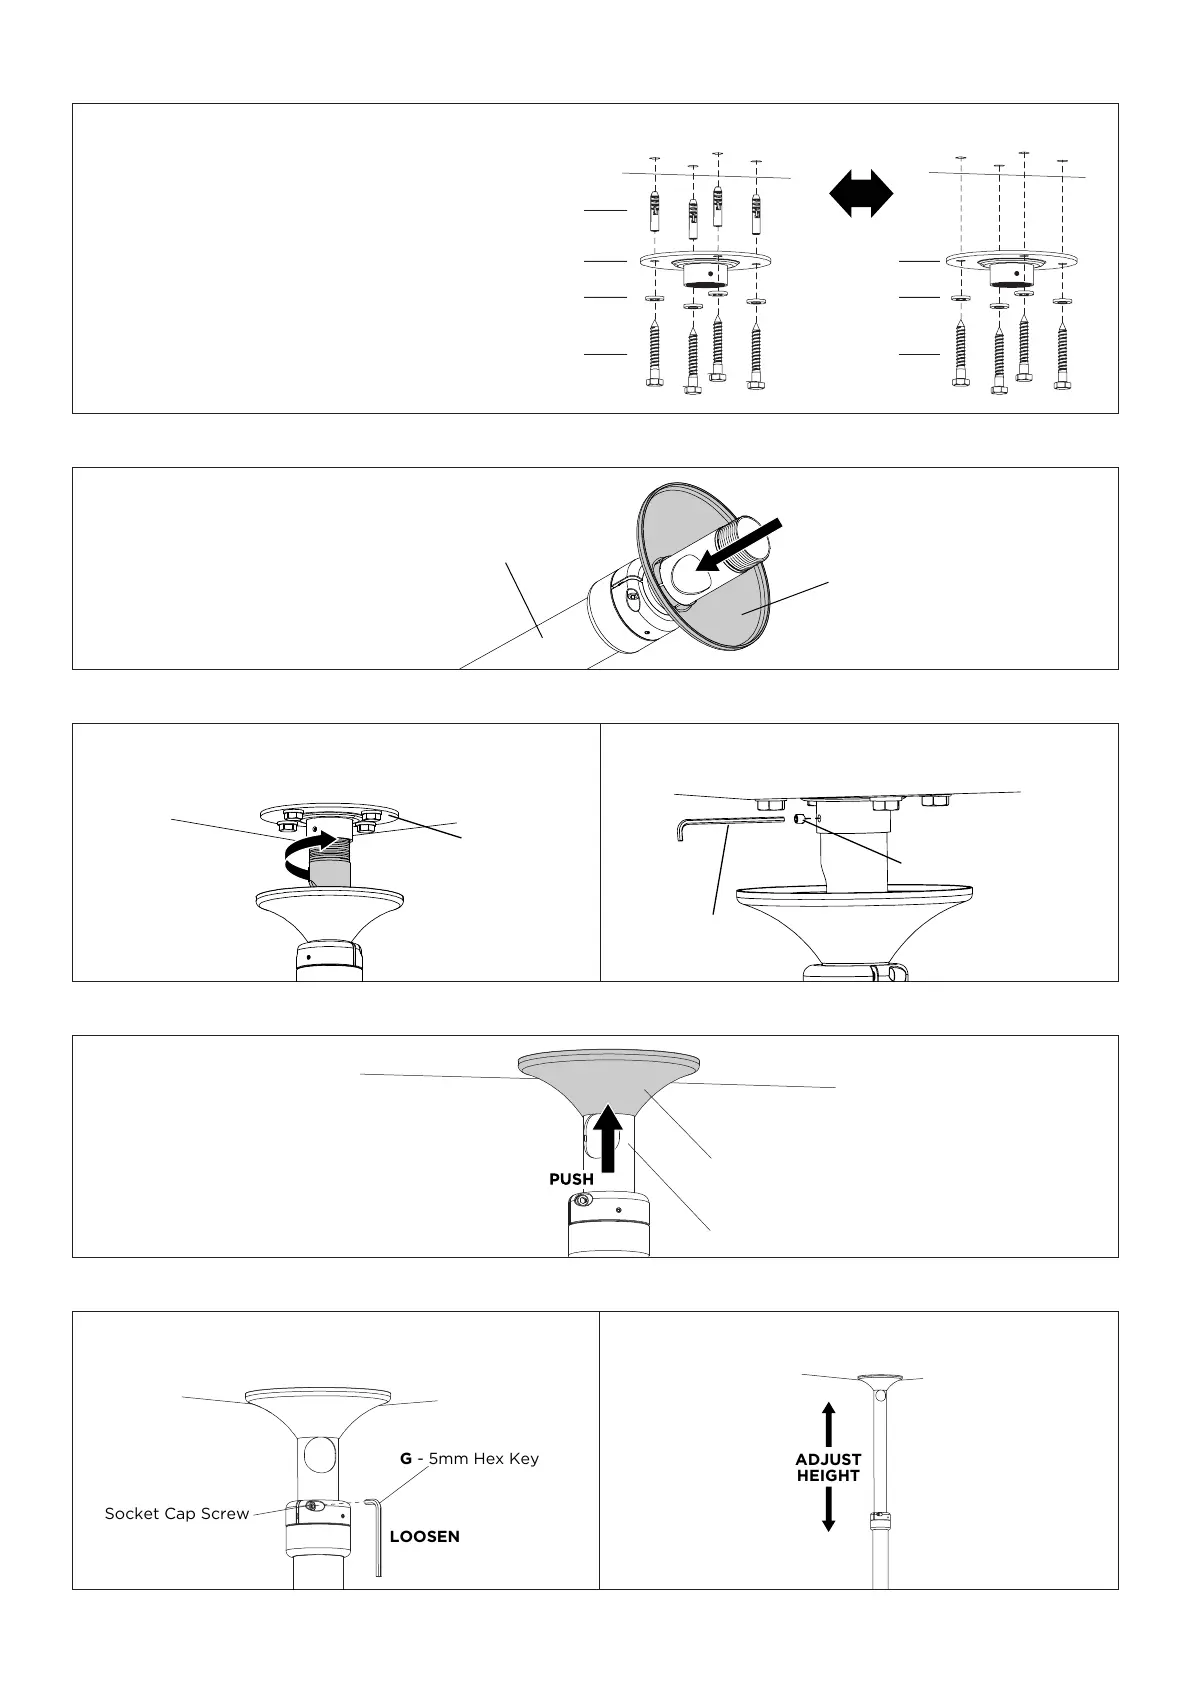
A
C
PUSH
2. Install Mounting Plate Cover
B
TWIST
G - 3mm
Hex Key
M
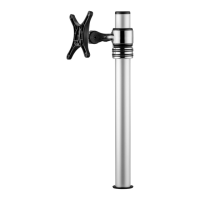
3.1. Screw Pole Assembly A into Mounting Plate B
by twisting top half of the Pole Assembly only.
3.2. Insert Set Screw M into the Mounting Plate to lock the
Pole Assembly in position.
3. Attach Pole Assembly to Mounting Plate
A
C
4. Position Mounting Plate Cover
1. Install Mounting Plate
• Use Mounting Plate B as a template to mark hole positions.
• Use a suitable power drill to drill Ø7x70mm holes for
timber joist installations or Ø12x70mm for concrete.
Masonry Ceiling Timber Ceiling
H
B
F
I - M10
Washer
B
F
I - M10
Washer
OR
5. Set length of Pole
LOOSEN
Socket Cap Screw
G - 5mm Hex Key
5.1. Whilst supporting the lower half of Pole
Assembly loosen the socket cap screws (x2).
5.2. Slide Pole Assembly to the desired height.
• Please choose fasteners that will suit your
installation,consultaqualiedengineerprior
to installing.
• Ensureceilingmountisvertical,thisproduct
will not suit slanted ceilings.
• Usegoodqualitystudndertoposition
mounting fasteners in the centre of the studs.
• Avoid mortar joins.
• Formetalbeams,pleaseconsultqualied
engineer.