Operating manual SUNTEST XLS / XLS+
- 20 -
!
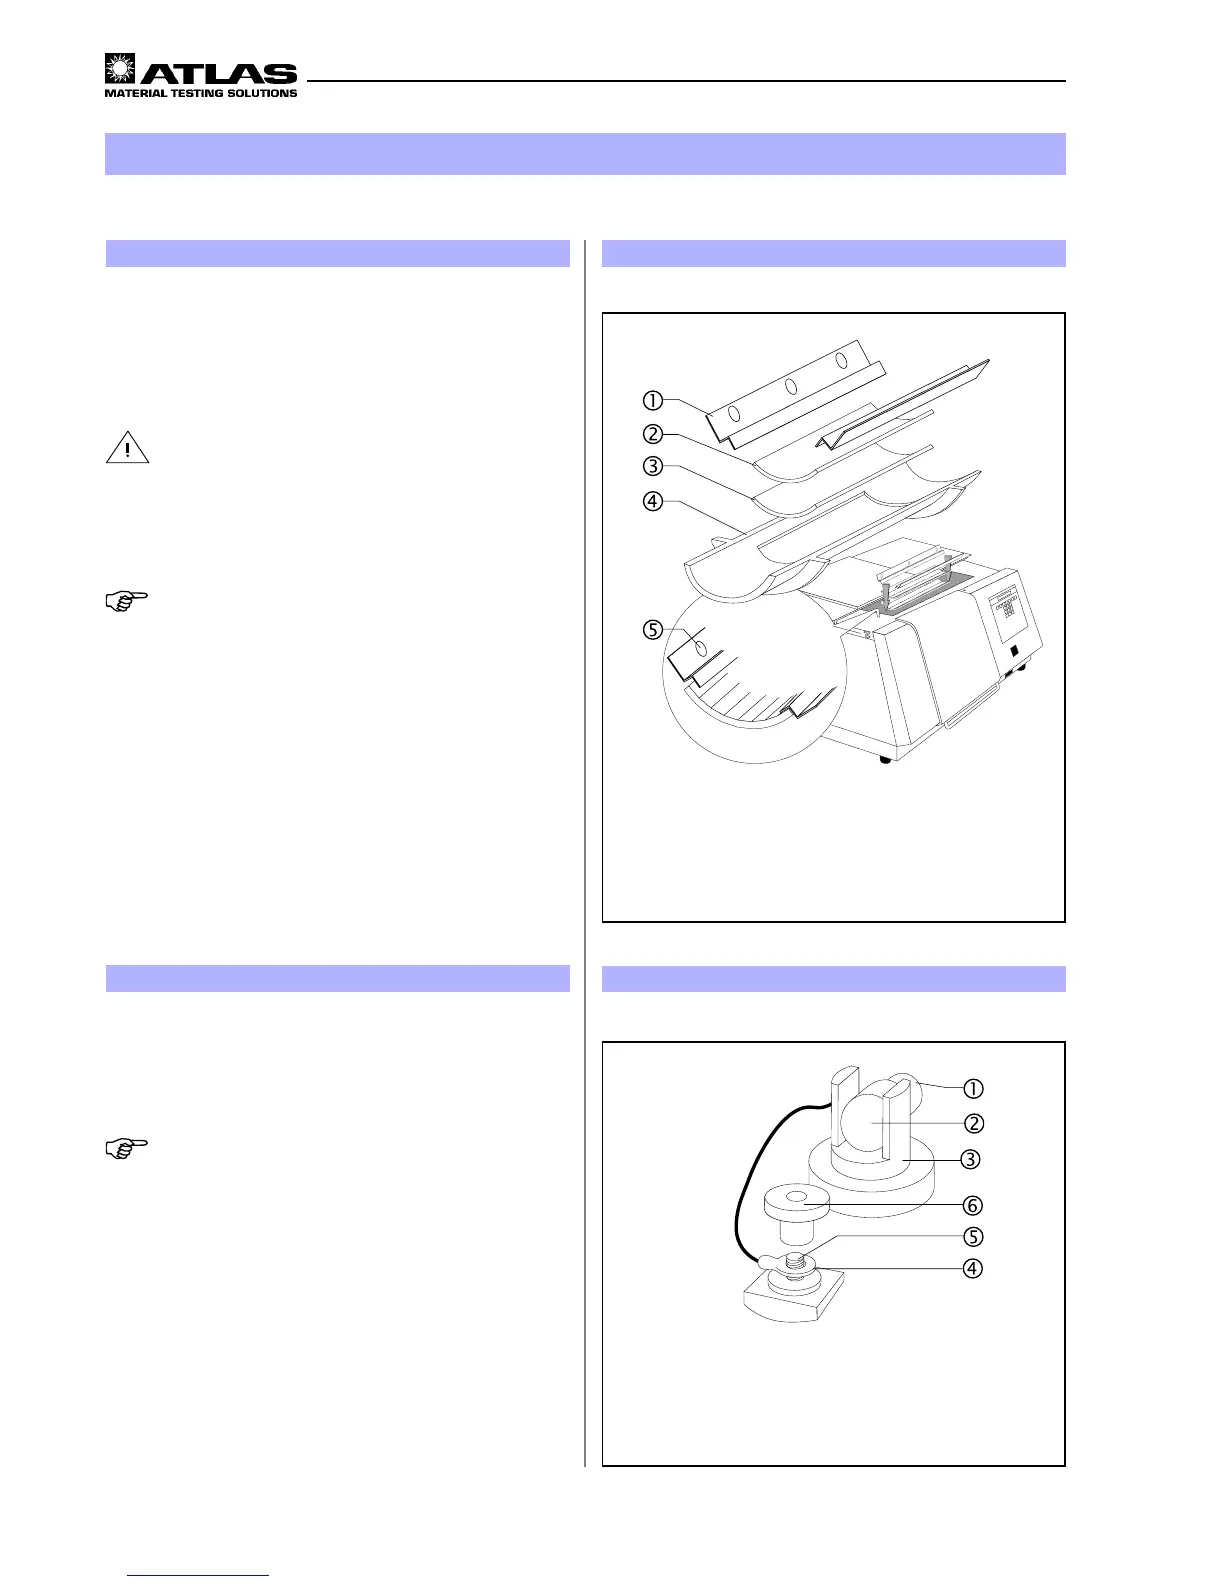
Xenon Lamp
"
Lamp socket
#
Mounting
$
Cable lug
%
Threaded pin
&
Knurled nut
Figure 146.2.4 Installation of the Xenon lamp
Before installation, the Xenon lamp should first be clea-
ned with a starch-free cloth that is moistened with a small
amount of spirit.
NOTE!
The lamp holder is located in the assembly compartment.
1. Carefully press the Xenon lamp
!
at the lamp sok-
ket
"
in the mounting
#
.
2. Place the cable lug
$
on the threaded pin
%
and
tighten it with the help of the knurled nut
&
.
6
Commissioning
!
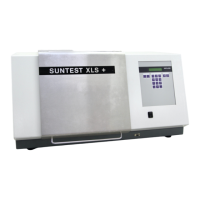
Z-Rail 2x
"
Coated / optionally uncoated quartz dish
#
Holding frame
$
Optional filter
%
Z-Rail Holes 3x
Figure 13
6.2.3 Installation of the optical filter
Clean the optical filter before assembling with a soft lea-
ther cloth / brush. Carefully wipe the optional filter „UV-
special glass“ with a starch-free cloth that is moistened
with 20% citric acid solution.
CAUTION - Danger of cuts and gashes:
The optical filters have sharp edges that can cause
cuts and gashes.
Hand-gloves should be worn whenever working on
the radiation unit.
NOTE!
The holding frame
$
, in which the optical filters are pla-
ced is located in the assembly compartment.
1. Wear protective hand-gloves.
2. First, place the optical filter “coated quartz dish” or the
optional “uncoated quartz dish”
#
in the holding fra-
me
$
.
3. Then, place the optional optical filter
"
(see chapter
5, “Accessories’).
4. Insert the Z-Rail
!
into the assembly compartment,
with the holes
%
facing towards the back of the unit.
5. Position the Z-Rail on top of the lower optical filter,
ensuring a tight and flush fit against the housing wall.
 Loading...