©
2012 Escalade Sports
For Customer Service Call 1-888-996-2729
5
All Rights Reserved.
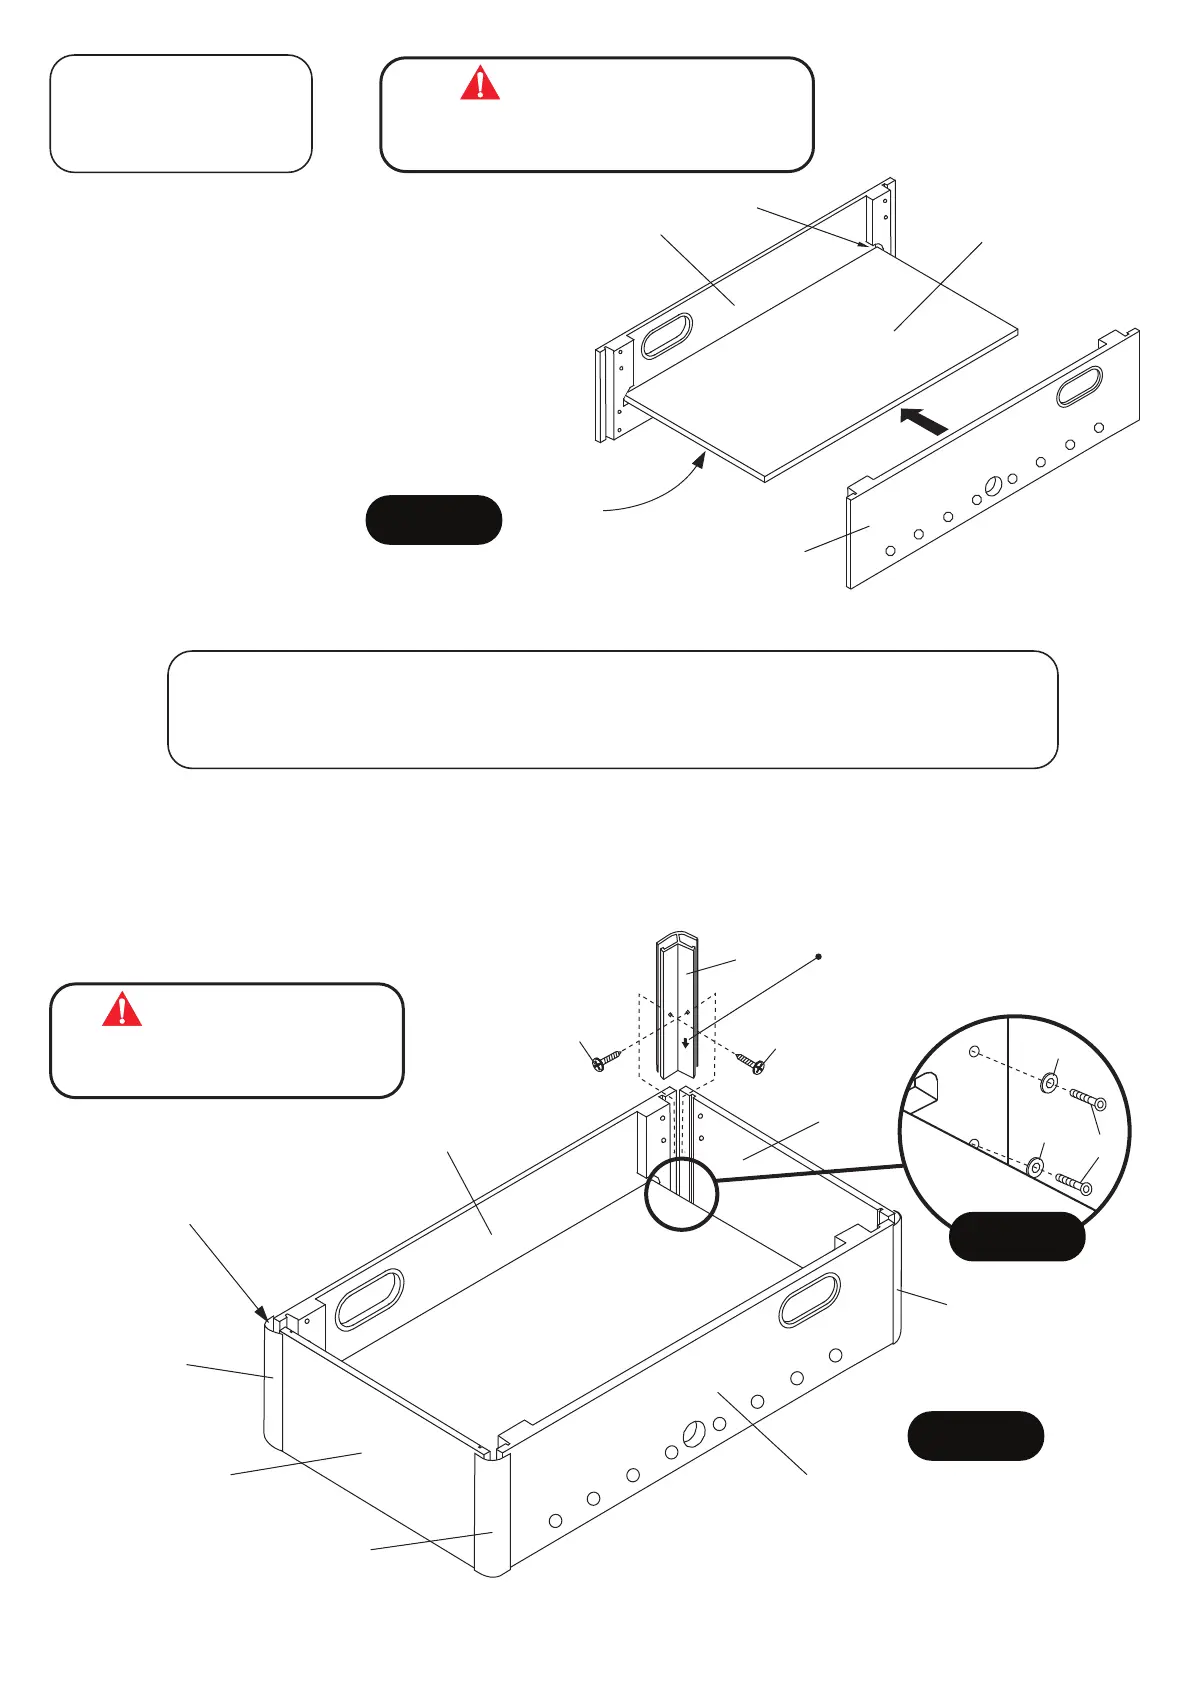
PARTS REQUIRED:
2 pcs - P1 Side Apron
1 pc - P3 Playfield
STEP 1:
Find a clean, level place to begin the assembly
of your soccer table. We recommend building
the table on the box top to protect the parts
during assembly.
Set P3 Playfield into the grooves in P1 Side
Apron as shown in FIGURE 1.
FIGURE 1
P1
P1
P3
NOTE:
Graphic on this side.
Groove
PARTS REQUIRED:
8 pcs - H1 Allen Head Bolt 8 pcs - H7 Phillips Round Head Screw 4 pcs - P12 Corner Post
8 pcs - H3 Flat Washer 2 pcs - P2 End Apron 1 pc - T1 Allen Wrench
STEP 2:
Attach P2 End Aprons onto P1 Side Apron using H1 Allen Head Bolts with H3 Flat Washers as shown in DETAIL A.
Do not tighten H1 Bolts on this time.
Slide P12 Corner Posts on the each end of P1 Side Apron and P2 End Apron. Use T1 Allen Wrench to tighten H1
Bolts. Use H7 Screws to secure P12 Corner Post as shown in FIGURE 2. Tighten, but do not strip out H7
Screws.
THIS STEP REQUIRES TWO OR MORE ADULTS.
VERY CAREFULLY SET P3 PLAYFIELD INTO THE GROOVES
IN P1 SIDE APRON.
DETAIL A
H1
H7
H7
H3
H3
P12
P1
P1
P12
P12
P12
P2
P2
FIGURE 2
THIS STEP REQUIRES TWO OR MORE ADULTS.
VERY CAREFULLY ATTACH P12 CORNER POST
ONTO EACH P1 & P2 APRON.
NOTE: P12 Corner Post should be
flush with bottom of P1 Side and
P2 End aprons.
NOTE: Install P12 Corner Posts
with arrow pointing down.
ATTENTION:
ATTENTION: