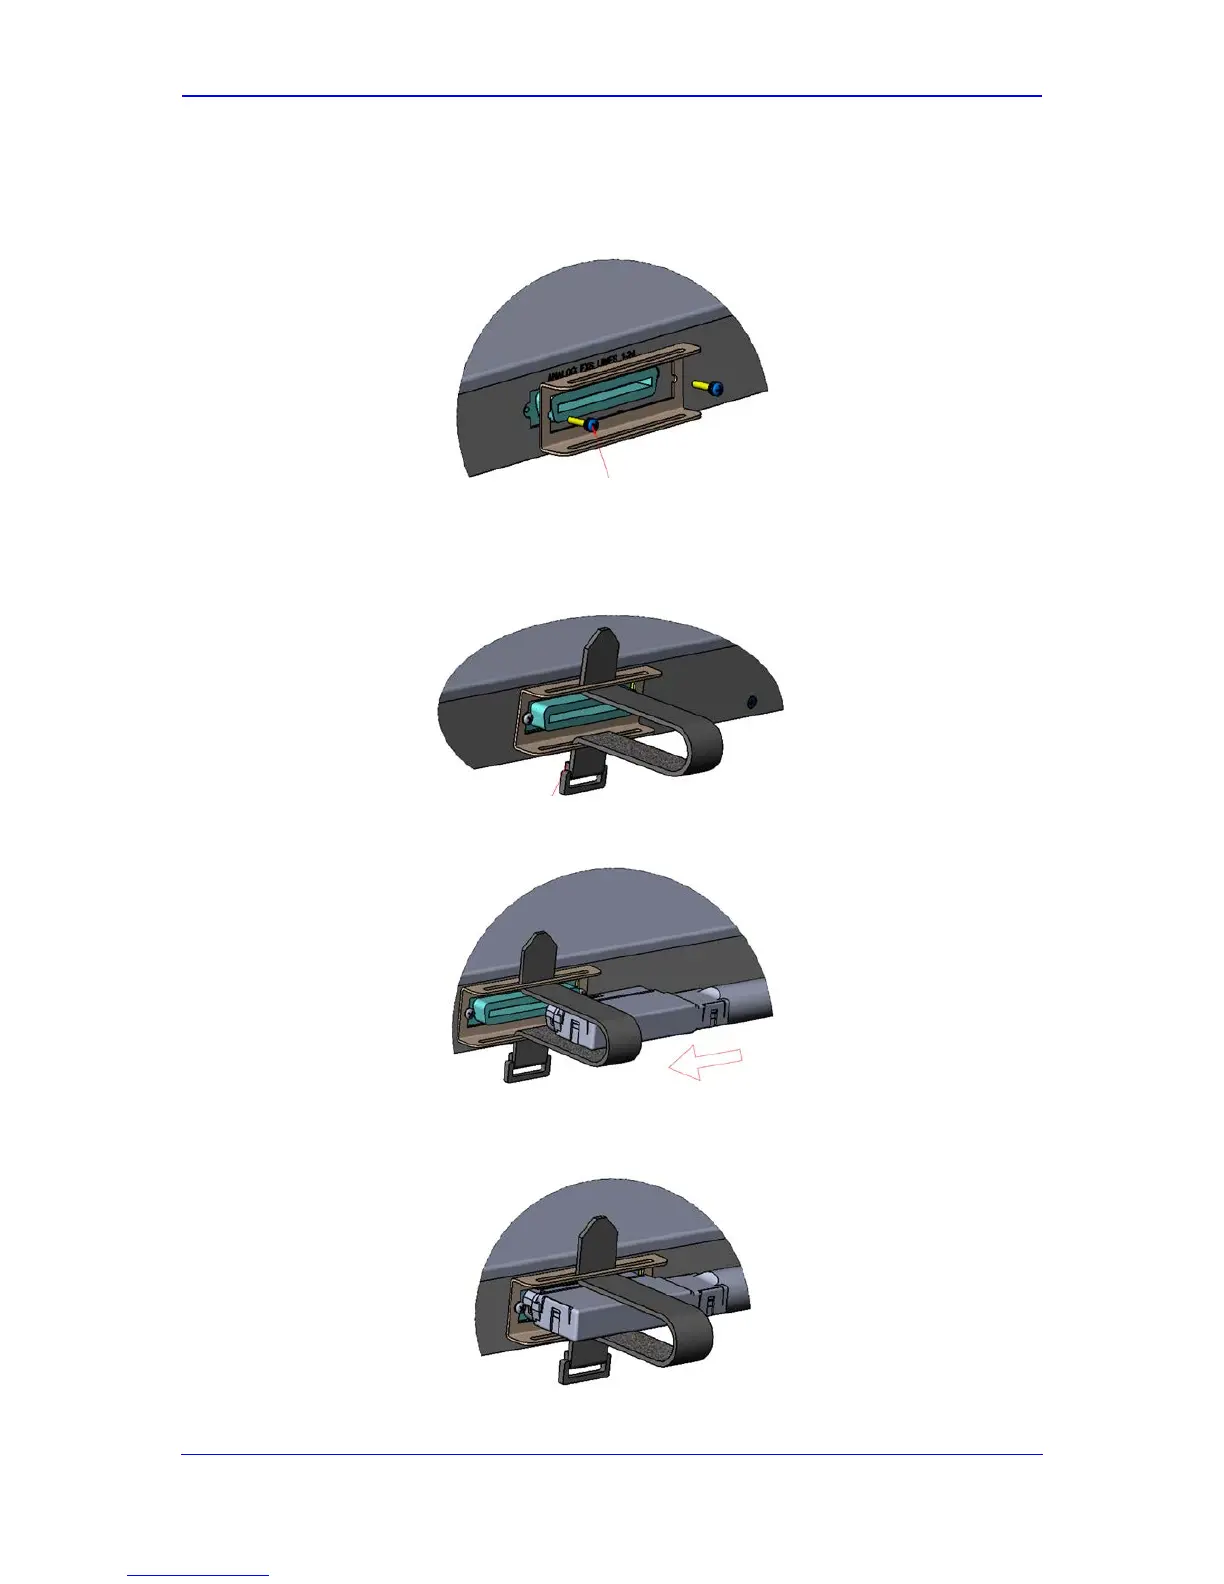
3. Place the supplied bracket over the connector and then fasten it to the chassis using
two screws. Depending on your cable connector requirements, use either the Hex.
standoff screws, short Philips screws, or long Philips screws.
Figure 5-16: Attaching Bracket over Telco Connector (e.g., Short Screws)
4. Feed the Velcro strap through the two slots of the bracket, from the bottom slot to the
top slot, with the Velcro side ("hooks") of the strap facing the chassis. Leave some
slack in the strap to allow the Centronics cable connector to slide through it (see next
step).
Figure 5-17: Feeding Velcro Strap through Bracket Slots
5. Slide the cable connector through the strap, as shown below.
Figure 5-18: Sliding Cable through Velcro Strap
6. Attach the cable connector to the device's Telco connector. A click or snap sound
might be heard when the connector is fully seated.
Figure 5-19: Attaching Cable Connector to Device's Telco Connector
 Loading...