SETTING LIMITS
12
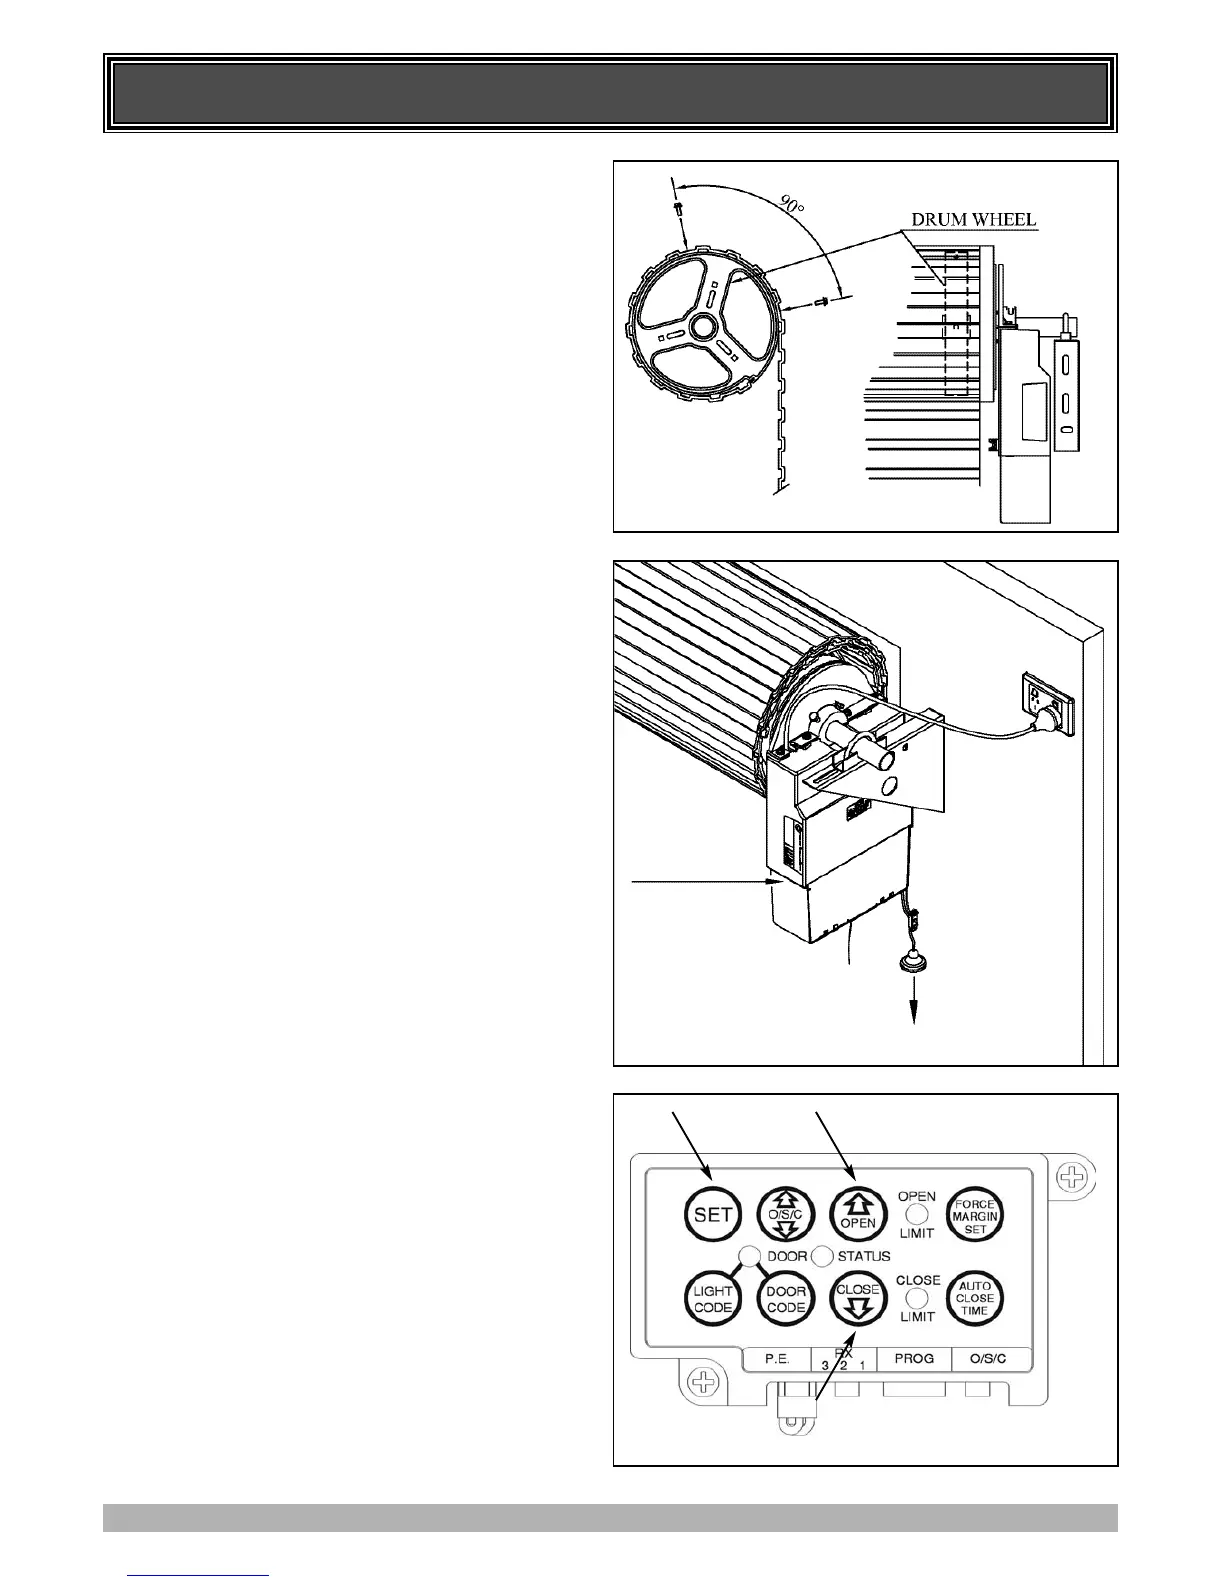
5. FIXING OF DOOR CURTAIN TO DRUM
WHEEL
The door curtain has to be secured to the drum wheel with
suitable fasteners.
1. With the door in the fully closed position, mark the curtain
(Fig. 13) on both ends of the door.
2. Open door slightly to have access to the marked positions.
Secure the curtain to drum wheel using self drilling screws
(two on each end). The screws should be at least 90 degrees
apart (Fig. 13).
6. SETTING DOOR TRAVEL LIMITS
POSITIONS - METHOD ONE - VIA THE
CONTROL PANEL
IMPORTANT NOTE: The O/S/C button will not function
until the open and close limits positions are set.
6.1 SETTING LIMITS POSITIONS
1. With the drive assembly in manual mode (Fig. 13) move the
door up by hand to an approximately mid open position.
2. Re-engage the drive gear to the door by pulling down on the
string and then releasing (Fig. 14).
3. Remove the light diffuser as per Fig. 14. Plug in the opener
and turn the power on.
4. Press the Close button (Fig. 15), the door will start closing.
Release the button once you have reached your desired
closed limit position.
5. Press the Set button (Fig. 15). This action will store into
memory the closed limit position.
6. Press the Open button (Fig 15), the door will start opening.
Release the button once you have reached your desired
opened limit position.
IMPORTANT WARNING: Please be aware that the garage
door will start closing automatically once step 7 is
performed. The door will also automatically re-open after
fully closing with a small pause between the cycles.
7. Press the Set button (Fig. 15). This action will store into
memory the open limit position. The door will now
automatically close to its limit position then fully open to
calculate the safety obstruction forces (ISS). Please be aware
of the above warning. The opener can now be operated from
the O/S/C Button.
6.2 RESETTING DOOR LIMIT POSITIONS
The door travel limit positions can be deleted for new
positions by the following steps below:
1. Press and hold the Close button (Fig. 15) for six (6) seconds
until you hear three beeps and the red Close Limit LED
starts to flash. Release the button.
2. Follow STEP 6.1 1 to 7 to set new travel limit positions.
Go to STEP 8 and test the Safety Obstruction Force.
FIG. 13
FIG. 14
FIG. 15
PRESS HERE
(BOTH SIDES)
AND PULL DOWN
TO REMOVE THE
LIGHT DIFFUSER
PULL MANUAL
RELEASE HANDLE
DOWN TO
DISENGAGE OR
RE-ENGAGE