SETTING SAFETY OBSTRUCTION FORCE
14
8. SAFETY OBSTRUCTION TEST
Please take care when testing the Safety Obstruction Force.
Excessive forces may cause SERIOUS PERSONAL
INJURY and/or property damage can result from failure to
follow this warning. The test below should be repeated at
regular intervals (approximately every two months).
8.1 TESTING CLOSE CYCLE
1.
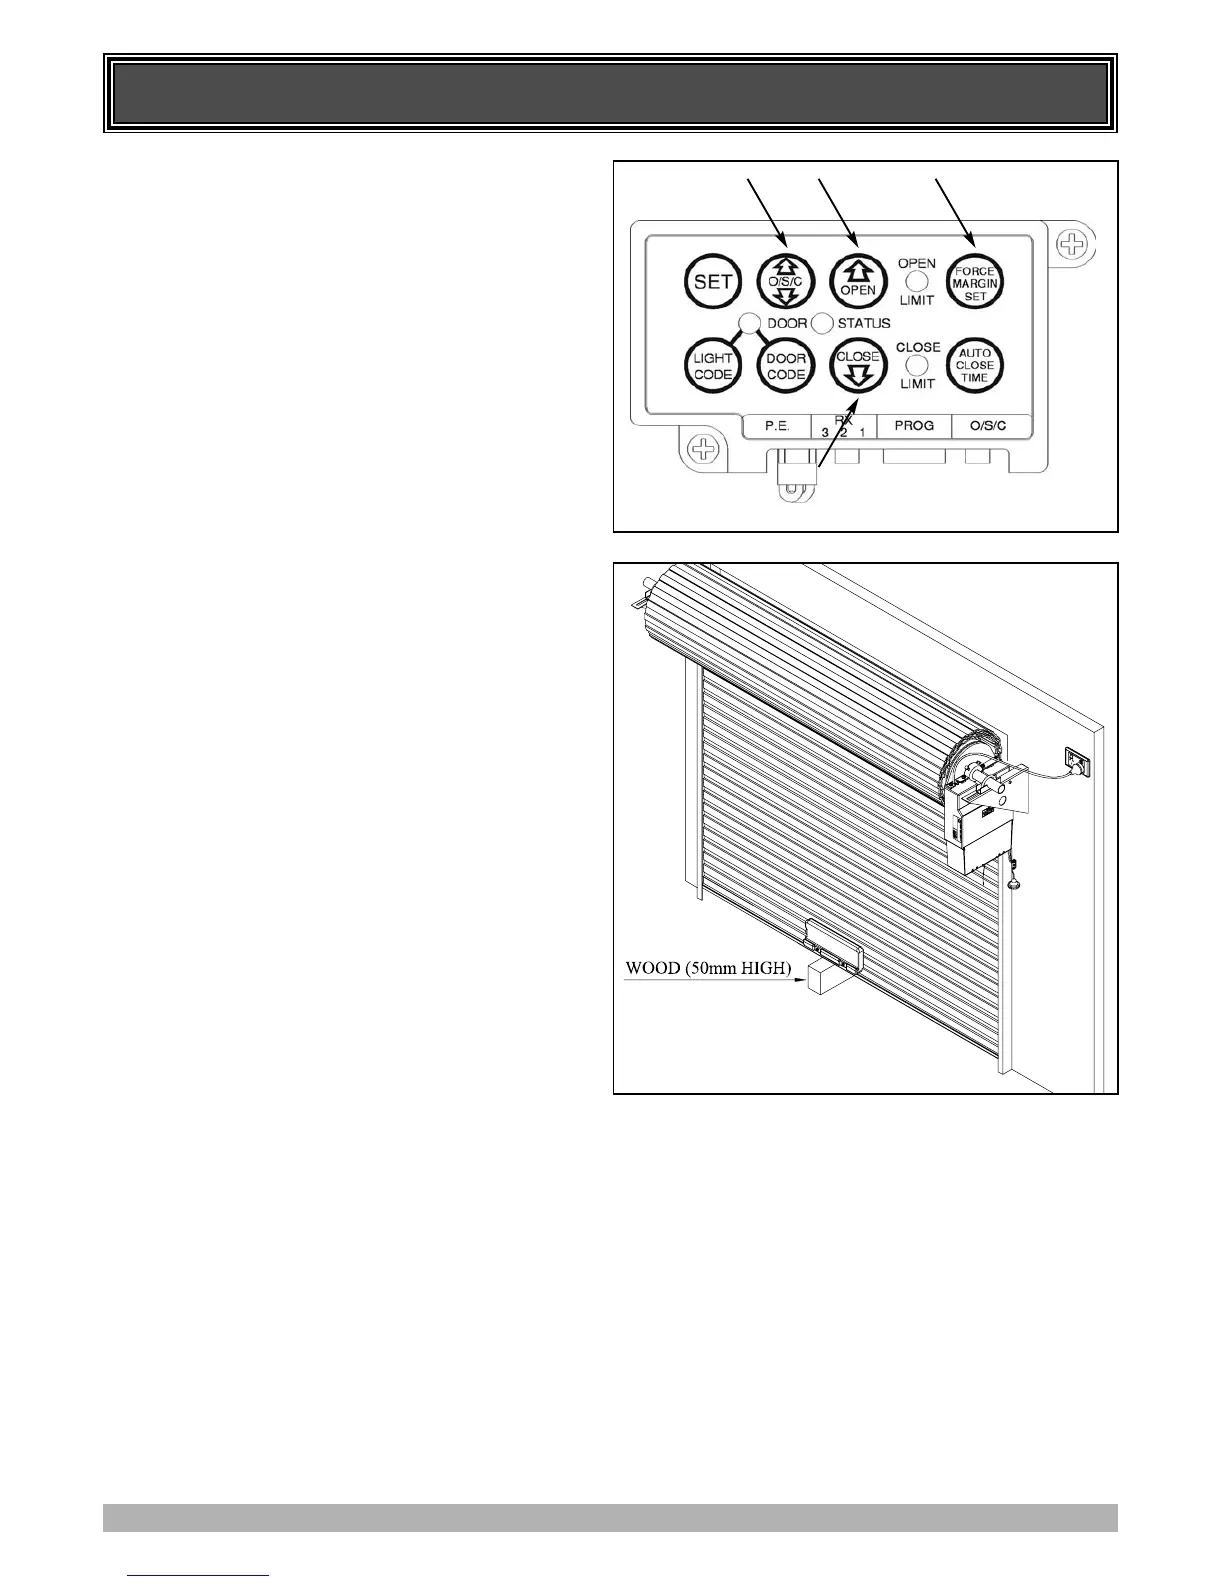
Open the door by pressing the Yellow O/S/C button (Fig. 18).
2. Place a length of timber approximately 50mm high on the
floor directly under the door (Fig. 19).
3. Press the Yellow O/S/C button to close door. The door
should strike the object and start to re-open.
4. Press again to close the door. When the door reaches half the
closing distance, grab the bottom rail of the door firmly, the
door should re-open. If the door stops on the obstacle and
fails to reopen, readjust and set the close limit lower (see
Step 6.2). Re-test as per Step 8.1 after you have adjusted the
close limit.
IMPORTANT WARNING: If the test fails, there may be
a problem with the door, discontinue use, put the door
into manual operation and call for service.
8.2 TESTING OPEN CYCLE
1. Close the door by pressing the Yellow O/S/C button.
2. Press again to open the door. When the door reaches half the
opening distance, grab the bottom rail of the door firmly, the
door should stop.
ADJUSTING SAFETY OBSTRUCTION FORCE
The Safety Obstruction Force is calculated automatically and
set in memory on the EasyRoller. It is usually not necessary to
adjust the Safety Obstruction Force. The only time the force
may need to be increased is due to environmental conditions,
for example, windy or dusty areas, and areas with extreme
temperature changes.
8.3 TO INCREASE FORCE PRESSURE
1. Press and hold the Force Margin Set button (Fig. 18)
2. While holding down the Force Margin button, press the
Open button (Fig. 18). Each press increases the force
margin. The Open Limit LED will illuminate each time the
Open button is pressed. Each press increases the force
margin. Test the force as per step 8.1 and 8.2. If the Open
Limit LED flashes continuously when the open button is
being pressed, this indicates that the maximum force
pressure setting has being reached.
8.4 TO DECREASE FORCE PRESSURE
1. Press and hold the Force Margin Set button (Fig. 18).
2. While holding down the Force Margin button, press the
Close button (Fig. 18). Each press decreases the force
margin. The Close Limit LED will illuminate each time the
close button is pressed. Test the force as per step 8.1 and 8.2.
If the Close Limit LED flashes continuously when the Open
button is being pressed, this indicates that the maximum
force pressure setting has being reached.
8.5 TO RECALL FACTORY SET FORCE
1. While holding down the Force Margin Set button (Fig. 18)
press the SET button (Fig. 18) for two (2) seconds.
2. Release both buttons. The default setting should now be
recalled.
FIG. 19
FIG. 18
IMPORTANT NOTE:
After installation ensure that the opener stops or is
prevented from opening when the door is loaded
with a mass of 20kg fixed centrally at the bottom
edge of the door.