CODING TRANSMITTERS
16
10. STORING TRANSMITTER(S) FROM A
REMOTE LOCATION
Using this method you don’t need to have access to the
control panel on the Door Opener. However, you do need a
transmitter that is pre coded to the controller’s receiver.
IMPORTANT NOTE: The Door or Courtesy Light must be
activated when the step below is performed. The moving
Door or Light switching on is to confirm from a remote
location that, the correct button was pressed, and the
transmitter is in range of the Opener.
1. Take any pre-coded transmitter. Press the button for the
function you require until the door is activated and release.
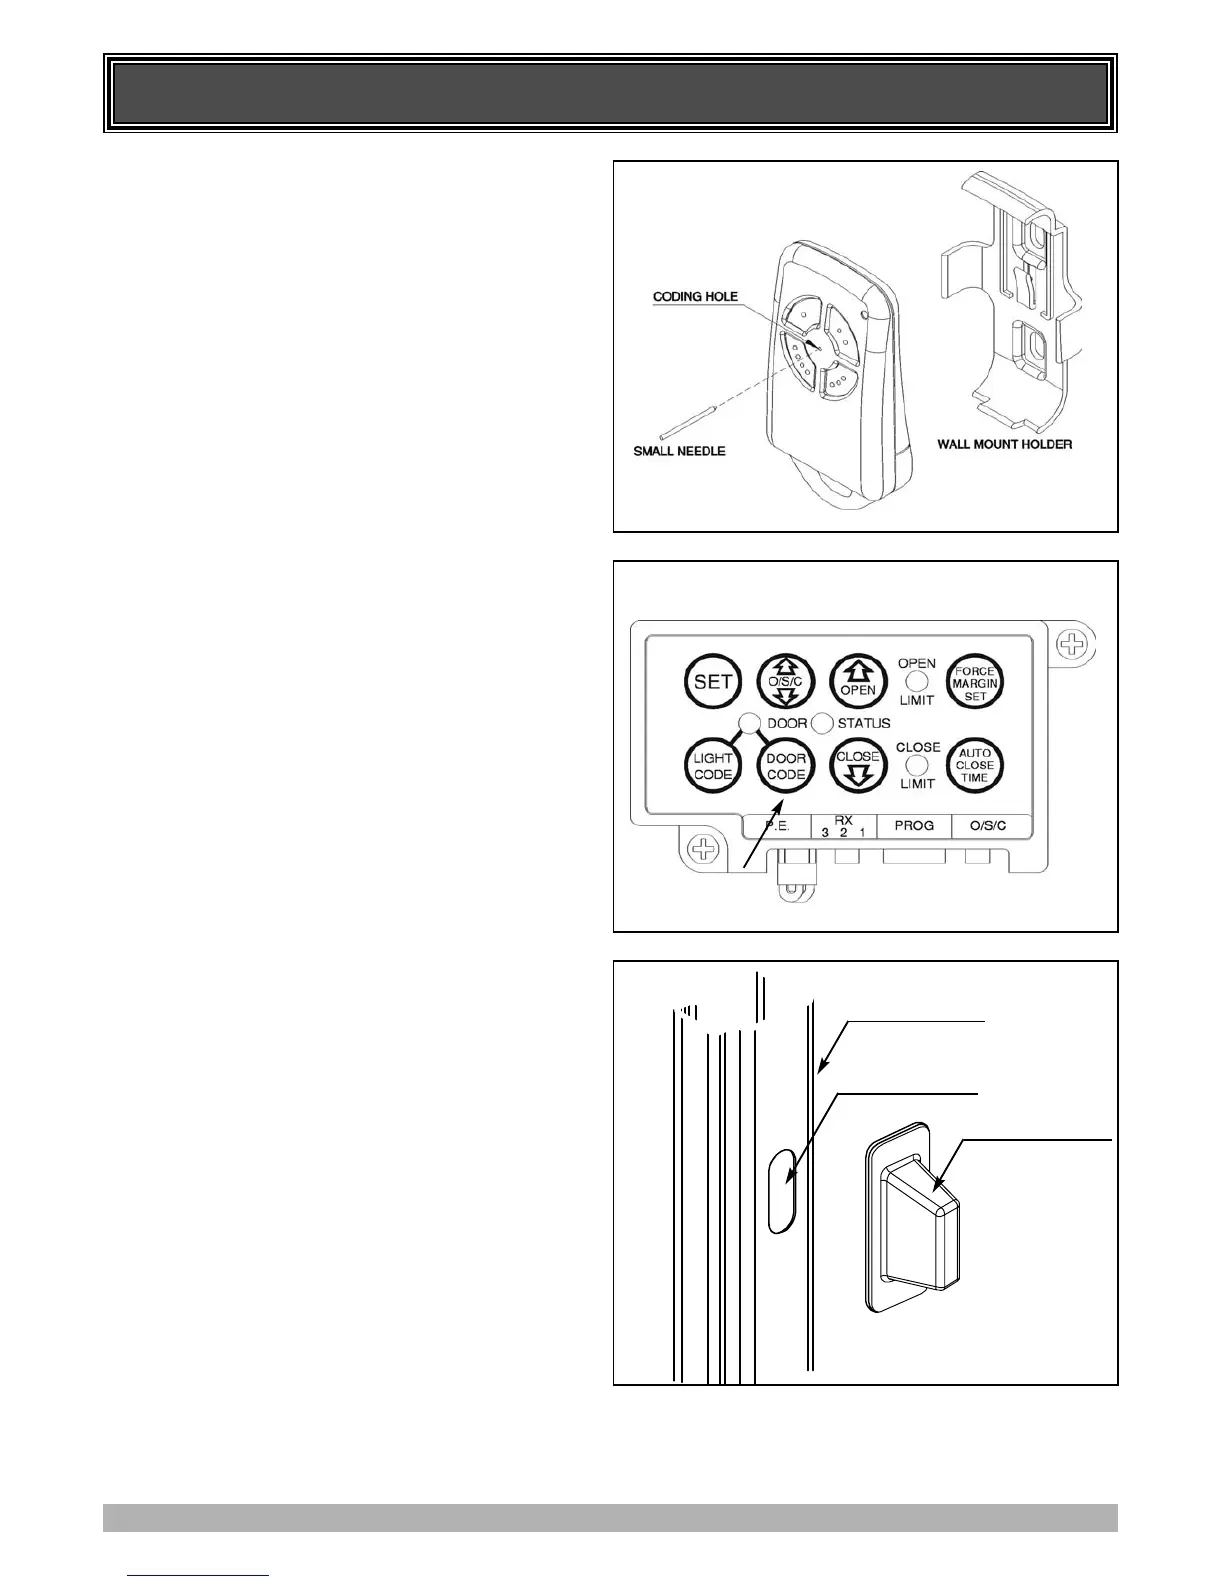
2. Then using a small needle press and hold firmly for two
seconds through the Coding Hole (Fig. 22)
3. Within 10 seconds take the additional transmitter you wish
to code.
4. Press the button (one of four) on that transmitter you would
like to use to control the door for two seconds, pause for two
seconds. Press the same button again on the transmitter for
two second, the button should now be recorded.
5. Wait for 10 seconds and then press the recorded transmitter
button to see if it operates the door.
11. DELETING PROGRAMMED CODES
11.1 DELETING A STORED TRANSMITTER CODE
1. Select the transmitter you want to delete.
2. Press and hold the Door Code button (Fig. 23).
3. Press the transmitter button you would like to delete for two
seconds. Pause for two seconds. Press the transmitter
button again for two seconds.
4. Release the Door Code button. The code should now be
deleted. Confirm this by pressing the transmitter button, the
door should not respond.
11.2 DELETING ALL STORED TRANSMITTER
CODES
1. Turn the Power Off to the Opener.
2. Press and hold the Door Code button (Fig. 23).
3. Turn the Power On again, while holding the Door Code
button. The Open Limit, Close Limit and Door Status LED’s
will illuminate for about five seconds. These LED’s will turn
Off and the Coding LED will illuminate. Release the Door
Code button. All the stored codes including the Courtesy
Light codes should now be deleted. Confirm this by trying
to operate the door by pressing the transmitters previously
used to control the door, the door should not respond.
12. INSTALLING LOCKING BAR COVERS
To protect against entrapment of fingers etc. inserted intro side
guides – remove the protective backing of the double sided tape
and install the locking bar covers over the holes in each side
guide (door guide track.)
FIG. 22
FIG. 23
FIG. 24
Double Sided Tape
Locking Bar Hole
Door Side Guide