SETTING LIMITS
13
7. SETTING DOOR TRAVEL LIMIT
POSITIONS – METHOD TWO - VIA THE
REMOTE CONTROL
IMPORTANT NOTE: The O/S/C button will not function
until the open and close limits position are set.
7.1 SETTING LIMITS
1. With the drive assembly in manual mode (Fig. 14) move the
door up by hand to an approximately mid open position.
2. Re-engage the drive gear to the door by pulling down on the
string and then releasing (Fig. 14).
3. Remove the light diffuser as per Fig. 14. Plug in the opener
and turn the power on.
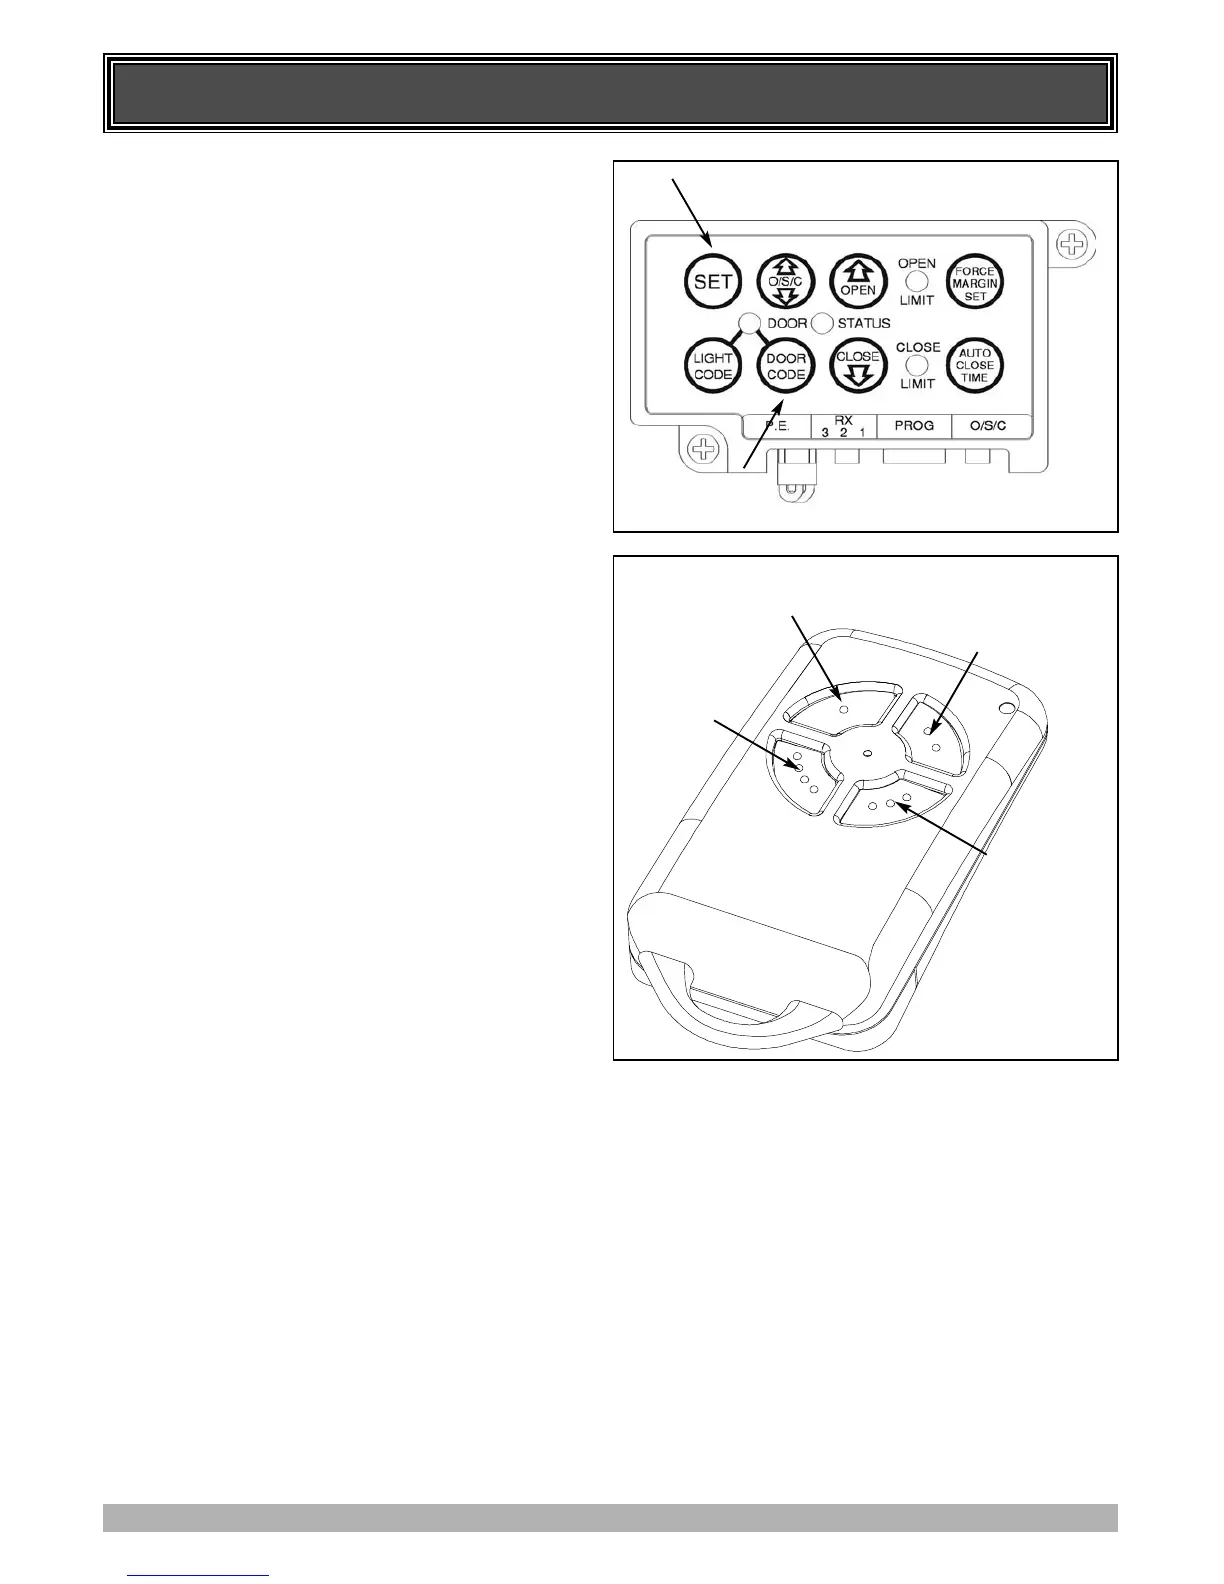
4. Press and hold the Door Code button (Fig. 16).
5. Press button 1 (Fig. 17) on the transmitter for two seconds.
Release and pause for two seconds. Press the same button
again on the transmitter for two seconds.
6. Release the Door Code button.
7. With the drive assembly in manual mode (Fig. 14) move the
door up by hand to an approximately mid open position.
8. Re-engage the drive gear to door by pulling down on the
string and then releasing (Fig. 14).
9. Press button 4 (Fig. 17), the door will start closing, release
the button once you are 1 to 2 cm from your desired closed
limit position. Press button 3 (Fig. 17) for two seconds then
release.
10. Press button 4, each press will enable you to inch the door
to your desired closed position.
11. Once you are happy with the position press button 2
(Fig. 17), this action will store into memory the closed limit
position.
12. Press button 1 (Fig. 17), the door will start opening. Release
the button once you are 1 to 2 cm from your desired open
limit position. Press button 3 for two seconds then release.
13. Press button 1. Each press will enable you to inch the door
to your desired closed position.
IMPORTANT WARNING: Please be aware that the garage
door will start closing automatically once step 14 is
performed. The door will also automatically re-open after
fully closing with a small pause between the cycles.
14. Once you are happy with the position press button 2, this
action will store into memory the open limit position. The
door will now automatically close to its limit position then
fully open to calculate the safety obstruction forces (ISS).
Please be aware of the above warning.
7.3 RESETTING DOOR LIMITS POSITIONS
The door travel limit positions can be deleted for new
positions by the following steps below:
1. Press and hold the Close button (Fig. 16) for six (6) seconds
until you hear three beeps and the red Close Limit LED
starts to flash. Release the button.
2. Follow STEP 7.1 1 to 14 to set new travel limit positions.
Important: Their is no need to re-code the transmitter used
for setting the limit positions. After the limits are set the
transmitter will automatically reset to normal operation.
Go to STEP 8 and test the Safety Obstruction Force.
FIG. 16
FIG. 17
INCH OPEN
BUTTON 1
INCH CLOSE
BUTTON 4
SET
BUTTON 2
SWITCH
BETWEEN FAST
AND SLOW
INCHING
BUTTON 3