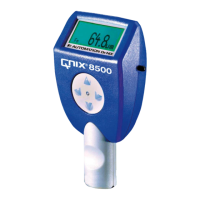
Instruction Manual QNix
®
8500
- 14 -
8.4.2 Displaying a summary of statistical data
If you select a block that is not active, a summary of statistical data will be displayed immedi-
ately. If you select the active block, choose „Show Values” from the submenu to display the
summary.
8.5 Gauge Setup
8.5.1 LC-Display
8.5.1.1 Unit of a Reading
Readings can be displayed either in µm or in mil (standard setting: µm).
Select the unit pressing the ▲ and ▼ buttons and then confirm with ►.
8.5.1.2 Resolution
Setting the decimal digits adjusts the resolution of the readings to the application. It can be
useful for example to blank out the decimal places when working on surfaces with high
roughness leads to high variations in the readings. The resolution can be set to „Coarse“
(0 µm), „Normal“ (0.0 µm) or „Fine” (0.00 µm).
8.5.1.3 Backlight
In „Auto" mode, the backlight is turned on for about 7 seconds while taking a reading. Switch
off the backlight using the menu item „OFF“.
Switching the backlight off will increase the service life of the batteries.
8.5.1.4 Display Orientation
The display orientation can be adjusted to the way the gauge is operated.
If the probe is connected to the gauge via adapter cable and the gauge is placed on a table,
the display orientation can be flipped by 180° to allow for an upright reading of the display.
To change the display orientation, press the ► button then select the setting “Normal” or
“Flip” using ▲ and ▼ and finally confirm by pressing ►again.
NOTE: When the display is flipped, the functions of the keypad are also flipped. As soon as
you confirmed the flipping, you should turn the gauge by 180° in order to operate the gauge
in a familiar manner.
Leave the menu item by pressing the (backspace) button: ◄.
8.5.2 Wireless Interface
If the wireless interface is activated, the gauge is constantly ready to receive commands/data
from the PC-Software. For example the gauge can be programmed for specific applications
using this interface (see § 12). You can also update the gauge software this way.
When the wireless interface is active, the antenna symbol Ψ appears in the lower left hand
corner of the display. In addition, the red LED in the keypad blinks every 7 seconds (even
when the gauge is turned off).
If data is transmitted via the wireless interface, the red LED flashes.
Deactivating the interface while not in use will increase the service life of your batteries. If the
gauge is not used for more than 30 minutes, the interface will deactivate itself automatically.
The next time the gauge is turned on the interface is activated again.
Using the “EnergySave” mode via the setup menu will deactivate the interface together with
the display (after about 30 seconds). This increases the service life of your batteries com-
pared to the setting “ON” depending on the application conditions.

 Loading...