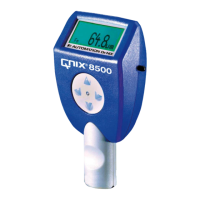
Instruction Manual QNix
®
8500
- 15 -
8.5.3 System Information
This menu item displays the following information:
- serial number and type of the gauge
- software/hardware version of the gauge
- memory in use (in %)
8.5.4 Language
The gauge can store up to 3 languages. As a standard, the device is delivered with the lan-
guages German, English and French already installed. Further languages are available upon
request. Furthermore, you can create your own language using the language editor software.
To change the language, access the list of languages, scroll through it using the ▲ and ▼
buttons and select the desired language by confirming with ►.
8.5.5 Buzzer
The buzzer can be switched on or off.
When the buzzer is switched off, the display will show the symbol in the lower left cor-
ner.
8.5.6 Time and Date
With the internal clock of the gauge, date and time of each recorded reading and created
batch is stored.
Setting of date and time can be necessary
- if changing the batteries took longer the 2 minutes
- after adjusting for daylight saving time
- after changing the time zone
8.5.6.1 Setting the Time
After selecting this menu item set hours and minutes using the ▲ and ▼ buttons. Confirm
with ►.
For corrections, use the backspace button: ◄.
8.5.6.2 Setting the Date
Set the date the same way you set the time.
8.5.7 The ▲ button
The ▲ button is used to set the zero reference (see § 6) or for taking a reading (see § 5.1).
Use the menu item „Button ▲“ to set the active option.
Please note that you will have to use the menu items „Zero “ and „Infi” in the „Calibration”
menu to set the zero reference if you select „Measure” here. Furthermore, it is not possible to
take a reading pressing this button when using the radio-controlled probe in wireless mode.
9 Radio Controlled Probe
Since firmware version 16, the QNix 8500 supports the radio controlled probe. Connecting
the probe with the gauge couples the two devices. At the same time, the current charge sta-
tus of the probes rechargeable battery is displayed among the probe information.
The rechargeable battery integrated in the radio controlled probe is automatically charged
when the probe is connected with the gauge. The probe signals the charging by periodically
flashing the blue probe light every few seconds.
When connected to the gauge, the Radio Controlled probe can be used like any other probe.
After disconnecting the probe from the gauge, the probe enters radio controlled mode. In the
upper display area, the charge status is updated during each reading. Within the status area

 Loading...