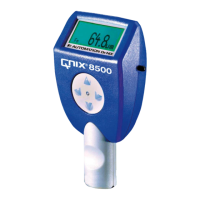
Instruction Manual QNix
®
8500
- 9 -
8.1.1 Custom-Designed Calibrations
8.1.1.1 Delete all
Selecting this menu item will delete all custom-designed calibrations after a confirmation dia-
log.
Further measurements are taken using the factory calibration.
8.1.1.2 Factory Calibration
Activating this function by pressing the ►button selects the factory calibration and the gauge
returns to the standard measuring mode.
8.1.1.3 Creating a new Custom-Designed Calibration
After confirming the menu item „Define New Calibration“ the name of the new calibration is
shown in the display, e.g.
>C 004 <
The first character is highlighted. To accept the name press the ► button until the cursor
jumps to “OK”. Confirm with ► and define the calibration as described in § 8.1.1.4.2.
The calibration name can be changed to any 8-character name directly after the number ap-
pears. To change each separate character press the ▲ or ▼buttons until he desired charac-
ter appears. Pressing ► confirms the character and the cursor jumps to the next character.
To correct a previously chosen character at any time, simply return by pressing the back-
space button: ◄.
8.1.1.4 Selecting a Custom-Designed Calibration
This menu level lists all currently saved custom-designed calibrations under the menu item
„Define New Calibration“. To select a certain calibration use the ▲ and ▼ buttons. Subse-
quently pressing ► opens the corresponding options menu. A dot at the right side of the dis-
play marks the active calibration.
8.1.1.4.1 Activating a Custom-Designed Calibration
Pressing the ►button activates the selected calibration.
A warning message appears in the display if this calibration has not yet been performed. In
this case the gauge jumps to the next menu for selection of the calibration method (see the
following paragraphs).
8.1.1.4.2 Calibration Methods
Before calibrating, we suggest to set a zero reference on the corresponding uncoated sub-
strate.
Two different calibration methods are available:
8.1.1.4.2.1 One-Point Calibration
A one-point calibration can optimize the measuring accuracy of the probe near an expected
coating thickness.
To perform a one-point calibration put a calibration foil with a thickness close to the expected
thickness on the uncoated substrate and place the probe on that film. Adjust the displayed
reading, using the ▲ and▼ buttons, until it matches the thickness of the film.
Pressing the ► button concludes the setting and the calibration is activated. The gauge re-
turns to the standard measuring mode automatically.
8.1.1.4.2.2 Two-Point Calibration
A two-point calibration can optimize the measuring accuracy of the probe within a certain
coating thickness range.

 Loading...