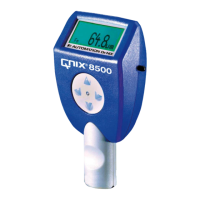
Instruction Manual QNix
®
8500
- 17 -
first 4 digits indicate the software version without the decimal dot (so “014c” means “1.4c”),
and the last 3 digits show the hardware revision of the gauge, also without the decimal dot.
10.4 I cannot activate the menu
Use the ▼ button. If 2 or more memory batches are defined and the memory mode is select-
ed, the ◄ and ► buttons select the next/previous batch, and the ▼ button switches to menu
entry (see also 8.3.5.1).
11 Installing the
PC Software
The PC-software is automatically installed after inserting the CD into your PCs CD-ROM
drive.
12 Installing the USB-RF-Dongle Drivers
You find the drivers for the USB-RF-dongle on the
PC-software CD.
After the dongle has been connected to the PC for the first time, the operating system of your
PC will open a window showing a message that new hardware has been found and that nec-
essary drivers have to be installed. Enter the path of the drive holding the CD in the desig-
nated field or use the “Search” function. Then start the installation.
This installation process is necessary only the first time the dongle is used. Please also refer
to the installation guide on the CD.
13 Setting the Gauge Options with the PC-Software
The setup options described in § 6can also be programmed and then downloaded into the
gauge using the PC-software. This is especially useful when entering the names for calibra-
tions and batches.
To do this, connect the RF-dongle to your PC and start the software. Also, activate the wire-
less interface of the gauge (see § 8.5.2).
After the PC-software identified the gauge, the possible menu options and their settings are
displayed in the software menu “Gauge Settings” or can be loaded from the gauge by click-
ing “Load Settings from Gauge”.
You can now enter and modify all gauge settings on your PCs monitor. Only after all inputs
are finished the settings are downloaded into the gauge by clicking on “Transfer Settings to
Gauge”.
14 Loading a new Language into the Gauge
Use the "LanguageEditor" of the PC-software to load a new language into the gauge.
The LanguageEditor contains a chart showing all commands and messages appearing on
the display.
15 Updating the Software in the Gauge and Probe
The software in the gauge and probe can be updated, if required. Enhancements of the soft-
ware are available for download on the internet site www.automation.de.
After downloading to the PC the updates can transferred to the gauge and probe with the
RF-interface.

 Loading...