Autostacker™ Parking Lift 19 P/N 5900248 — Rev. B — May 2021
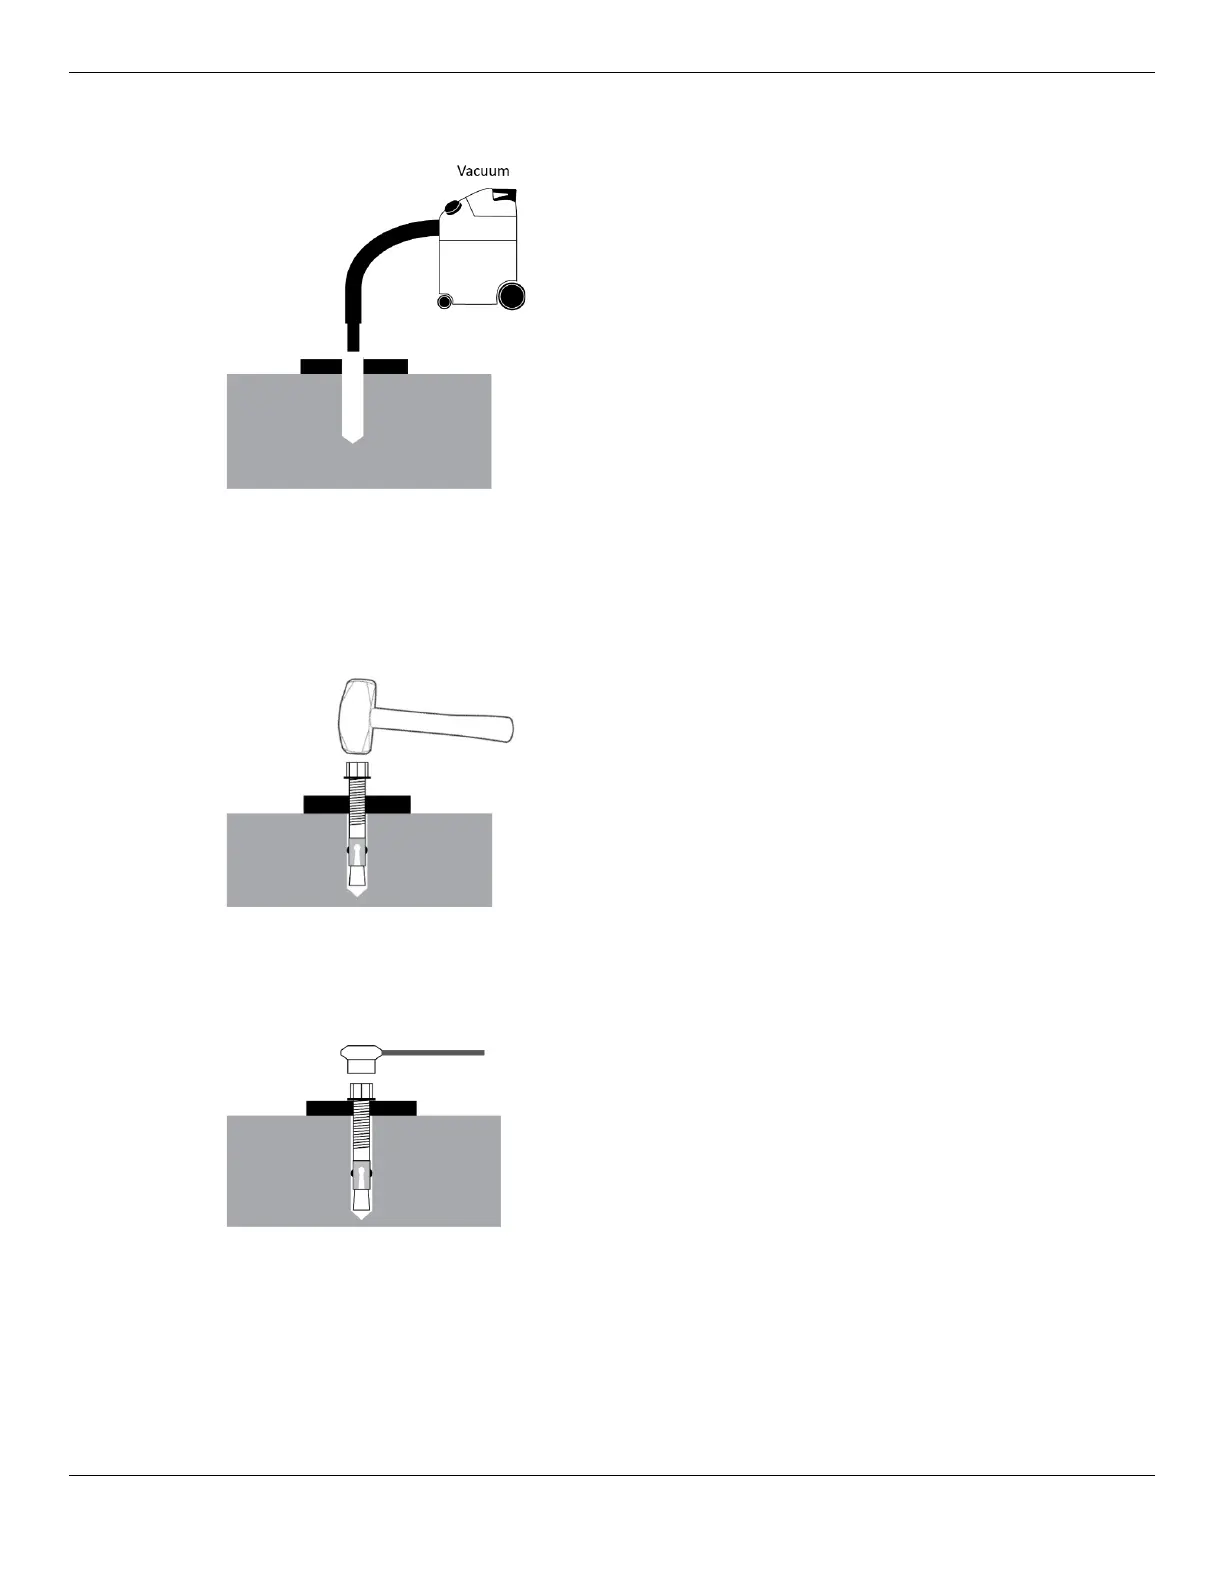
3. Use a wire brush or Vacuum to thoroughly clean each hole.
You can also use a hand pump or compressed air. Make sure
to thoroughly clean the holes.
Do
not
ream the hole. Do
not
make the hole any wider than
the drill bit made it.
4. Make sure the Washer and Nut are in place, then insert the Anchor Bolt into the hole.
5. Hammer or mallet the Wedge Anchor the rest of the way down into the hole.
Stop hammering when the Washer is snug against the Base.
Use a hammer or mallet to get the Expansion Sleeve through
the Base and down into the hole.
Even using a hammer or mallet, the Anchor Bolt should only
go into the hole part of the way; this is normal. If the Anchor
Bolt goes all the way in with little or no resistance, the hole is
too wide.
Once past the hole in the Base, the Anchor Bolt eventually
stops going down into the hole as the Expansion Sleeve
contacts the sides of the hole; this is normal.
6. Wrench each Nut
clockwise
to the recommended installation torque, 85 – 95 pound feet, using a
Torque Wrench.
Wrenching the Nut forces the wedge up, pushing out the
Expansion Sleeve and pressing it tightly against the Concrete.
Important: Do
not
use an impact wrench to torque the
Anchor Bolts.