Autostacker™ Parking Lift 55 P/N 5900248 — Rev. B — May 2021
Attach the Conduit Tube
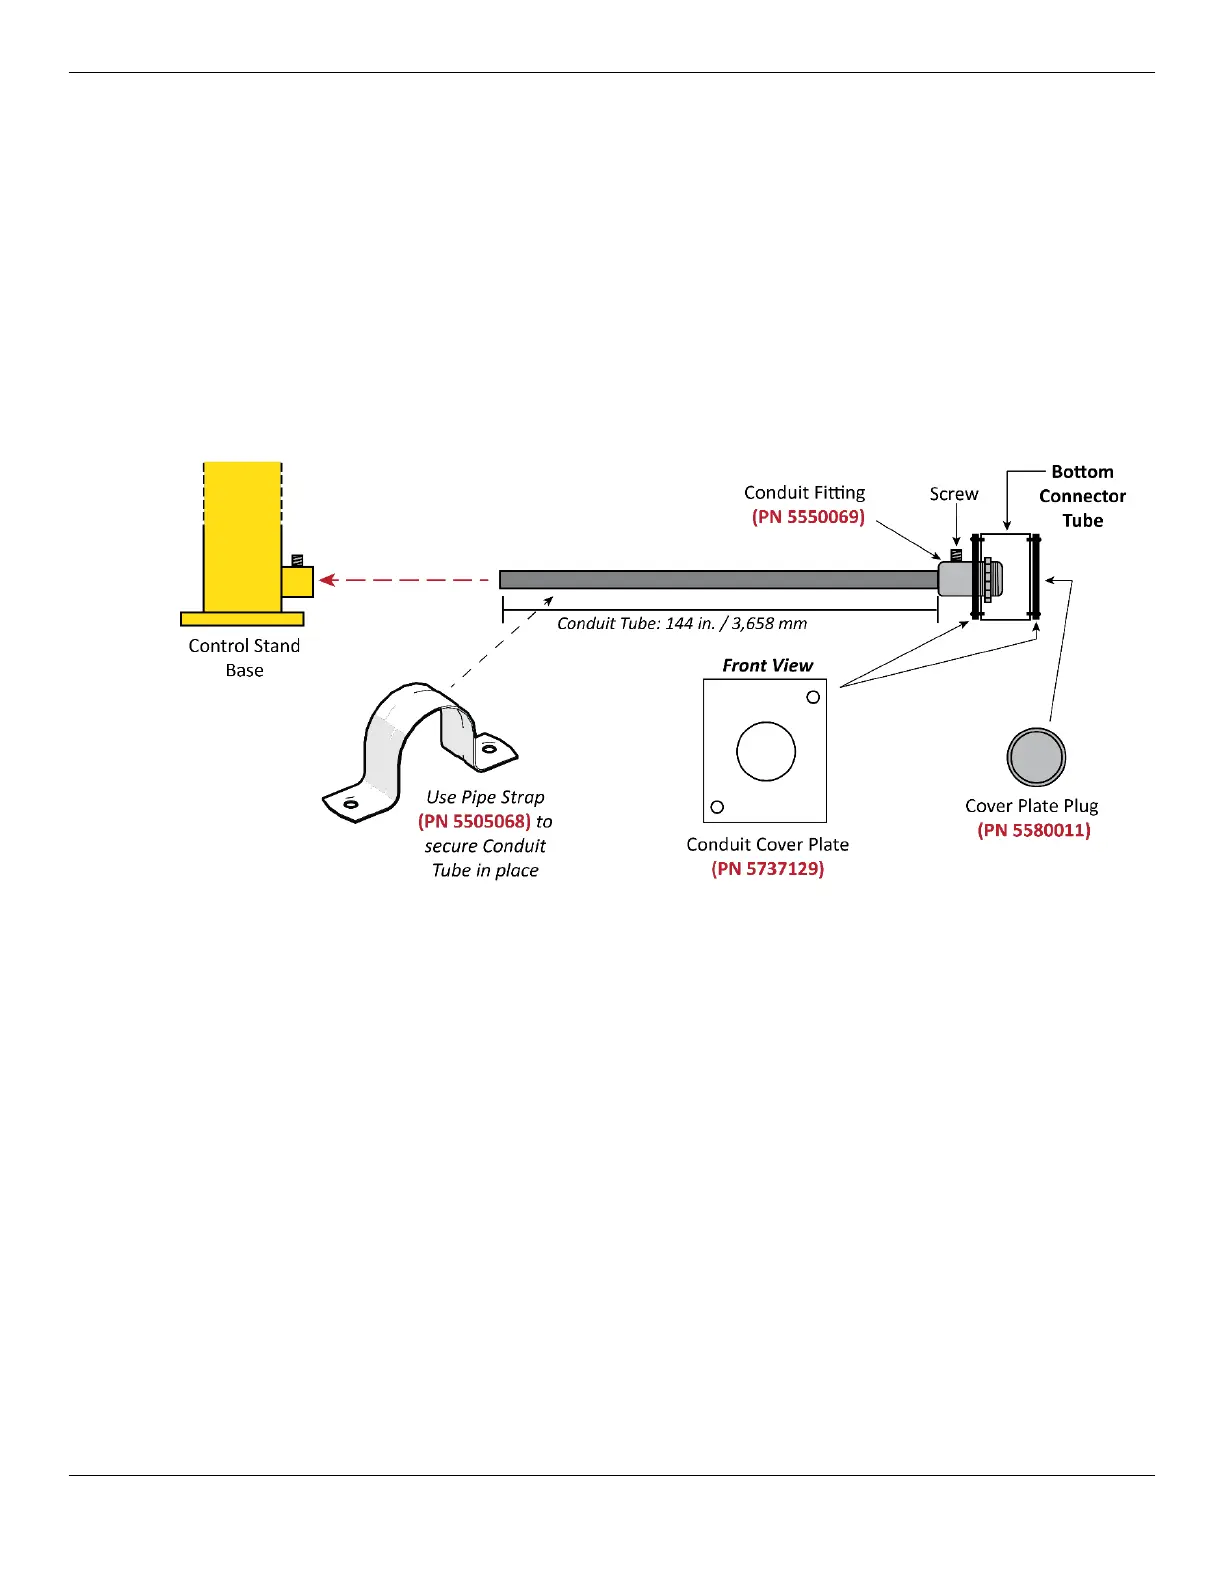
In order to place the Control Stand at the
Rear
of the Lift, you need to first attach the Conduit Tube to
the Bottom Connector Tube; the Conduit Tubes protects the Control Stand wiring from being exposed
and damaged.
If you plan to position the Control Stand at the
Front
of the Lift, continue to the next section.
The components involved include:
• Conduit Cover Plates. Attach to the Windows on either side of the Bottom Connector Tube.
• Conduit Fitting. Attaches to the Conduit Cover Plate and holds one side of the Conduit Tube.
• Conduit Tube. Attaches to the Conduit Fitting. Used for routing the Control Stand wiring.
The following drawing shows how to attach the Conduit Tube to the Bottom Connector Tube.
Side view. Not to scale. Not all components are shown.
Note: Depending on your layout, you can trim the Conduit Tube to fit different Control Stand
locations; some customers prefer to have the Control Stand closer to the Lift for easier
Vehicle drive-on and drive-off. For safety purposes, the Control Stand must be kept within a
safe distance from the Lift and
the Control Stand operator must always have a
clear, unobstructed view of the Lift.
To attach the Conduit Tube:
1. Find the Conduit Cover Plates (2), Conduit Fitting, and Cover Plate Plug.
2. Attach the Conduit Fitting to the Conduit Cover Plate, then attach the Conduit Cover Plate to the
Window on the Bottom Connector Tube; the other Cover Plate goes on the other side of the
Bottom Connector Plate.
Use four M6 x 1 x 10 Screws.
For the Conduit Cover Plate facing the non-approach side of the Lift, insert the Cover Plate Plug in
place.
3. Connect the Conduit Tube to the Conduit Fitting, then adjust the screw on the Fitting to hold the
Tube securely in place.