Image
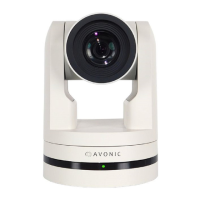
Figure 32: WebGUI > VIDEO > Camera Settings > Image
These are settings that have an effect on the image post-processing. Basically, these settings are all artificial: they
don’t affect the optical parts of the camera itself. The settings are listed below.
Bright The amount of detail that is visible in darker areas of the image. Be careful not to set this setting too high, as you
will see that the image becomes ‘milky-white’!
Contrast The amount of detail that is visible in lighter areas of the image.
Sharpness Artificial contrast, be careful no to set this too high as it will create a sort of 'halo' around sharp edges of filmed
objects. The setting of sharpness coincides with the setting of noise reduction.
Gamma The gamma curve selection has to do with the perception of the human eye to lighter and darker. If you select
a higher rate of gamma, you will see that the picture become darker, but also with more detail in the picture.
DCI The Dynamic Contrast affects the contrast of the picture. The higher the number, the more contrast you will
have.
B&W Mode Black and White Mode makes the picture black and white.
Flip-H, Flip-V, Auto flip The Flip-H mode turns the picture horizontally, while the Flip-V mode turns it vertically by 180 degrees. When Auto
Flip is on, the camera will automatically flip the picture horizontal and vertical.
Low-Light Mode The Low-Light mode is designed for capturing video in situations where the camera is placed in an environment
with very low or near-complete darkness. The frame rate will drop to 10 frames per second, to catch as much
light on the sensor as possible. If this mode is required to capture a clear image, it is recommended to increase
the lighting in the scene for improved results.
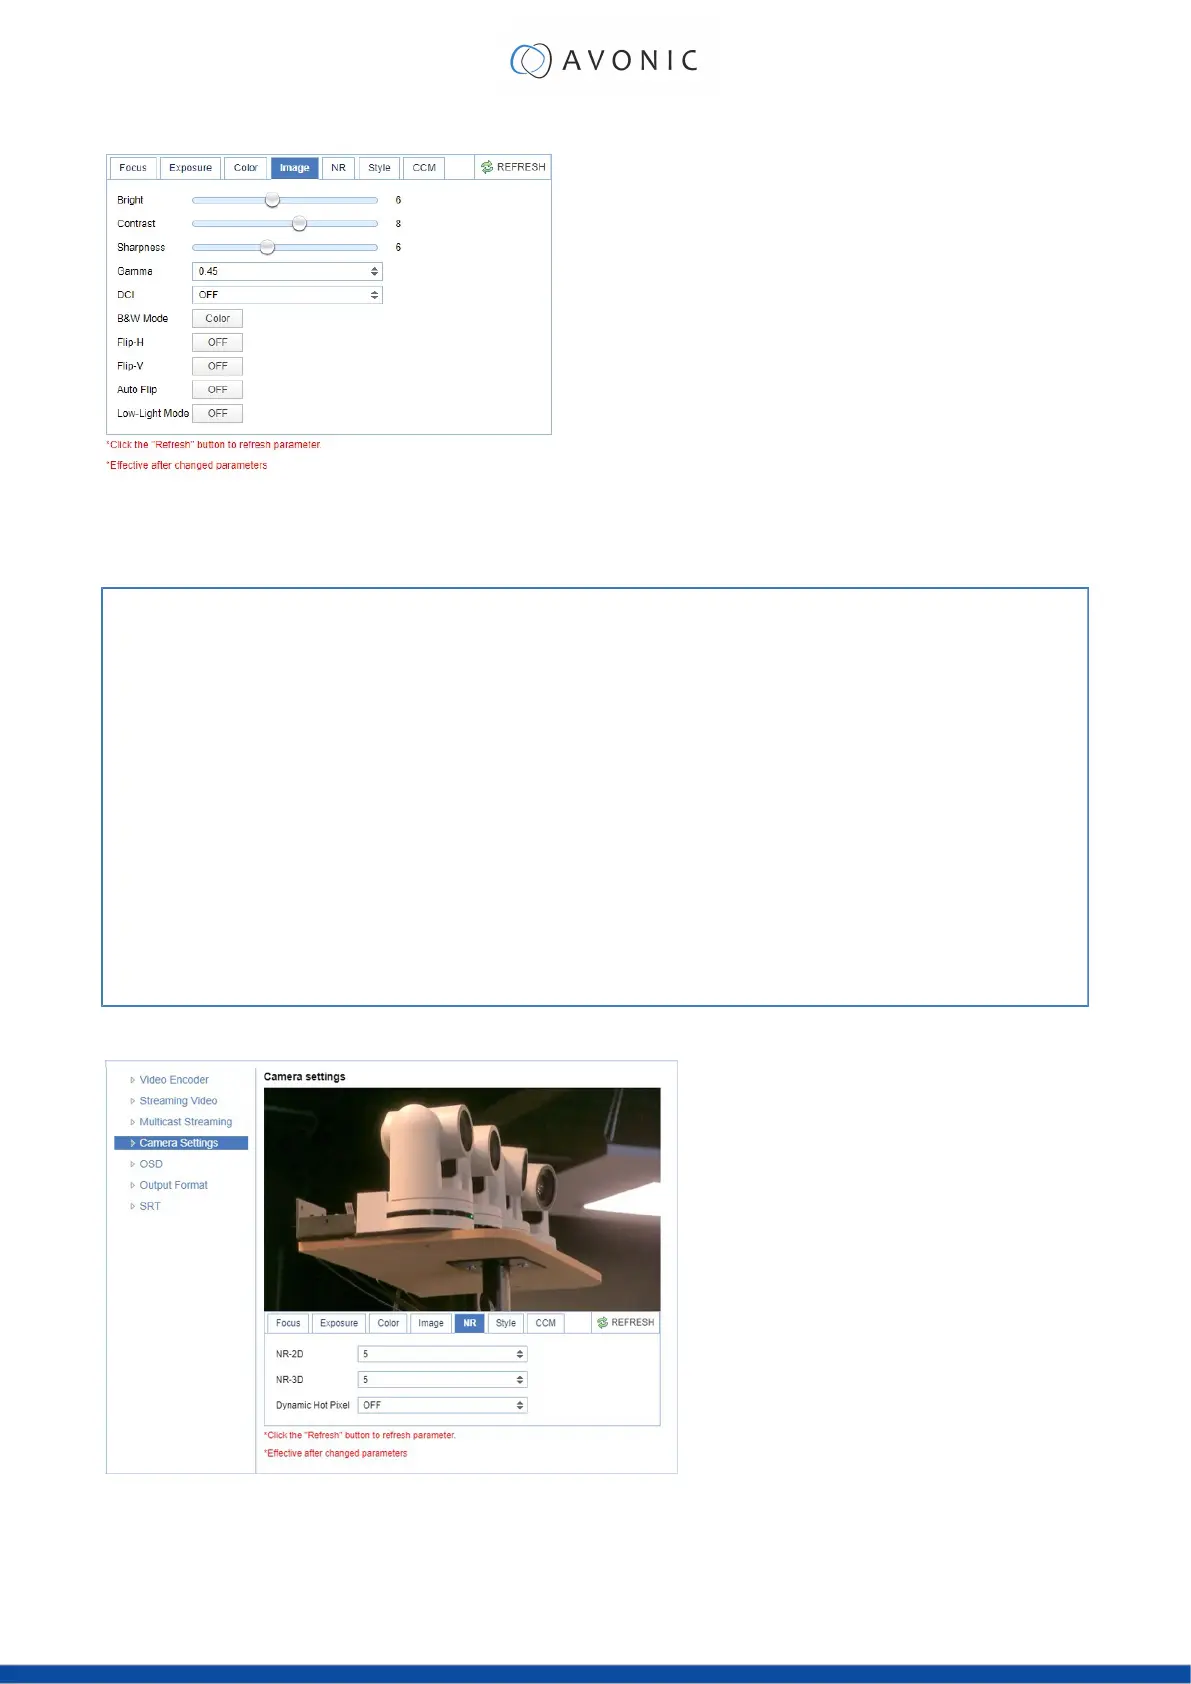
NR (Noise Reduction)
Figure 33: WebGUI > VIDEO > Camera Settings > NR
Noise reduction can be used to soften the image when noise is present due to poor lighting conditions. The higher
the amount of noise reduction, the softer the image will get, ultimately resulting in loss of details.
34

 Loading...