11
Step8: You will be prompted to restart your web browser for network setting changes.
‧ For PPPoE and DHCP, continue as instructed in “3.2.2 DDNS Setting”.
‧ For Static IP, disconnect your camera and your PC, and connect them to Internet separately.
Next, enter the IP address of the camera in the URL address box of the web browser, and see if you
can access the camera successfully.
3.2.2 DDNS Setting
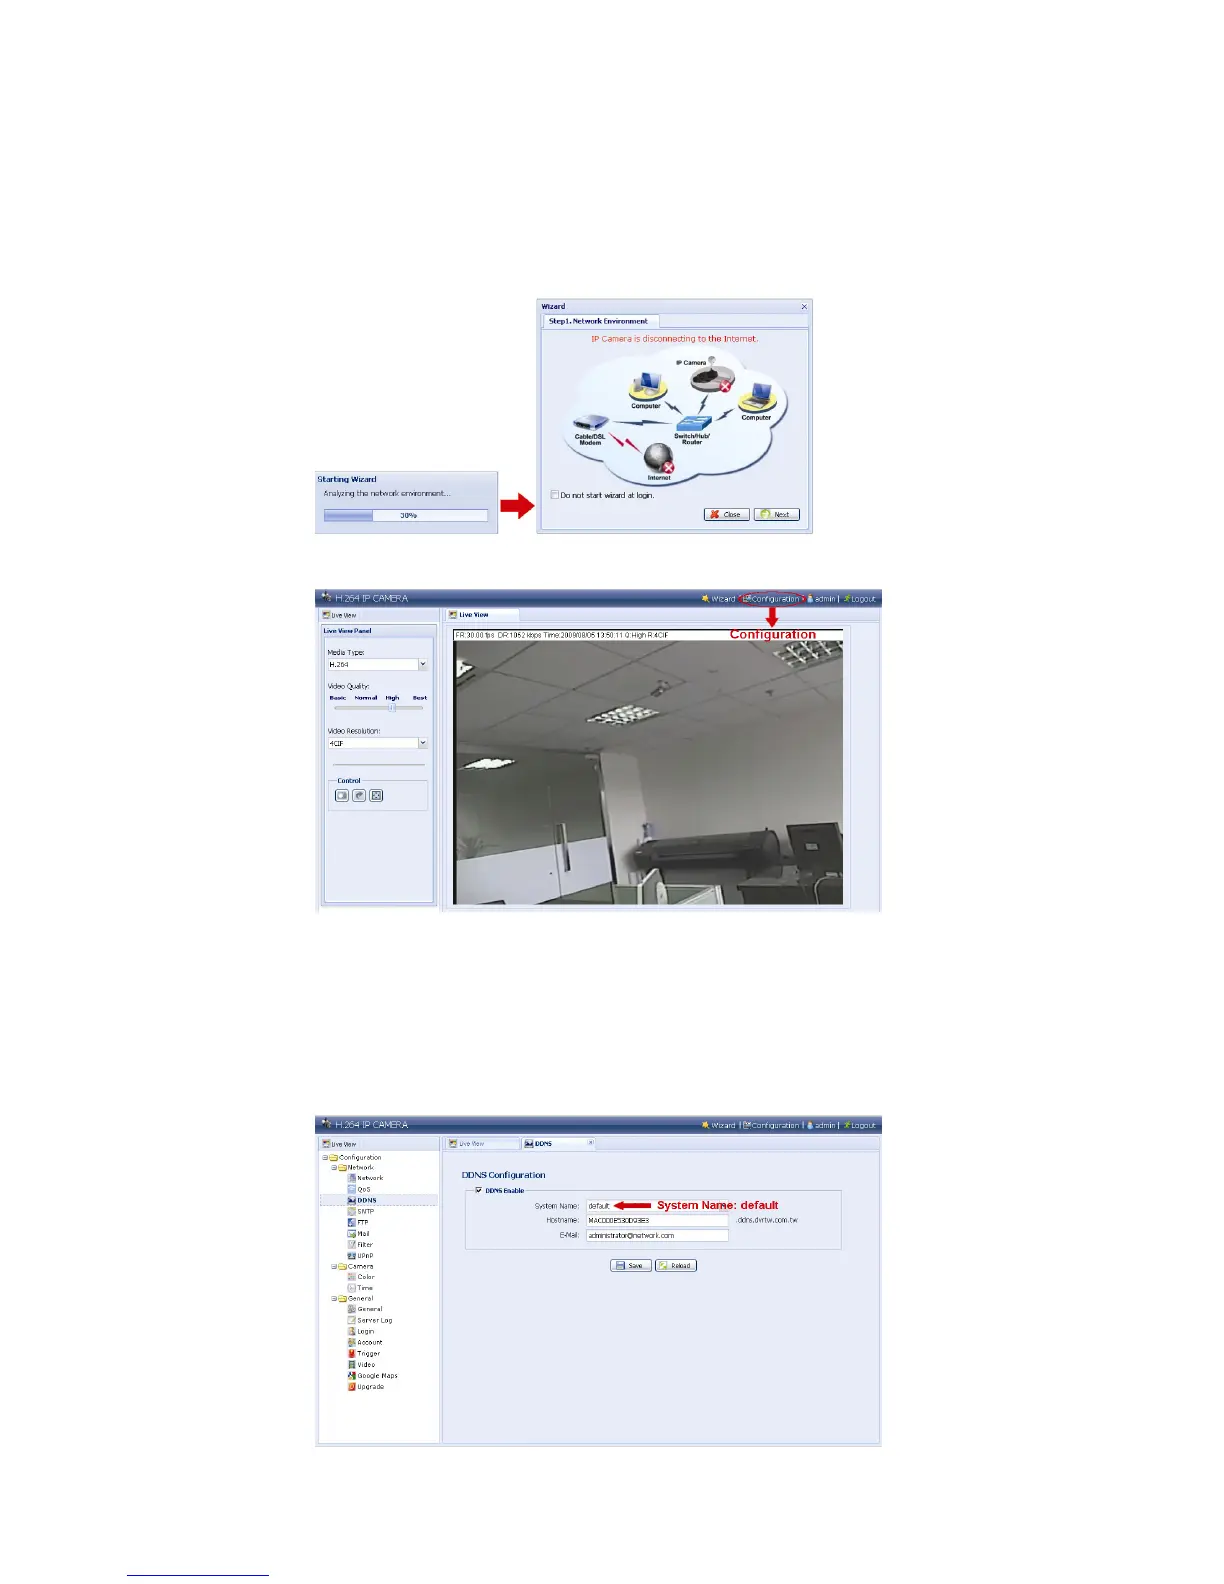
Step1: Re-log in the network camera, and select “Close” for network environment checking.
Step2: In the live page, click “Configuration” to open the configuration page.
Step3: Click “Network” “DDNS”, and check “DDNS Enable”.
Step4: Select “default” in “System Name”.
In “Hostname”, keep the default value, i.e. the MAC address of this camera, or change
the name to a meaningful one. It’s easier to memorize.
Then, note down the whole address of the camera, for example,
MAC000E530D93E3.ddns.dvrtw.com.tw.