9
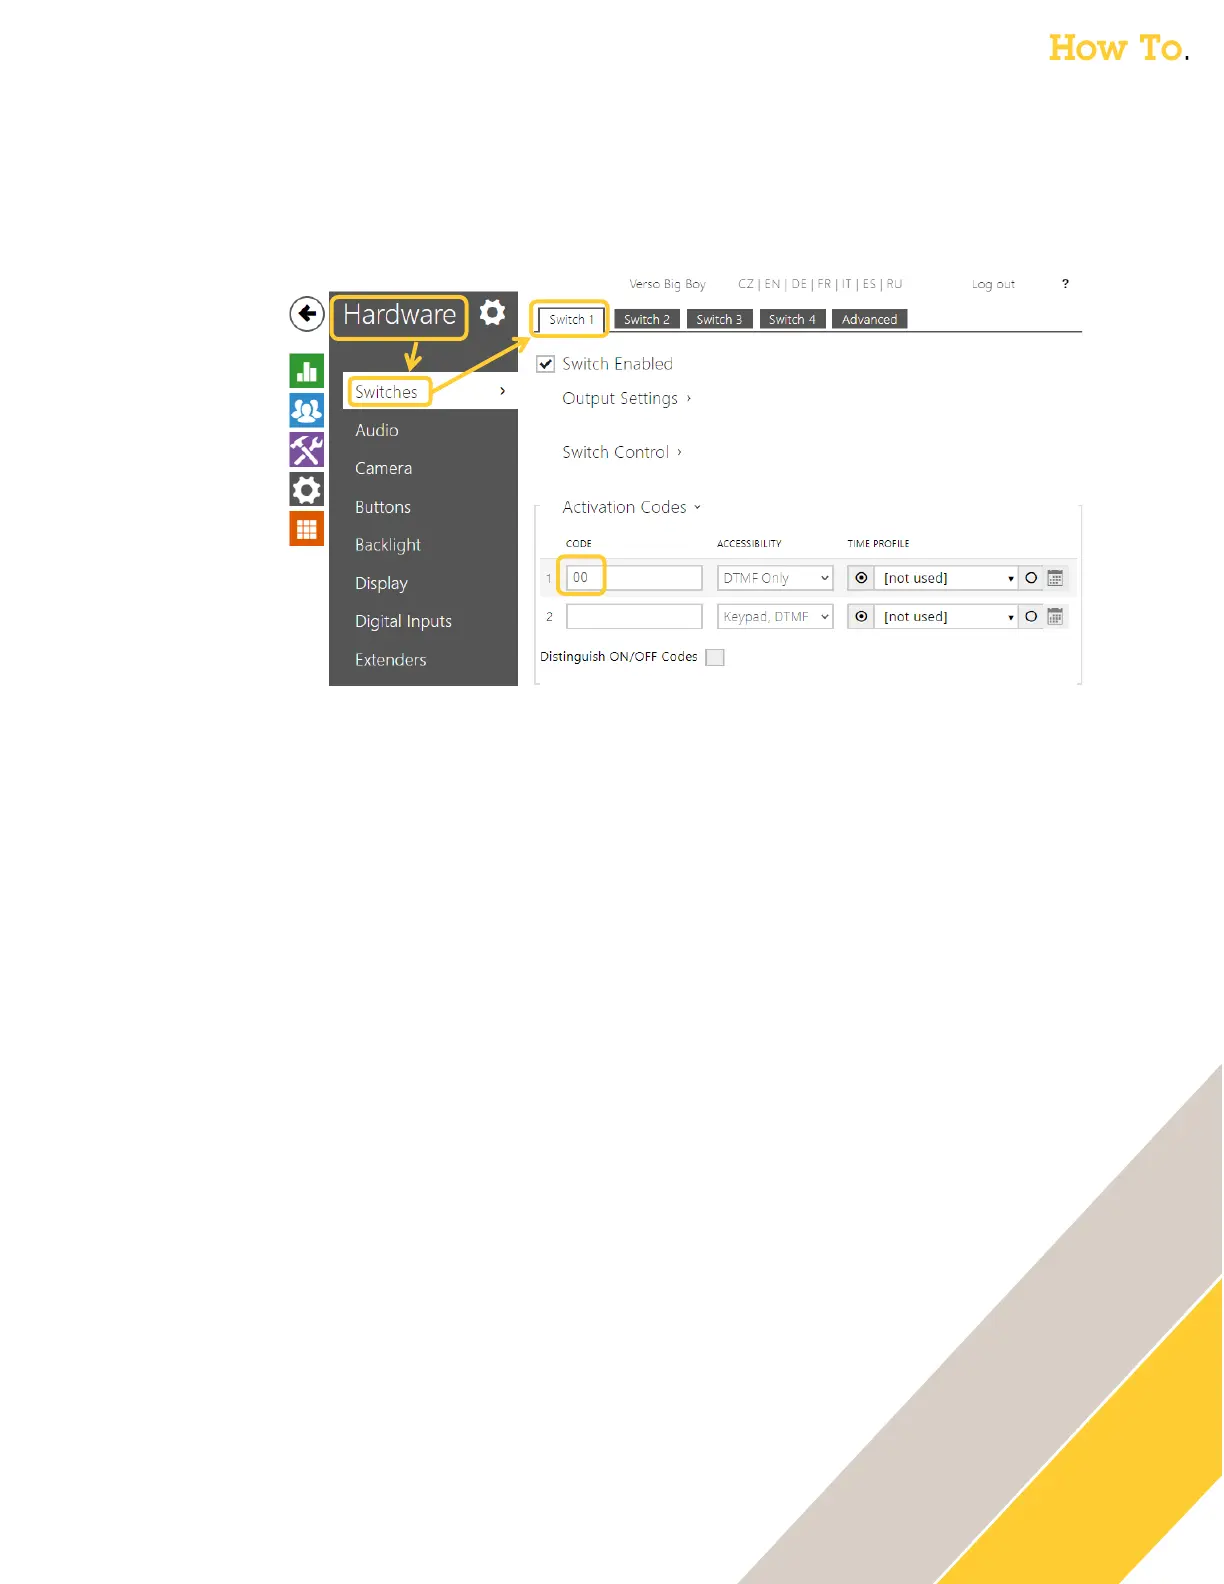
o 2N Intercoms: The DTMF sequence can be found in the 2N web GUI under Hardware →
Switches then Switch 1 (default). Scroll down to find the DTMF sequence under Activation
Codes.
o For 2N Intercoms, you may need to append an * after the Unlock Pin in the 2N D7A.
6. When on a call with the Intercom, an Open Door Icon will appear on the bottom left of the
touch screen on the 2N D7A phone. This will pass the programmed unlock pin to the
intercom to unlock the door during the call.
7. Update Authentication with the credentials of the Intercom the D7A Phone will use to
send commands
o Axis Intercom: this can be created in the Axis Intercom web GUI under System → Users.
There you can add a user w/Operator Role the D7A phone will use.
o 2N Intercom: this can be created in the 2N Intercom web GUI under Services → HTTP API
then Account 1 (or unused account). Enable it, create the credentials & assign user
privileges (ex. Switches) the D7A phone will use.
8. Click Confirm
9. Repeat the above steps for any additional Axis or 2N Intercoms, by selecting the next drop
down in the Door Phone list at the top of the page.