AXIS P33/P33-V Network Camera Series Installation Guide Page 15
ENGLISH
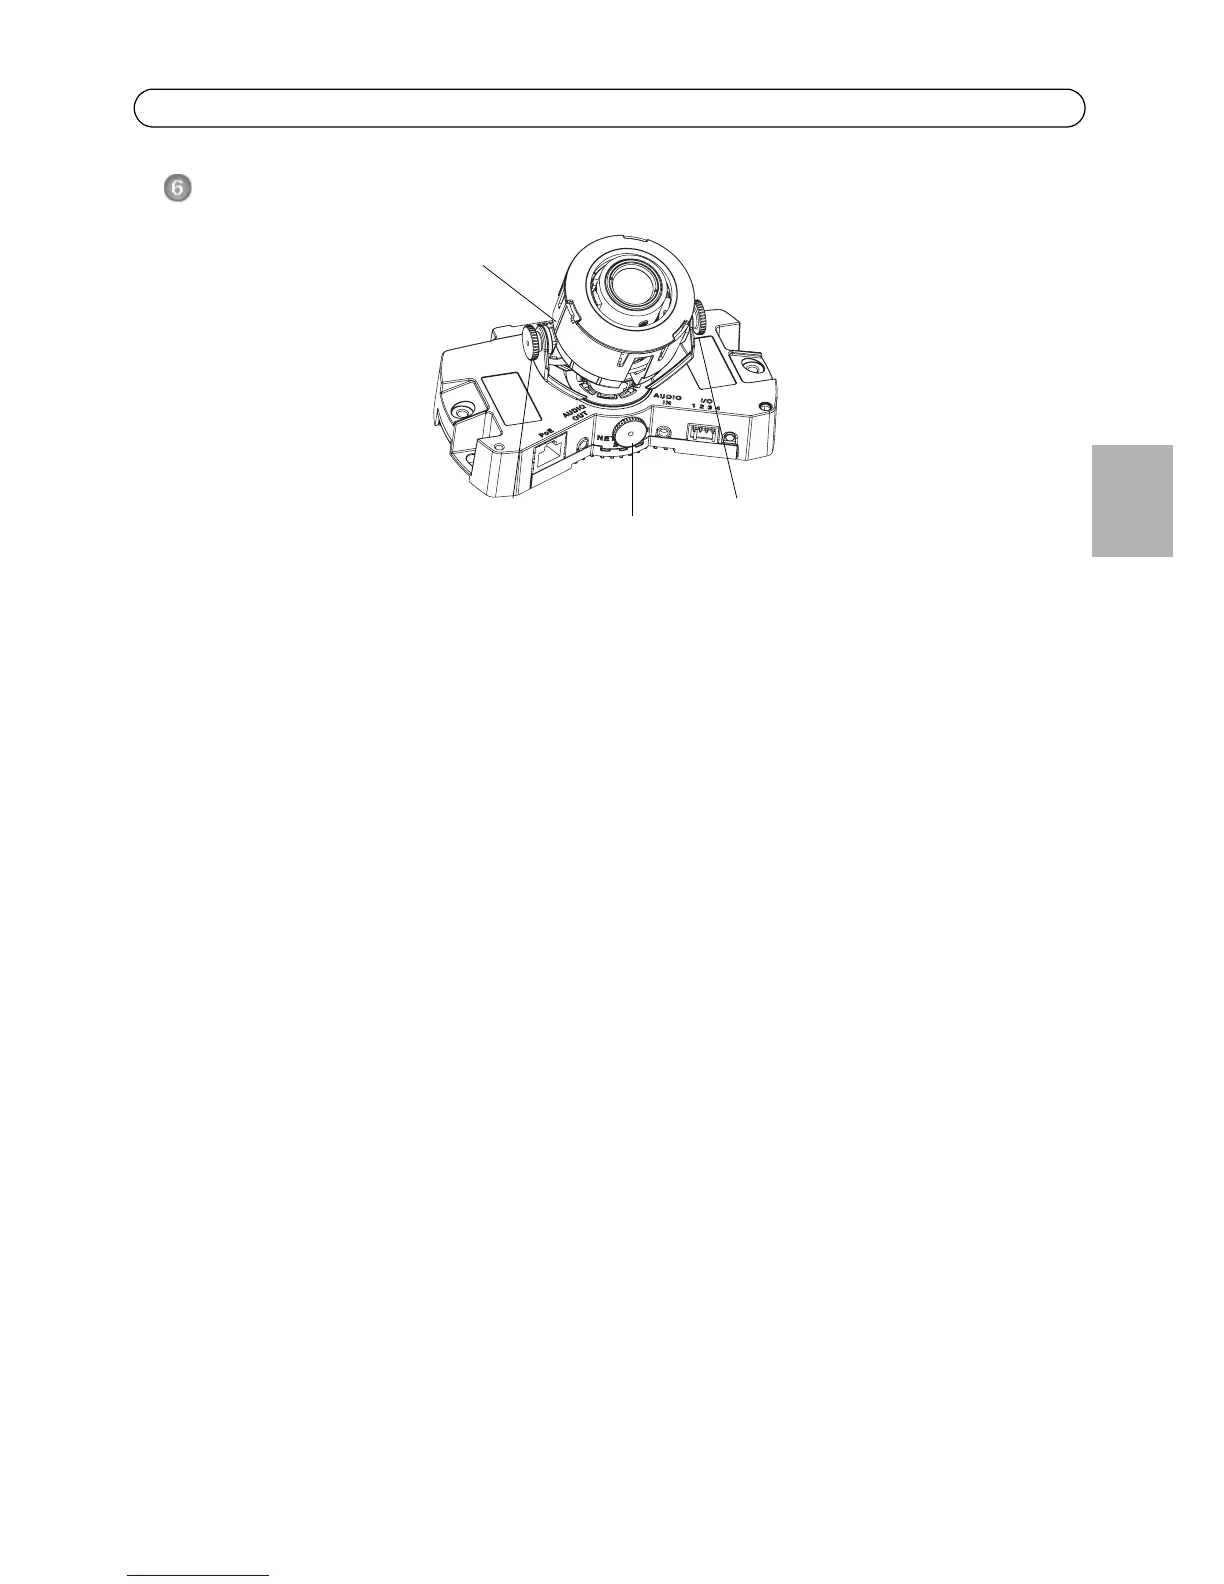
Adjust the Lens
Open the Live View page in the web interface and make the following adjustments to the camera:
1. Loosen the locking screw and tilt adjustment screws.
2. Turn the lens (with the lens holder) to the desired position. Make sure the horizontal lines on
either side of the lens are aligned horizontally.
Note:
Ensure that the mark on the lens cover, between the horizontal lines, is facing up.
3. Once satisfied, gently tighten the locking screw and tilt adjustment screws to secure the
camera’s position.
4. Open the Focus Adjustment page in the Web interface under Setup > Basic Setup > Focus &
Zoom, and follow the on-screen instructions. Use the image window to adjust the focus and
zoom. See the online help files for more information.
Note:
Due to the dome’s refraction, the image may appear slightly out of focus once the dome has been
placed. To correct this go to the Focus Adjustment page in the Web interface under Setup > Basic
Setup > Focus & Zoom, and adjust the focus again.
Warning! Adjusting the focus and zoom manually can damage the lens.
 Loading...