AXISP55-ENetworkCameraSeries
4.Putthetopcoverbackinitsoriginalpositionandfastentwodiagonallyoppositescrews
rst(torque<0.7Nm),andthentheotherscrews.
5.Putthesunshieldbackinitsoriginalpositionandfastenthescrews.
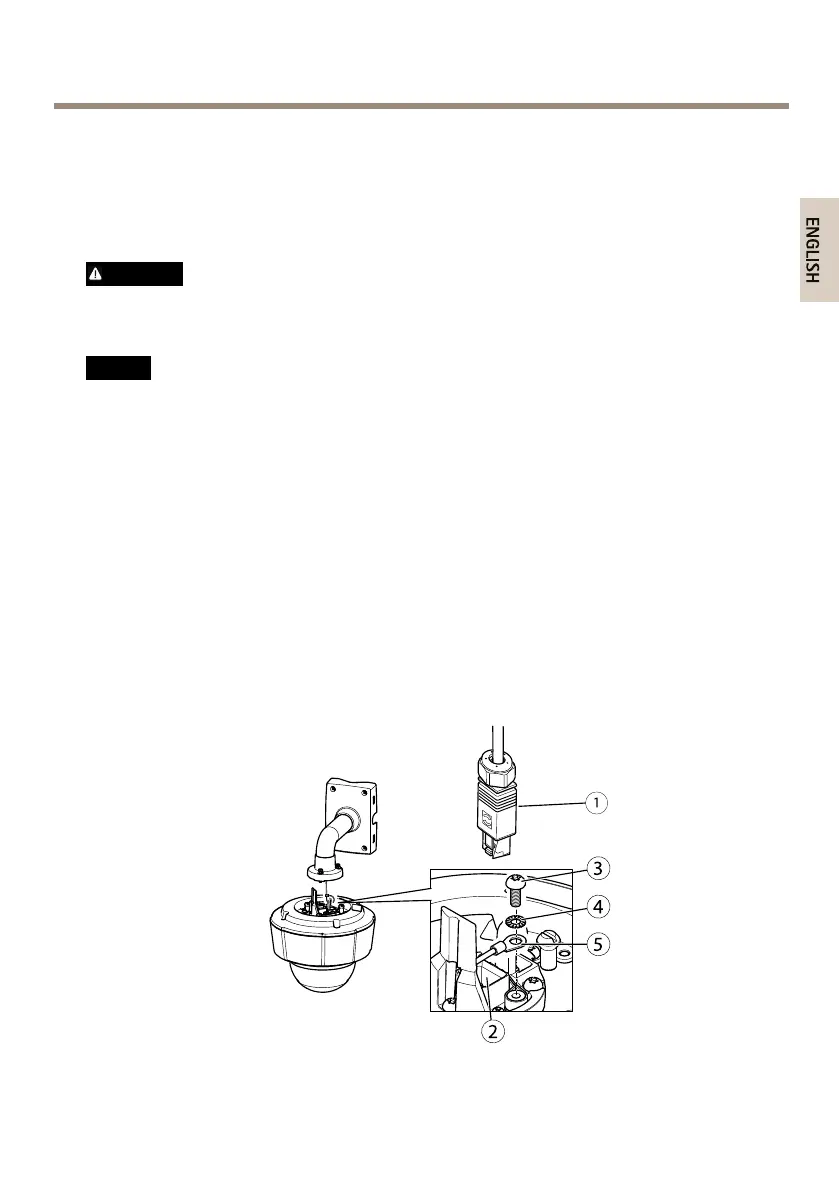
InstalltheCameraonaBracketMount(soldseparately)
WARNING
•Riskofelectricshock.Theproductshallbegroundedusingagroundingwire.Makesure
bothendsofthegroundingwireareincontactwiththeirrespectivegroundingsurfaces.
NO NO
NO
TICE TICE
TICE
•TocomplywiththeIP66-rateddesignofthecameraandmaintaintheIP66protection,
thesuppliedRJ45Push-pullConnector(IP66)shallbeused.Alternatively,usetheRJ45
IP66-ratedcablewithpremountedconnectorwhichisavailablefromyourAxisreseller.
Donotremovetheplasticnetworkconnectorshieldfromthecamera.
•Becarefulnottodamagethenetworkcablewhenconnectingit.
1.Installthebracket(notincluded)accordingtotheinstructionssuppliedwiththebracket.
Ifdrillingisrequired,makesuretousedrillbits,screwsandplugsthatareappropriate
forthematerial.Seewww.axis.comforinformationonavailablemountingaccessories.
2.Securethecamerausingthesuppliedsafetywire.
3.Routethenetworkcableandagroundingwirethroughtheholesinthemounting
bracket.Makesurethegroundingwireisasshortaspossibletomakethecurrentpath
asshortaspossible.
4.Loosenthegroundingscrewandremovethewasherandcableshoe.
1.
Networkconnector–RJ45Push-pullConnector(IP66)
15