Get to know us at: www.axvue.com
INSTRUCTION MANUAL
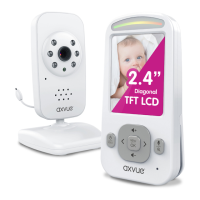
Model- A1080DU
Revised at 12/2020
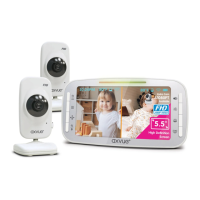
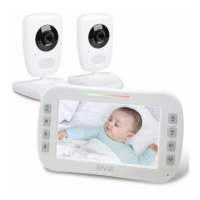
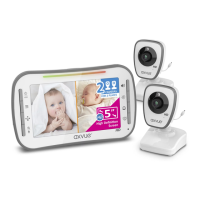
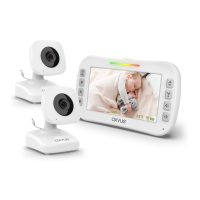
AXVUE A1080DU VIDEO BABY MONITOR
WITH 5.5" LCD SCREEN & 2 CAMERAS
Adapters:
FEATURES & COMPONENTS
Camera:
1. LED*
2. Power/Video
3. Menu
4. Pan/Tilt
5. Zoom/Talk Back (OK)
6. Volume
7. Brightness
8. Cam/Split
9. VOX
10. Microphone
11. Speaker
12. DC Jack
13. Baery Compartment
14. Kickstand
× 3× 1 × 2
Monitor:
Power & Low Baery Sound Lights
*LED
Red LED stop flashingRed LED flashs
Step 5:
OK
8
3
Please read the following instrucons and warnings carefully
Keep this instrucon manual for the future.
For technical support see the FAQ page.
For adult use only.
1. Night-Vision LED
2. Lens
3. Microphone
4. Speaker
5. Power/Code
6. DC Jack
7. Temperature Sensor
8. Wall Mounng Hole
Keep the distance
between sensor and body
at least 0.6 inch for
accurate temperature
result.
0.6 in
Step 1: Place the monitor display in the living room, bedroom or any place you want to watch your
baby. Use an adapter to connect the camera with an electrical outlet.
Step 2: Turn on the monitor by pressing the
Power/Video
“ ” buon for 5 seconds unl axvue logo or
video shows up on the screen.
Step 3: Press
Power/Video
“ ” buon to turn off the video if you only need to hear the voice.
Step 4: Turn off the monitor completely by pressing and holding the
Power/Video
“ ” buon for
5 seconds.
Step 4:
SETUP & USE
Step 2:
Step 3:
Make sure the power adapter is plugged into
camera and turn on the camera by pressing Power
On/Off Switch “ ” buon for 3 seconds.
3
3 feet
Figure 1
3 feet
Figure 2
TO USE PORTABLE/BATTERY MODE
Step 1: Charge the baery for at least 8 hours before using portable/baery mode.
Step 2: Make sure the adapter is plugged into the camera.
Step 3: The baery life can be up to 10 hours if it is fully charged.
Baery life will be shortened if recharging it connuously. Unplug the power adapter when you are
not using it for a long me.
Please charge the baery for 6
~
8 hours before using the product.
TO USE PLUGGED-IN MODE
The monitor and camera are paired before shipment. If it is unpaired for some reason, please refer
to the following steps:
TO PAIR MONITOR AND CAMERA (ADD CAMERA)
Step 1: Make sure the camera and monitor are in the same place.
Please charge the battery for at least 8 hours before
using the product.
Step 1: Test recepon first, put the camera in a suitable place that
will provide you the best view of your baby in the crib (Note: Do
not hang up the camera firmly unl the inial installaon test is
completed). Plug the adapter into the wall outlet and turn on the
camera.
Step 2: Turn on the monitor by pressing and holding the Power/
Video
“ ”
buon for 5 seconds unl “axvue” shows up, then the
video will show up on the screen immediately. If the video does
not show up, please refer to “TO PAIR MONITOR AND CAMERA
(ADD CAMERA)” on the next page. If the video shows up, the
inial installaon test is completed, then you can set up the
camera according to the instrucon below.
Set Up Camera: Place the camera on a flat surface, such as a
wardrobe or shelf (Figure 1). Or hang it on the wall (Figure 2). No
maer wherever to place the camera, please make sure to keep it
away from the crib for at least 3 feet and all power cords should be
placed behind the camera properly. Then adjust the angle of the
camera lens unl the enre crib shows up on the display, or adjust
it to the best angle that you think to watch your baby.
Turn on the monitor by pressing
and holding Power/Video
“ ”
buon for 5 seconds.
42
1
6
OK
5
OK
3
OK
7
-Store this product out of the reach of babies (at least 3 feets (0.9 m)
away from the crib). A strap wound around the baby’s neck may result in
asphyxiaon. Use a safety clip to clamp the power cord and keep it out
of baby’s reach. Do not use other extension cords. Only use the power
adapter provided.
-Do not touch the exposed part if the adapter is connected with power.
-Test regularly before inial use or when change the posion of camera.
-Avoid placing the product in humid place or contacng with liquid. (such as bathtub, sink, etc.)
-Do not apply heat to the product.(such as stoves, radiators, etc.)
-Using the product in venlated place. Avoid placing it on sofas, cushions, beds or other places which
may block venlaon.
-The product only can be operated by adult. Do not allow baby to play with it. Tiny accessories are
contained, please be careful when unpack and install it.
THIS PRODUCT CAN NOT SUBSTITUE PARENT’S SUPERVISION
ON YOUR CHILD.
WARNING
-Only use the recommended rechargeable baery. Please contact us if you need to change it.
For the contact list, please refer to the last page of the instrucon.
-Please clean the baery compartment before using it.
-Avoid short circuits the power supply terminal.
-Remove the baery when you are not using it or when running out of power.
-Keep the baery away from children.
-Dispose of the empty baery properly.
BATTERY WARNING