Get to know us at: www.axvue.com
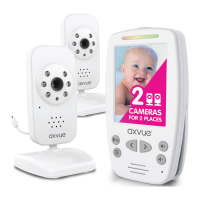
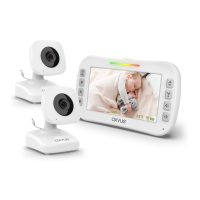
AXVUE E662 Video Baby Monitor
with Two Way Communication & Temperature
Tools required for wall mount: Screwdriver and drill (not included)
Keep this instrucon manual for future reference.
For technical support see FAQ page.
For adult use only.
Please read the following instrucons and warnings carefully
Model- E662
INSTRUCTION MANUAL
STRANGULATION HAZARD - Children have STRANGLED in cords.
Keep this cord out of reach of children (more than 3 feet away
from the crib). Use enclosed Security Clips to help secure cord
away from baby’s reach. Never use extension cords with AC
adapters. Only use the AC adapters provided.
WARNING
Features and components
(continued)
CAMERA
1 Nighme LEDs
2 Lens
3 Power Indicator
4 Microphone
5 Speaker
6 Power / Code
7 Temperature Sensor
8 DC Jack
x2
x2
x12
Adapter for camera:
Step1: Turn camera power on by pressing and
holding Power / Code ‘ ’buon unl
the power indicator lights.
Step2: Press and hold Power / Video
buon on monitor for 5 seconds unl the
AXVUE showed on the screen. Video should
immediately appear on screen.
If video does not appear, go to ‘To pair monitor
and camera’. If video appears, the inial set up
test is completed, and you can install camera
according to the instrucons below.
Install Camera: Place the camera on a flat
surface, such as a bureau or shelf (Figure1) or
mount the camera on a wall (Figure 2). For
example: On the desk or cabinet or fixed to the
wall, make sure that at least 3 feet from the
crib, power line should be placed above or
behind the camera, adjust the camera angle
unl the display see the enre crib, or the best
line of sight you think.
Before using the monitor, charge the baery for 6-8 hours.
3 feet
Figure 1
Fixing cable
with clip
3 feet
Figure 2
WALL-MOUNT
1. Pre-drill a hole in the wall, a 3/16” (4.8mm) drill bit.
2. Insert the wall anchor into the hole and with a hammer, tap gently on the
end unl the wall anchor is flush with the wall.
3. Tighten screw unl only 1/4” (6.2mm) of the screw is exposed.
4. Insert camera adapter into the camera’s adapter jack.
5. Slide the back of the camera down onto the screw unl the camera is secure to the wall.
6. Plug the adapter into a standard electrical outlet.
7. Secure the cord to the wall by using the security clips to keep cord away from baby’s reach.
Setup & use
1 Power / Video
2 LED*
3 Le
4 Talk Back / Zoom
5 Menu / OK
6 Speaker
7 Right
8 Volume Up
9 Volume Down
10 Microphone
11 Baery Compartment
12 Kickstand
13 DC Jack
Power & Low Baery
Sound Lights
*LED
Adapter for monitor:
Features and components
MONITOR
STRANGULATION HAZARD - Children have STRANGLED in cords. Keep this cord out of reach of
children (more than 3 feet away from the crib). Use enclosed Security Clips to help secure cord
away from baby’s reach. Never use extension cords with AC adapters. Only use the AC adapters
provided.
WARNING:
-Use only the original rechargeable baery provided. Please contact AXVUE INC. for replacement
baery. Contact informaon can be found on last page of these instrucons.
-Clean baery and product contacts prior to baery installaon.
-Do not short-circuit supply terminals.
-Remove baery when product is stored for long periods of me or when baery is exhausted.
-Keep all baeries away from children.
-Dispose of exhausted baery properly.
BATTERY WARNING
WARNING
-Strangulaon Hazard - Children have STRANGLED in cords. Keep this cord out of reach of children
(more than 3 feet away from the crib). Use enclosed Security Clips to help secure cord away from
baby’s reach. Never use extension cords with AC adapters. Only use the AC adapters provided.
-When an adapter is plugged into an electrical outlet, do not touch the exposed end.
-Test monitor before first use, periodically, and when changing locaon of the camera.
-Do not use monitor near water (such as bathtub, sink, etc.).
-Keep monitor away from heat sources (such as stoves, radiators, etc).
Make sure there is proper venlaon around all monitor components. Do not place on sofas,
cushions, beds, etc. which may block venlaon.
-This product is not a toy. Do not allow children to play with it. This product contains small parts.
Adult assembly required. Exercise care when unpacking and assembling the product.
THIS PRODUCT CANNOT REPLACE RESPONSIBLE ADULT SUPERVISION.
WARNING
TO USE PLUGGED-IN MODE
Step 1: Place the monitor in the room from which you want to monitor your baby (ie., living room or
bedroom). Plug the monitor AC adapter into the AC adapter jack and other end into standard
electrical outlet.
Step 2: Press and hold Power / Video buon for 5 seconds to power up unl the AXVUE logo or
video appears on screen.
Step 3: For audio and no video, press the Power / Video buon.
Step 4: To turn the monitor off completely, press and hold the Power / Video buon for 5 seconds.
TO USE PORTABLE / BATTERY MODE
Step 1: Charge the baery for 6 hours at least before using the monitor in portable mode.
Step 2: Make sure camera adapter is plugged into the camera.
Step 3: The baery life can be up to 8 hours if fully charged.
Before using the monitor, charge the baery for 6-8 hours.
TO PAIR MONITOR AND CAMERA ( ADD A CAMERA )
Baery life will be weakened if recharging constantly. Remove baery if long me of non-use, or exhausted.
Red LED will flash
The monitor and the camera are paired prior to the shipment. If the monitor and camera are
found not paired for some reason, follow steps below:
Step 3: Press Power / Video for 5 seconds to power on the monitor.
Step 5: Using the Le or Right to highlight ADD CAM and press Menu / OK to confirm.
Step 6: Choose the idenfying number to be assigned on the camera.
Step 7: Press the Menu / OK buon again to start pairing and the red light will flash.
Step 4: Press Menu / OK shortly to enter menu, then press Right to highlight the camera opon
funcon and Menu / OK to confirm.
Step 1: Make sure the monitor is at the same area with the camera.
Step 2: Make sure the camera AC adapters are plugged in.
Step 9: Waing 3 seconds, the green light stop flashing once paired successfully and the video will appear.
Step 8: Press Power/Code ‘ ’on the camera unl the power indicator flashes.
VOX
1
1
2
3
4