AB-6256
4
Installation
Precautions for installation
• Installation environment
Although the main unit enclosure conforms to IEC IP65 for dustproof and waterproof, avoid installing in locations exposed to
corrosive atmosphere or direct sunlight.
• Handling of the main unit
The main unit is packaged in a tightly sealed aluminum moisture-proof bag for shipment. This prevents large output drift
that may be caused from moisture absorption of the main unit continuously non-energized. Table 1 shows the output drift
(reference value) after the main unit has been left without power supply.
Note that output drift of the main unit continuously energized is ±150 ppm/year.
Table 1. Output drift of the main unit continuously non-energized (reference value)
Non-energized period
to 6 hours to 12 hours to 24 hours to 48 hours
30
< ±10 ppm drift
50
< ±10 ppm drift < ±15 ppm drift
Humidity (%RH)
80
< ±10 ppm drift < ±15 ppm drift < ±25 ppm drift
IMPORTANT:
The main unit is packaged for shipment after inspection and calibration. To minimize the output drift that may
occur after its installation, it should be unpacked and mounted just before the power is supplied (approximately
within 48 hours).
If the main unit has been continuously non-energized (since it is unpacked till it is activated, or since it is shut
down) for 48 hours or over, be sure to conduct the CO
2
zero gas calibration (explained later) after the power is
supplied.
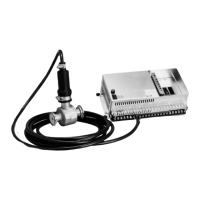
Assembly
The assembly kit (sampling probe and cable assembly) and the main unit must be ordered and mounted separately to minimize
the drift (See the above Precautions for installation section.) caused by the main unit left non-energized after being unpacked.
If it takes more than 48 hours to activate after the product installation, mount only the assembly kit at the time of installation and
unpack the main unit to mount right before activating.
Installation of assembly kit
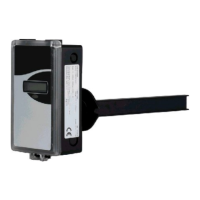
Sampling probe
: Sampling probe needs to be mounted to the duct first before mounting the main unit.
1) Select a the probe mounting position where the typical CO
2
concentration of the air can be detected and where the specific
air velocity can be acquired.
2) Drill a hole with 25 mm diameter for mounting the sampling probe and two holes with 4 mm diameter for the screws, as
shown in Figs. 2 and 3.
3) Provide a gasket between the probe and the duct, and insert the sampling probe so that the air sampling part is completely
inserted inside the duct to expose it to the air inside the duct.
4) Set the sampling probe so that the air flows perpendicularly to the probe (air sampling part), as shown in Fig. 3.
5) Check the mounting orientation. ‘UP’ mark on the sampling probe (See Figs. 2 and 3.) must be positioned on the upper side.
Then, fix the sampling probe with two M4 screws with washers on the both sides.
Figure 3. Sampling probe mounting to the duct
irflow direction
‘UP’ mark
(UP mark on the upper side)
M4 screw and washer
(another one on the other side.)
Sampling probe
Duct
Gasket
φ4 mm hole
φ25 mm hole
 Loading...