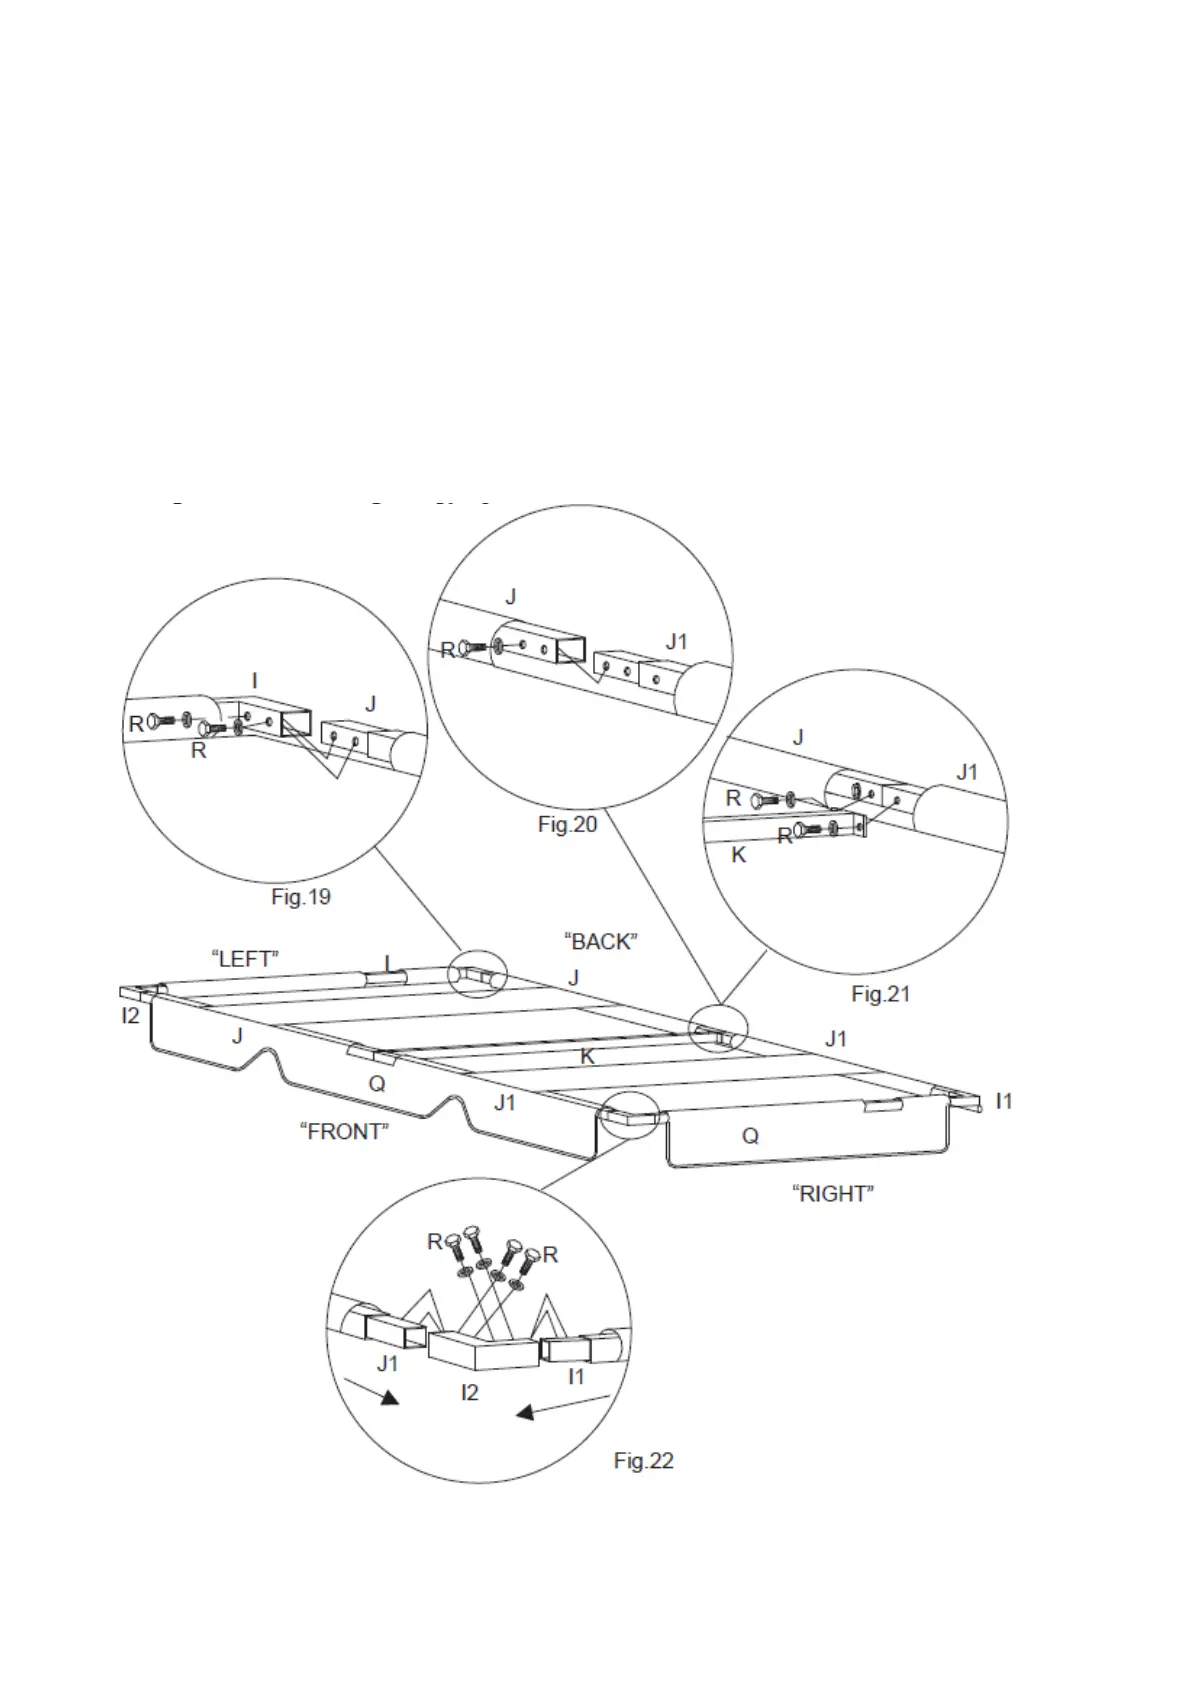
16 of 19
Step 12: Awning Assembly
Note: Assemble awning frame before attaching awning canopy (Q).
Step 12A: Attach Left Awning Frame (I) to Back Awning Frame (J) with Bolts and Washers (R). Repeat
for Right Awning Frame (I1) and Back Awning Frame (J1). See Figure 19.
Step 12B: Attach Back Awning Frame (J) to the Back Awning Frame (J1) and the Center Awning Frame
(K) with Bolts and Washers (R). Repeat for the front awning frame. See Figure 20 and Figure
21.
Step 12C: Attach Awning Corner Connector (I2) to Right Side Awning Frame (I1) and Front Awning
Frame (J1) using Bolts and Washers (R). See Figure 22.
Repeat for second Awning Corner Connector (I2) to Left Side Awning Frame (I) and Front
Awning Frame (J) using Bolts and Washers (R). TIGHTEN BOLTS.
Step 12D: Place Awning Canopy (Q) over assembled awning frame and secure with velcro.