Page 12
NOTE: You may not be able to attain the proper value resistor to fit you application, use the closest
standard value you can find.
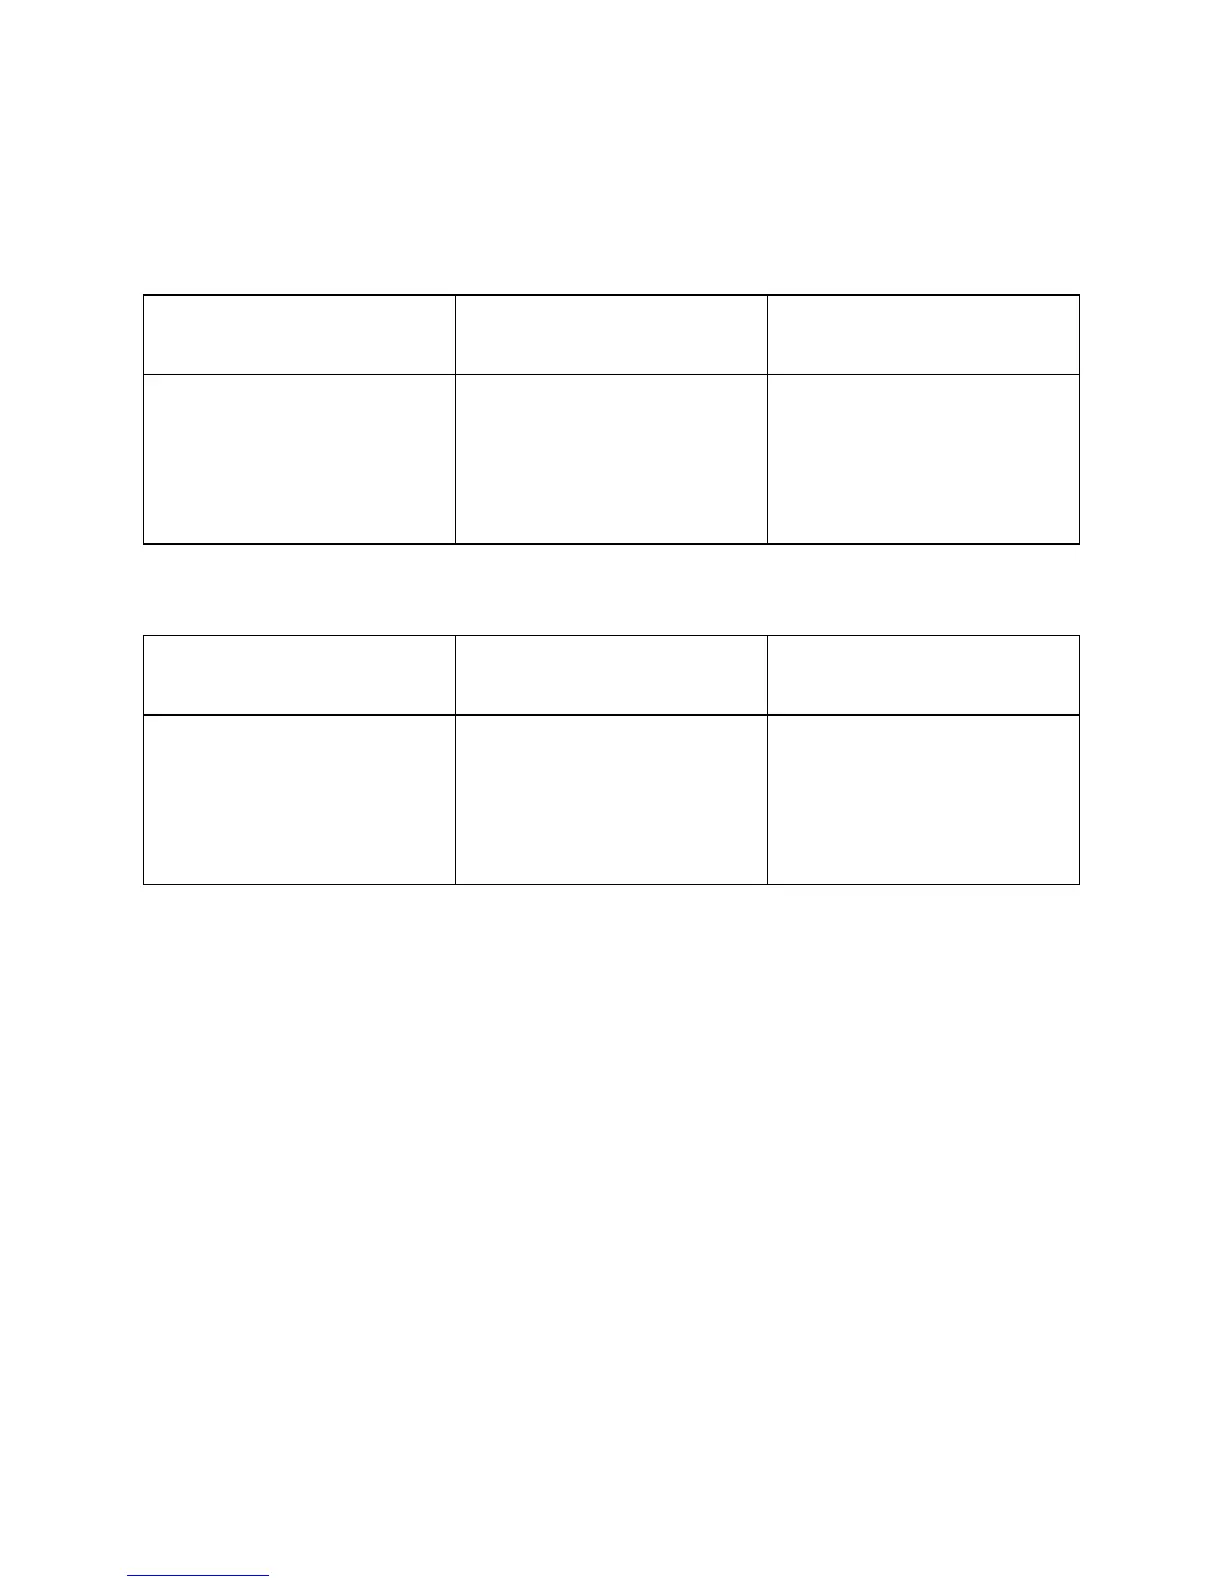
Refer to the following table for more calculated values of MM
Rc desired
(ohms)
Ri calculated
(ohms)
Ri standard
(ohms)
5 K
20 K
35 K
50 K
75 K
5.3 K
25.0 K
53.8 K
100 K
300 K
5.36 K
24.9K
53.6 K
100 K
301 K
Refer to the following table for more calculated values of MC
Rc desired
(ohms)
Ri calculated
(ohms)
Ri standard
(ohms)
25
45
75
100
125
30
68
171
403
2.1K
30.1
68.1
169
402
2.10K
2. Locate the 2 gold-plated pin receptacles with the label “RLOAD” between them on the inside of
the unit (see figure 1). They are located near the left end of the circuit board and near the
MM/MC selector switch.
3. Trim the leads of the resistors (one per channel) to approximately _ inch.
4. Insert the leads into the RLOAD pin receptacles securely.
5. The factory installed resistors in the PRO10 will match most phono cartridges on the market.
 Loading...