14 P/N 69761 rev. B
Banner Engineering Corp. • Minneapolis, U.S.A.
www.bannerengineering.com • Tel: 763.544.3164
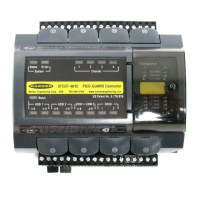
PICO-GUARD Controller
Instruction Manual
When the OSSD outputs change from OFF to ON, EDM 1
input will be verified to be open within 250 ms. Once EDM 1
input has been verified to be open, EDM 1 input is allowed
to be either open or closed, for as long as the OSSD outputs
remain ON.
Refer to Figure 3-9 for one-channel EDM hookup. Connect
the monitor contacts between EDM 1 a and b (terminals 12
and 13) or between +24V dc and EDM 1 b (terminal 13).
Leave EDM 2 open (terminals 14 and 15, no connection). Set
the configuration DIP switches to “1,” per Section 4.1.
• Two-channel monitoring is a separate connection of closed
monitor contacts that are forced-guided (captive contact)
from each device controlled by the PICO-GUARD. The
monitoring contacts should always close within
250 milliseconds of the corresponding OSSD turning OFF;
they stay closed for as long as the OSSD outputs are OFF.
When the OSSD outputs are ON, both monitor contacts must
be in the same state (either open or closed) within
250 milliseconds of each other.
Refer to Figures 3-7 or 3-8 for 2-channel EDM hookup.
Connect the monitor contacts as shown between EDM 1 a
and b (terminals 12 and 13) and between EDM 2 a and b
(terminals 14 and 15). Alternately, the monitor contacts may
be connected between +24V dc and EDM 1 b (terminal 13)
and between +24V dc and EDM 2 b (terminal 15). Set the
configuration DIP switches to 2, per Section 4.1.
• No monitoring. Use this setting initially, in order to perform
the initial checkout; see Section 3.8. If No Monitoring is
selected, the user must ensure that any single failure of the
external devices does not result in a hazardous condition
and, in such a case, that a successive machine cycle will be
prevented (see Note below, EDM and Control Reliability).
To configure the System for No Monitoring, set the
configuration DIP switches to 2, per Section 4.2, and connect
a jumper (supplied) between EDM 1 b (terminal 13) and EDM
2 b (terminal 15). See the top PICO-GUARD controller in
Figure 3-10.
NOTE: EDM AND CONTROL RELIABILITY
In the U.S., Control Reliability requires that a single failure
does not prevent a normal stop from occurring, or issues an
immediate stop command, and the next cycle is prevented from
occurring until the fault is corrected.
A common method of satisfying these requirements is through
the use of dual channel control with monitoring, where a
normally closed, forced-guided contact of each MPCE (or FSD)
is wired as described in Section 3.9.3 and as shown in Figures
3-7, 3-8, 3-9, and 3-10.
3.9.4 Remote Interface Output Connections
The Remote Interface output is to be used for non-safety-
related diagnostic or system-monitoring purposes only. The
Remote Interface output (terminals 28 – 31) is used for setup
or to monitor system operation of the PICO-GUARD system.
See Section 4.6 for operation and Section 2.7 for output
specifications.
The Remote Interface may be used with up to four optional
Remote Display units. Use the instructions that come with
the Remote Display to connect to the controller’s Remote
Interface.
To connect a PC, PLC or other monitoring device using the
RS-232 terminals (30 and 31), connect the data signal line
(DB9 connector pin 2) to the Tx + terminal (31) and connect
the signal ground (DB9 connector pin 5) to the Tx – terminal
(30); see Figure 3-1 and Section 4.6.
3.9.5 Non-Safety Output Connections
Auxiliary, Weak Signal, Fault, and optional Channel Outputs
are non-safety outputs, used to monitor system operation of
the PICO-GUARD system. See Section 4.5.7 for operation and
Section 2.7 for output specifications.
Connect the Auxiliary load wires to the Aux terminal (25) and
to 0V dc.
Connect the Weak Signal load wires to the Weak terminal (26)
and to 0V dc.
Connect the Fault load wires to the Fault terminal ( 27) and to
0V dc.
Connect the Channel 1 load wires to the Ch1 terminal (33)
and to 0V dc.
Connect the Channel 2 load wires to the Ch2 terminal (34)
and to 0V dc.
Connect the Channel 3 load wires to the Ch3 terminal (35)
and to 0V dc.
Connect the Channel 4 load wires to the Ch4 terminal (36)
and to 0V dc.
3.10 Preparing for System Operation
Perform the Commissioning Checkout, as described in
Section 6.3.
Installation and Alignment
 Loading...