EasyManua.ls Logo

Banner Q4XTILAF300-Q8 - User Manual

Default Icon
37 pages
Print Icon
To Next Page IconTo Next Page
Loading...
Q4X Stainless Steel Analog Laser Sensor
Instruction Manual
Original Instructions
185624 Rev. F
21 April 2021
©
Banner Engineering Corp. All rights reserved
185624

Questions and Answers

  • A
    andre54Aug 14, 2025
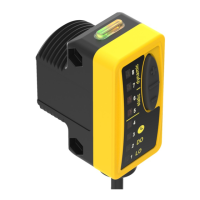
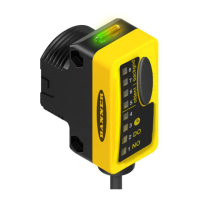
    What to do if the distance being taught is outside of the valid sensing range for Banner Q4XTILAF300-Q8 Accessories?
    • B
      Brandon PriceAug 14, 2025
      If the distance being taught to your Banner Accessories is outside of the valid sensing range, present a target within the sensor's specified range and then re-TEACH the device.
  • J
    Joe PriceAug 17, 2025
    What to do if Banner Accessories output is short-circuited?
    • C
      Clarence WalshAug 17, 2025
      If the output of your Banner Accessories appears to be short-circuited, the first step is to carefully check the wiring. Look for any electrical short circuits and make sure that the wiring is correctly configured.
  • J
    James SmithAug 20, 2025
    What to do if Banner Q4XTILAF300-Q8 signal is saturated?
    • G
      Gabriel JohnsonAug 20, 2025
      If the signal of your Banner Accessories is saturated due to too much light, try repositioning either the sensor or the target. Another approach is to increase the angle of incidence between the sensor and the target to reduce the amount of light received.
  • P
    Pamela McdonaldAug 25, 2025
    What to do if Banner Q4XTILAF300-Q8 Accessories shows no valid signal in range?
    • P
      Pamela OrozcoAug 25, 2025
      If your Banner Accessories unit is showing 'no valid signal in range', attempt to reposition the sensor or the target.
  • D
    Danielle LawsonAug 28, 2025
    What to do if the adjusted endpoint is between the other endpoint and the end of range in Banner Q4XTILAF300-Q8?
    • Y
      ycoxAug 28, 2025
      If the adjusted or taught end point in your Banner Accessories is between the other end point and the end of range, resulting in insufficient space to create the minimum window size, you should TEACH or adjust the end points to maintain the minimum window size within the sensing range.
  • B
    bdennisAug 31, 2025
    What to do if there is a signal saturated (too much light) in Banner Accessories?
    • J
      Joshua RodriguezAug 31, 2025
      If the signal is saturated (too much light) in Banner Accessories, reposition the sensor or the target to increase the detection distance, or increase the angle of incidence between the sensor and the target.
  • Y
    Yolanda TateSep 3, 2025
    What to do if Banner Q4XTILAF300-Q8 has no valid signal in range?
    • W
      William WintersSep 3, 2025
      If Banner Accessories has no valid signal in range, reposition the sensor or the target.
  • B
    bensonnicholasSep 6, 2025
    What to do if the adjusted or taught end point is between the other end point and the end of range in Banner Accessories?
    • J
      Jeremy WhiteSep 7, 2025
      If the adjusted or taught end point is between the other end point and the end of range in Banner Accessories, TEACH or adjust the end points to maintain the minimum window size within the sensing range.
  • D
    Dennis WalkerSep 9, 2025
    What to do if the adjusted or taught window size is smaller than the minimum window size in Banner Accessories?
    • T
      Timothy WeaverSep 9, 2025
      If the adjusted or taught window size is smaller than the minimum window size in Banner Accessories, the sensor automatically adjusts the window size to maintain the minimum window and completes the adjustment or the TEACH.

Summary

1 Product Description

1.1 Models

Lists various Q4X sensor models with their sensing ranges, outputs, and connections.

1.4 Laser Description and Safety Information

Provides Class 1 laser safety information for ≤ 510 mm and > 510 mm models.

2 Installation

2.2 Sensor Orientation

Guidance on optimal sensor-to-target orientation for reliable detection.

2.3 Mount the Device

Steps for mounting the sensor onto a bracket or machine.

3 Sensor Programming

3.1 Setup Mode

Explains how to enter and navigate the sensor's Setup mode using buttons.

3.1.1 TEACH Menu

Details selecting the TEACH mode (Two-point or One-point).

3.1.12 Reset to Factory Defaults

Explains how to reset the sensor to its factory default settings.

3.2 Manual Adjustments

3.2.1 Manual Adjustments in Two-Point TEACH Mode

Adjusting 10 V (20 mA) and 0 V (4 mA) points in Two-Point TEACH mode.

3.2.2 Manual Adjustments in One-Point TEACH Mode

Adjusting the 5 V (12 mA) midpoint and analog window size in One-Point TEACH.

3.3 Remote Input

3.3.1 Select the TEACH Mode Using the Remote Input

Using the remote input to select the TEACH mode.

3.3.2 Reset to Factory Defaults Using the Remote Input

Resetting the sensor to factory defaults via the remote input.

3.4 Locking and Unlocking the Sensor Buttons

3.5 TEACH Procedures

3.5.1 Two-Point TEACH

Step-by-step guide for performing a Two-Point TEACH procedure.

3.5.2 One-Point TEACH

Step-by-step guide for performing a One-Point TEACH procedure.

6 Troubleshooting

Banner Q4XTILAF300-Q8 Specifications

General IconGeneral
Sensing Range300 mm
Input Voltage10-30 V dc
OutputNPN/PNP
IP RatingIP67
TypePhotoelectric Sensor
Sensing Distance300 mm
Operating Voltage10 - 30 V DC

Related product manuals