1. Fan replacement kit
4. R emov e the front panel assembly. See "Remove the front panel assembly", page 2
5. R emov e the power supply assembly. See "Remove the power supply assembly", page 4
6. R eplace the fan assembly. See "Replace the fan assembly", page 4
7. Install the power supply assembly. See "install the power s upply assembly ", page 6
8. Install the front panel assembly. See "Install the front panel assembly", page 6
9. Install the top cover. S ee "Install the top cover", page 7
10.C onnect the audio processor to the AC power and turn it on.
11.Verify if the new fan is w orking correctly.
1.3 Remove the top cover
Necessary tools
#2 Phillips screwdriver
How to remove the top cover from the audio processor?
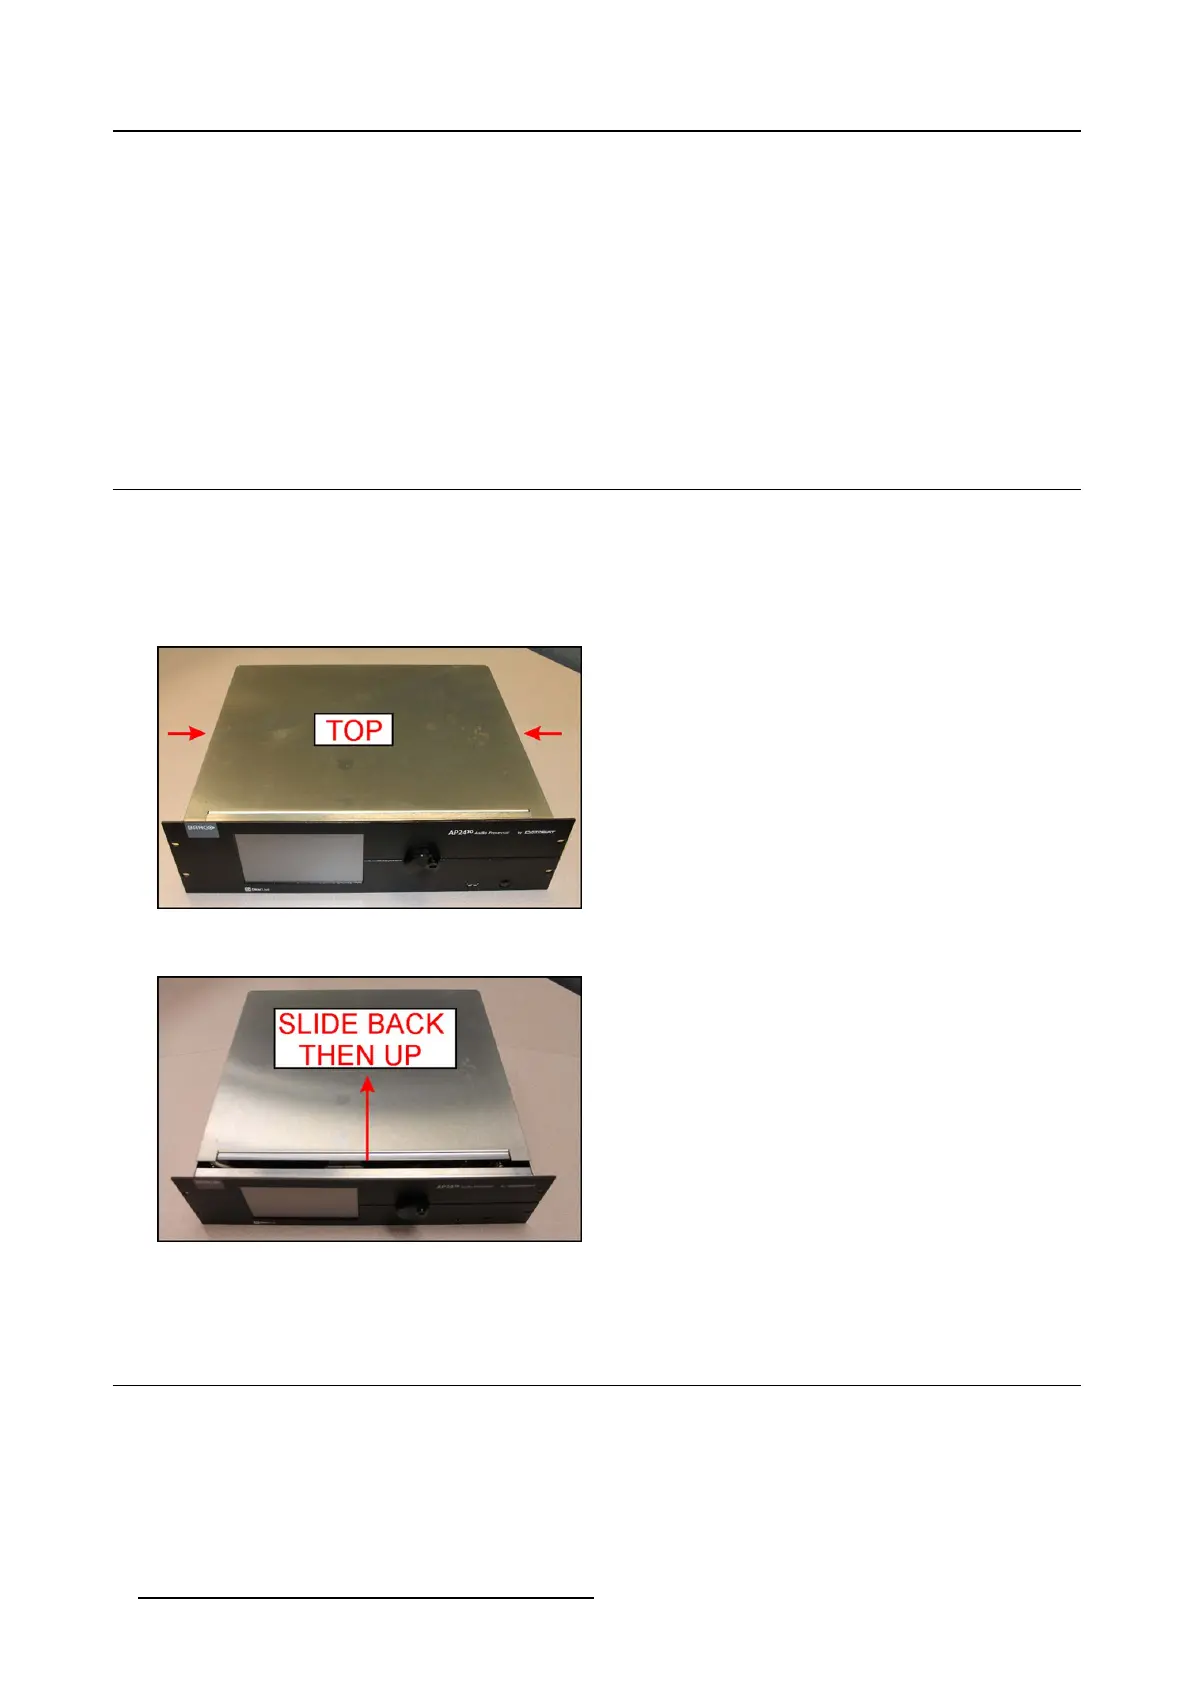
1. R emov e the two 4–40 x 1/4” pan head Phillips screws from both sides of the top cover.
Image 1-1
2. S lide the top cover to the back of the processor.
Image 1-2
3. L ift the top cover up to remove it.
1.4 Remove the front panel assembly
Necessary tools
#1 Phillips screwdriver
How to remove the front panel a ssemb
ly?
1. C arefully turn the processor on its side.
2. R emov e four 4–40 x 3/16” flat-head Phillips screws from the bottom.
2
R59770891 AP20 & AP24 FAN REPLACEMENT KIT 28/09/2015