1. Fan replacement kit
1.5 Remove the power supply assembly
Necessary tools
#1 Phillips screwdriver
How to remove the power supply assembly?
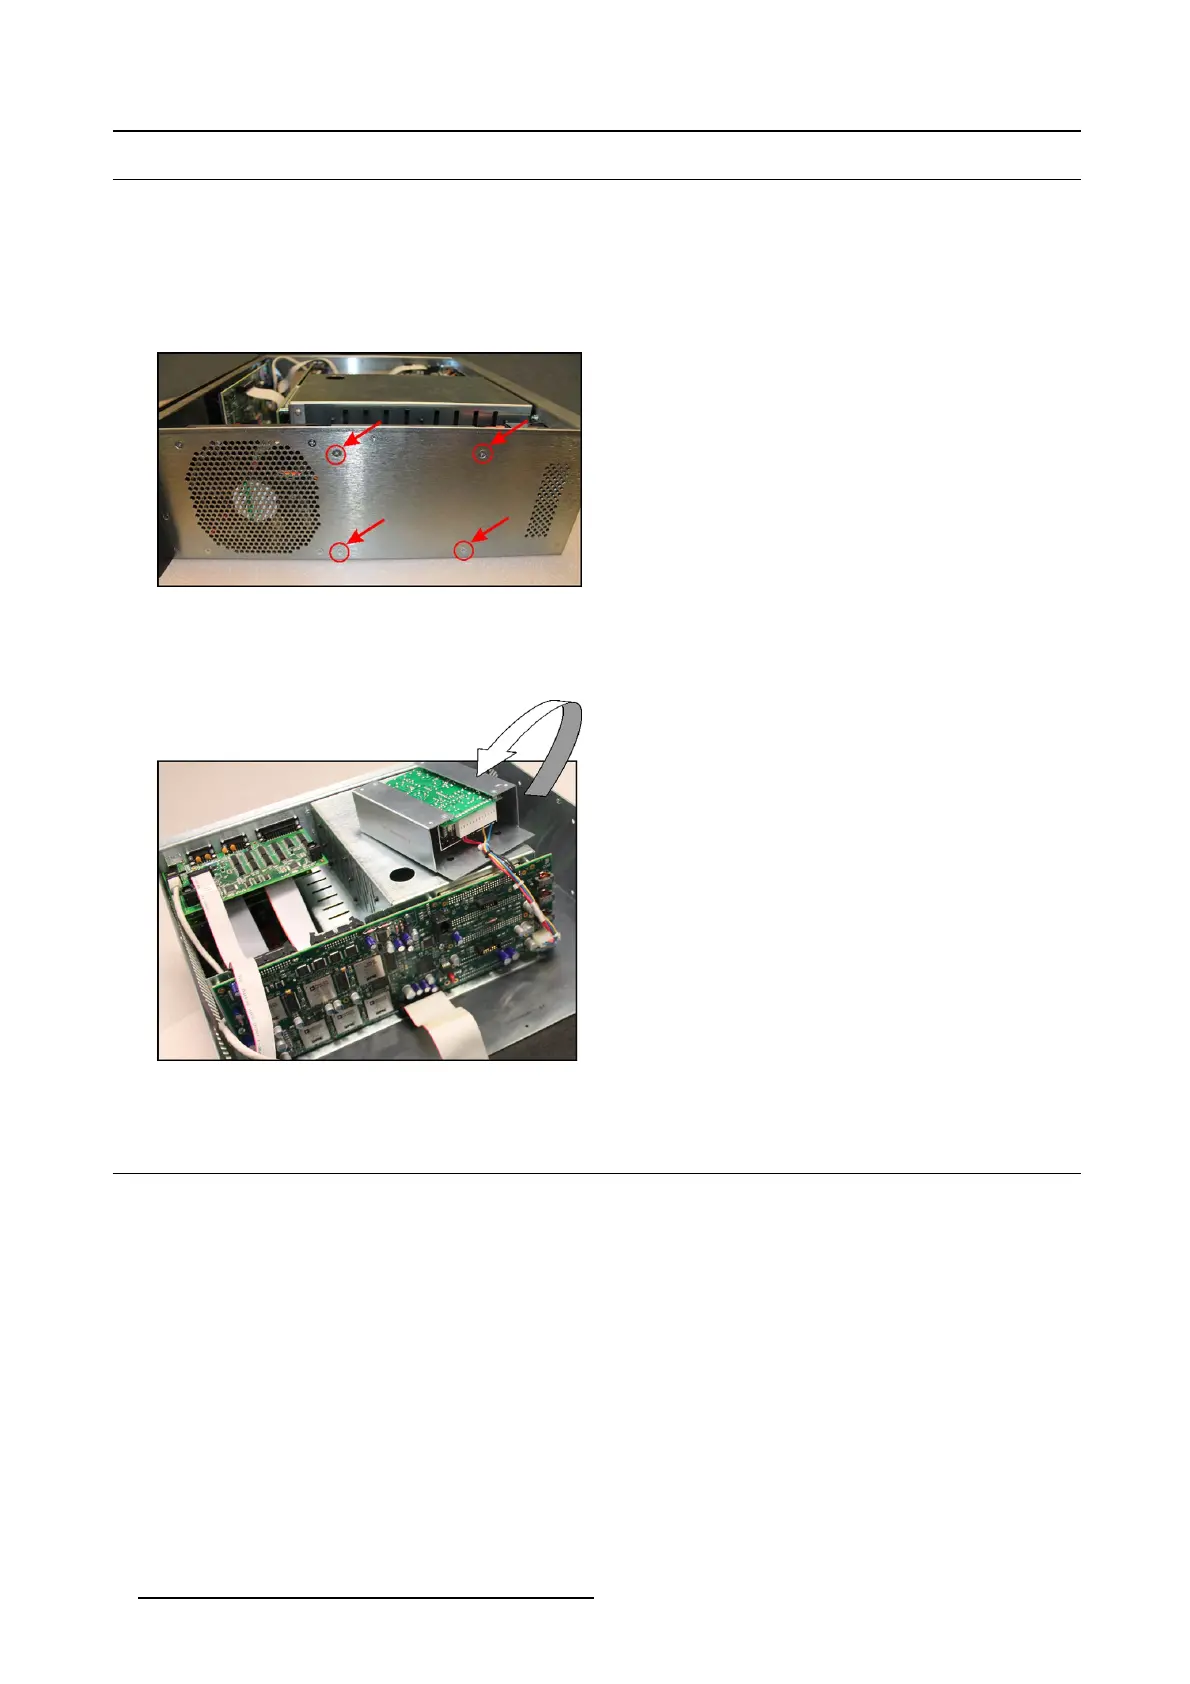
1. R emov e t hree of the four 6–32 x 1/4” pan-head P hillips screws that hold the power supply in place; These screws can be found
on the side.
Image 1-6
2. R emov e the fourth screw, while holding the p ower supply. Do this so that the power supply will not fall.
3. C arefully lift the power supply ou t and set it on top of the car d cage.
Tip: No cables need to be removed from the power supply, but make sure not to stress the cables.
Image 1-7
1.6 Replace the fan assembly
Necessary tools
• A s mall flat-blade screwdriver
• #2 Phillips screwdriver
• 5/16” combination wrench
Necessary parts
• Sub-Assembly, Fa n
• Keps nuts, 6–32, s teel, clear zinc finish (4 pieces)
• Screw, 6–32 x 1/2” flat head Phillips, 100°, steel, clear z inc (4 pieces)
How to replace the fan assembly?
1. R emov e the fan power connector from the front panel.
Tip: Useasmallflat-b lad e screw d river to h
elp lift up the connector out of the socket.
Caution: Do not pull the power connector directly up on the wires. This will pull them out of the connector.
4
R59770891 AP20 & AP24 FAN REPLACEMENT KIT 28/09/2015