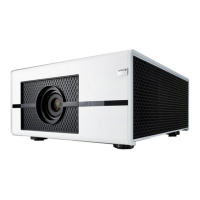
Please make sure the center of lens is retangular to the center of the screen.
•
Moving the lens horizontally
The distance of horizontal lens movement is 30% of half the screen width in both directions. For instance, if you are using
a 80" × 50" screen, you will be able to move the image left or right by no more than 12".
horizontal
lens shift
adjustment
Range of
horizontal
lens shift
adjustment
This illustration shows normal horizontal lens shift without the use of special specification lens or projector.
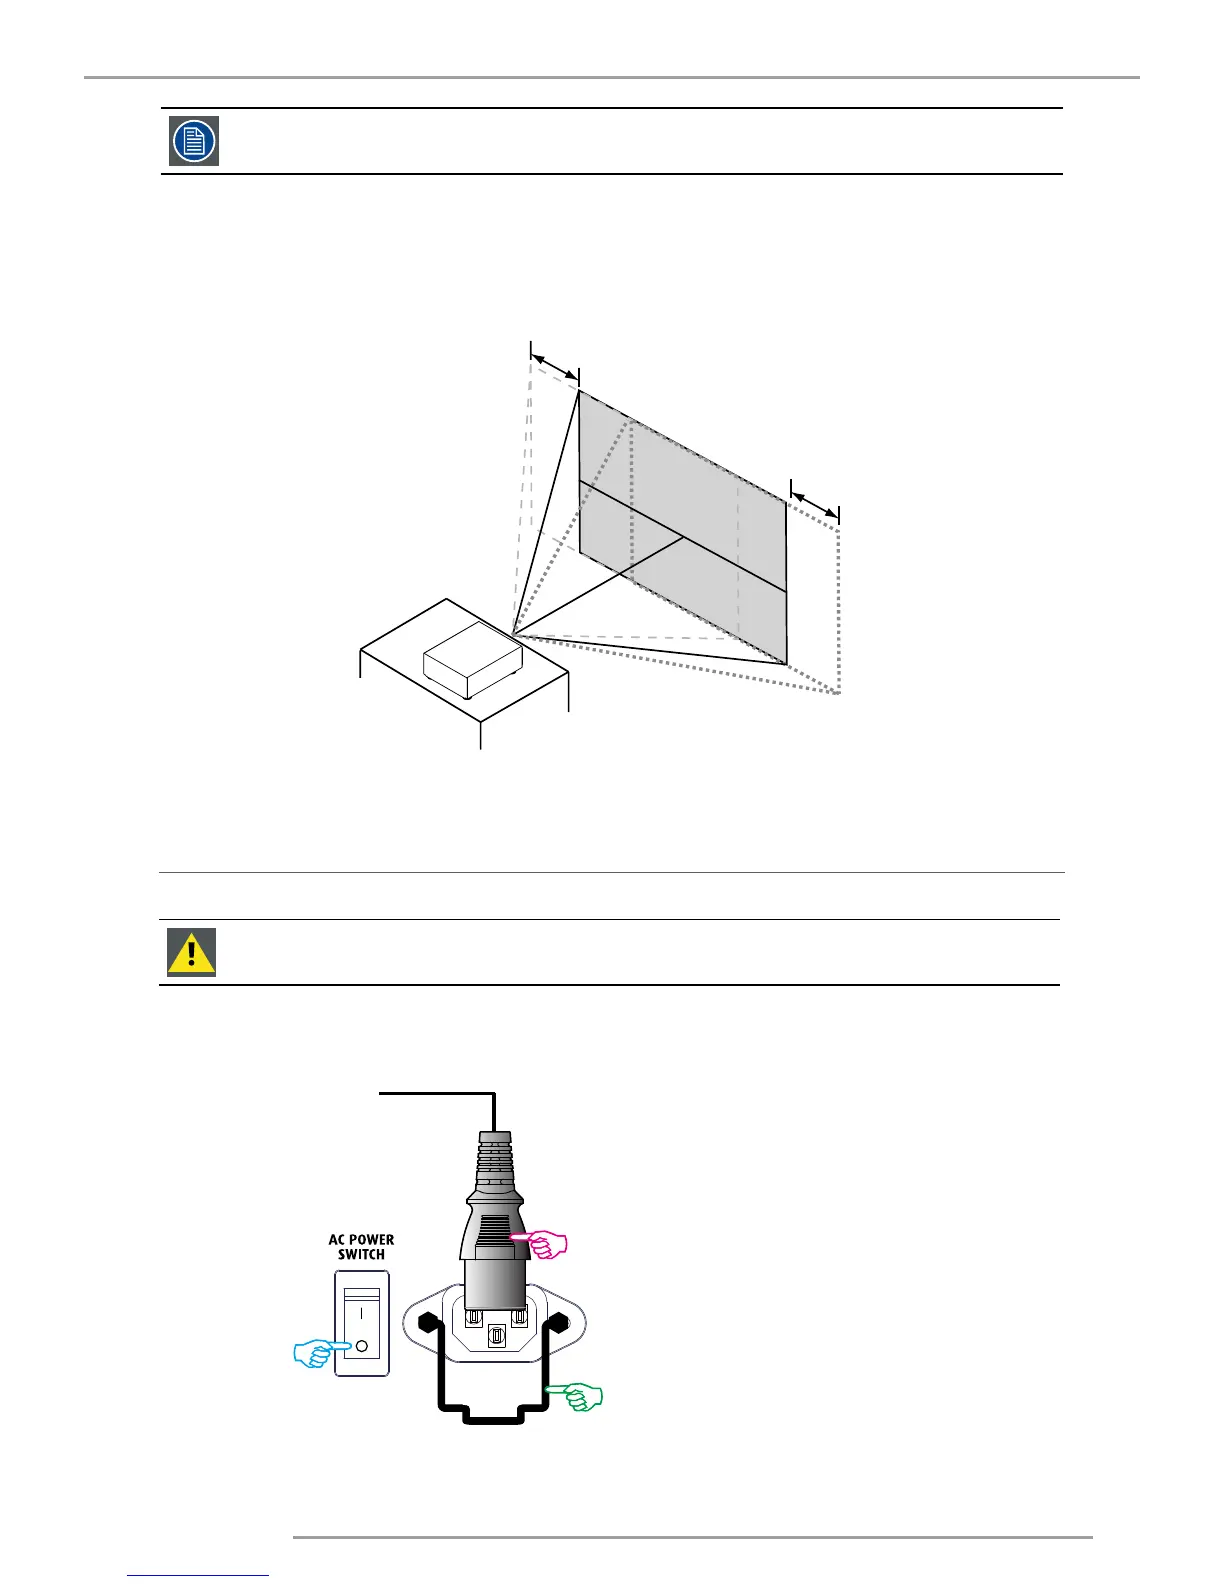
3.3 Connecting the projector with the power net
CAUTION: Use only the power cord provided with the projector.
1.
Ensure that the power switch stands in the ’0’ (OFF) position (1).
2.
Connect the female side of the power cord with the power input socket of the projector (2).
3.
Secure the power plug by locking the plug holder clamp (3).
Connect to Wall plug
4.
Connect the male side of the power cord to the local power net.