18 • Important: Always read and follow operating instructions.
Stages of Ination on a
Conventional Tire and Rim
Review these descriptions and diagrams carefully. Refer to them as
necessary during bead sealing, bead seating, and inflation to verify that
you are proceeding properly and safely.
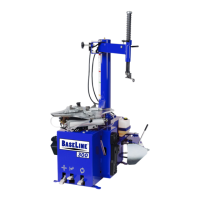
Bead Sealing
Bead sealing is the process of capturing air pressure between the tire
and the rim. The tire will usually contain about 1/2 to 2 PSI at initial bead
seal.
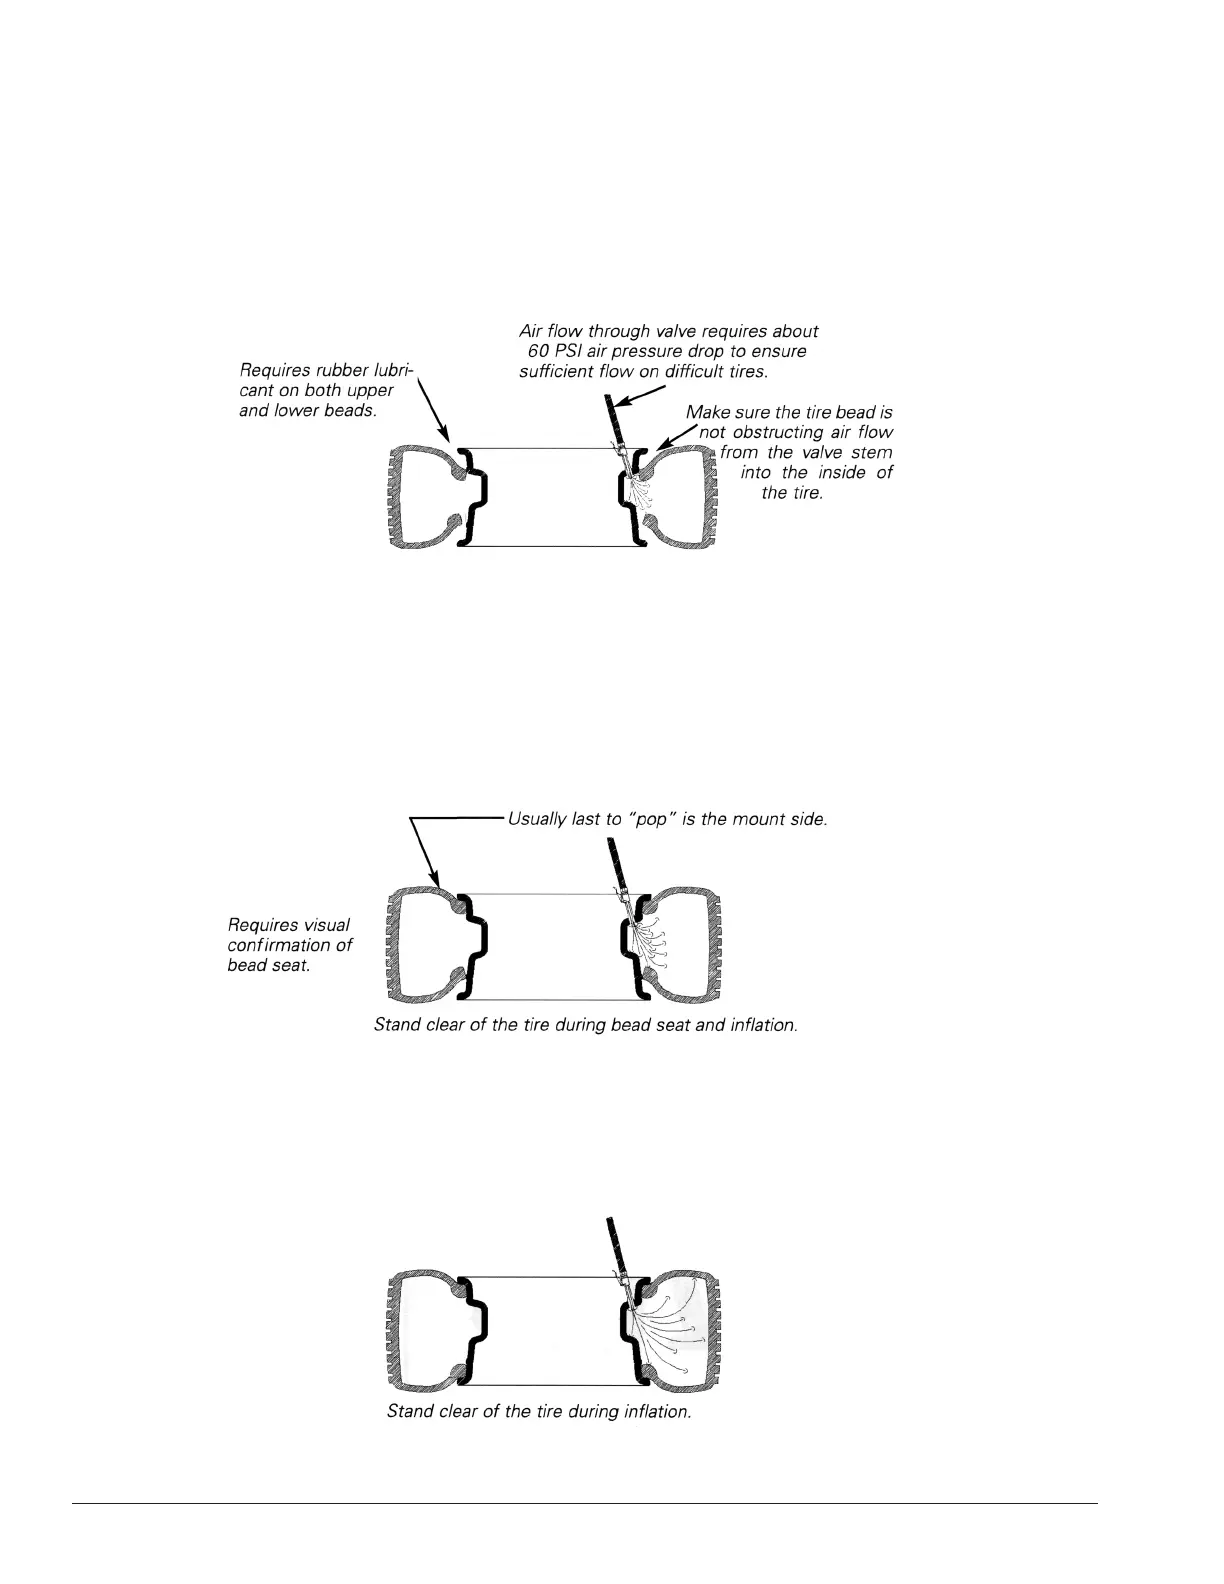
Bead Seating
Bead seating usually occurs on the long tapered side of the wheel first
and the shorter side last. Bead seating will usually require at least 7 PSI
in the tire. 40 PSI is the maximum safe pressure at this stage regardless
of tire operating pressure.
Most European import cars and many aftermarket alloy wheels are
very tight and can be dicult to bead seat. Also note that asymmetrical
hump and run-flat tires are extremely dicult to bead seat. Follow tire
manufacturer’s recommended procedure for bead seating.
Inflation
After the beads are seated, the tire is ready to be inflated. Do not
inflate the tire above the manufacturer’s recommended pressure as
stamped on the tire sidewall. The typical inflation pressure for automo-
bile tires is between 24 and 45 PSI. Light truck inflation pressure typi-
cally covers a wider range.