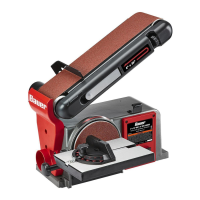
Page 8 ;&(%$*4.8"4,7%<'*#$"&8#=%/7*,#*%4,77%>?@@@?@AA?BCDC1 Item 58339
EF;6GH IJ6KFGLIM NFLMG6MFMO6E6GPJ
I/*(,$"83%L8#$('4$"&8#
%K*,9%$.*%6MGLK6%LNJIKGFMG%EF;6GH%LM;IKNFGLIM%#*4$"&8%,$%$.*%+*3"88"83%&2%$."#%
5,8',7%"847'9"83%,77%$*`$%'89*(%#'+.*,9"83#%$.*(*"8%+*2&(*%#*$%'/%&(%'#*%&2%$."#%/(&9'4$1
G&&7%E*$%P/
GI%JK6!6MG%E6KLIPE%LMaPKH%;KIN%FOOLU6MGFT%IJ6KFGLIM-%
G'(8%$.*%J&)*(%E)"$4.%&2%$.*%$&&7%&22%,89%'8/7'3%$.*%$&&7%2(&5%"$#%*7*4$("4,7%&'$7*$%
+*2&(*%/*(2&(5"83%,8V%/(&4*9'(*%"8%$."#%#*4$"&81
GI%JK6!6MG%E6KLIPE%LMaPKH-%
UI%MIG%IJ6KFG6%QLG]%FMH%RPFKU%ULEFST6U=%UFNFR6U=%IK%K6NI!6U1
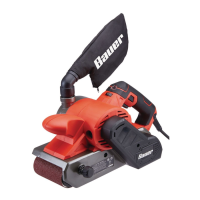
L8#$,77"83%E,89"83%S*7$
1. Loosen the Belt Support Locking Screw.
Raise the Belt Support Assembly to 45°
and tighten the Locking Screw.
E,89"83%
S*7$
S*7$%
E'//&($%
F##*5+7V%
T&4b"83%
E4(*)
U('5
U('5
;"3'(*%U
2. Pull the Belt Tension Lever out
to release the tension.
3. Slide the Sanding Belt onto the front and
rear Drums with the directional arrows
on the inside of the Belt pointing in the
direction of rotation. Refer to Figure D.
4. Center the Belt correctly on both Drums.
Push the Tension Lever back to tighten
the Belt to the Belt Support Assembly.
5. Loosen the Belt Support Locking Screw,
lower the Belt Support to its horizontal
position and tighten the Locking Screw.
F9d'#$"83%E,89"83%S*7$%G(,4b"83
1. Turn the Sander on, then immediately turn off.
2. The Belt should remain centered on the front
and rear Drums. If the Belt starts moving to the
side of either Drum, it needs to be adjusted.
S*7$%
F7"385*8$%
^8&+
;"3'(*%6
3. If the Belt moves towards the front of
the Sander, turn the Belt Alignment
Knob slightly counterclockwise.
4. If the Belt moves towards the rear of the Sander,
turn the Belt Alignment Knob slightly clockwise.
5. Turn the Sander on and immediately off again
after adjustment to check alignment.
6. If necessary, continue to adjust the Belt
Alignment Knob until the Belt rides in the
center of the front and rear Drums.