Page 8 >"-&#$95<19)(&?2$+#1"<+@&,($)+$&9)((&ABCCCBCDDBEFGF/ Item 57608
HI>;JK LM;NIJOL! PIO!J;!I!Q;H;JRM
H,$91719)#1"<+
Electrical Rating 120 VAC / 60 Hz / 15 A
Rated No Load Speed 3800 RPM
Cutting Capacity at 45° L 1-1/2" x 5-1/2"
Cutting Capacity at 90° L/R 2-5/8" x 7-5/8"
Maximum Bevel 48° Left – 3° Right
Maximum Miter 48° Left and Right
Saw Blade
12" Diameter,
1" Round Arbor
4000 Minimum RPM Rating
H$#2,&B&'$7"-$&R+$%
&N$)*$&;!JON;&OPMLNJI!J&HI>;JK&O!>LNPIJOL!&+$9#1"<&)#$&4$81<<1<8&"73+&
:)<2)(&1<9(2*1<8&)((&#$Z#&2<*$-&+245$)*1<8+$-$1<&4$7"-$&+$#&2,&"-&2+$&"73+&,-"*29#/
!"#$% For additional information regarding the parts listed in the
following pages, refer to Parts List and Diagram on page 18.
P"2<#1<8
1. Use the four bolt holes provided in the Base
to mount the Miter Saw to a stable support
before use. Mounting hardware not included.
2. Ensure that the Miter Saw is always stable
and secure (e.g. fixed to a bench).
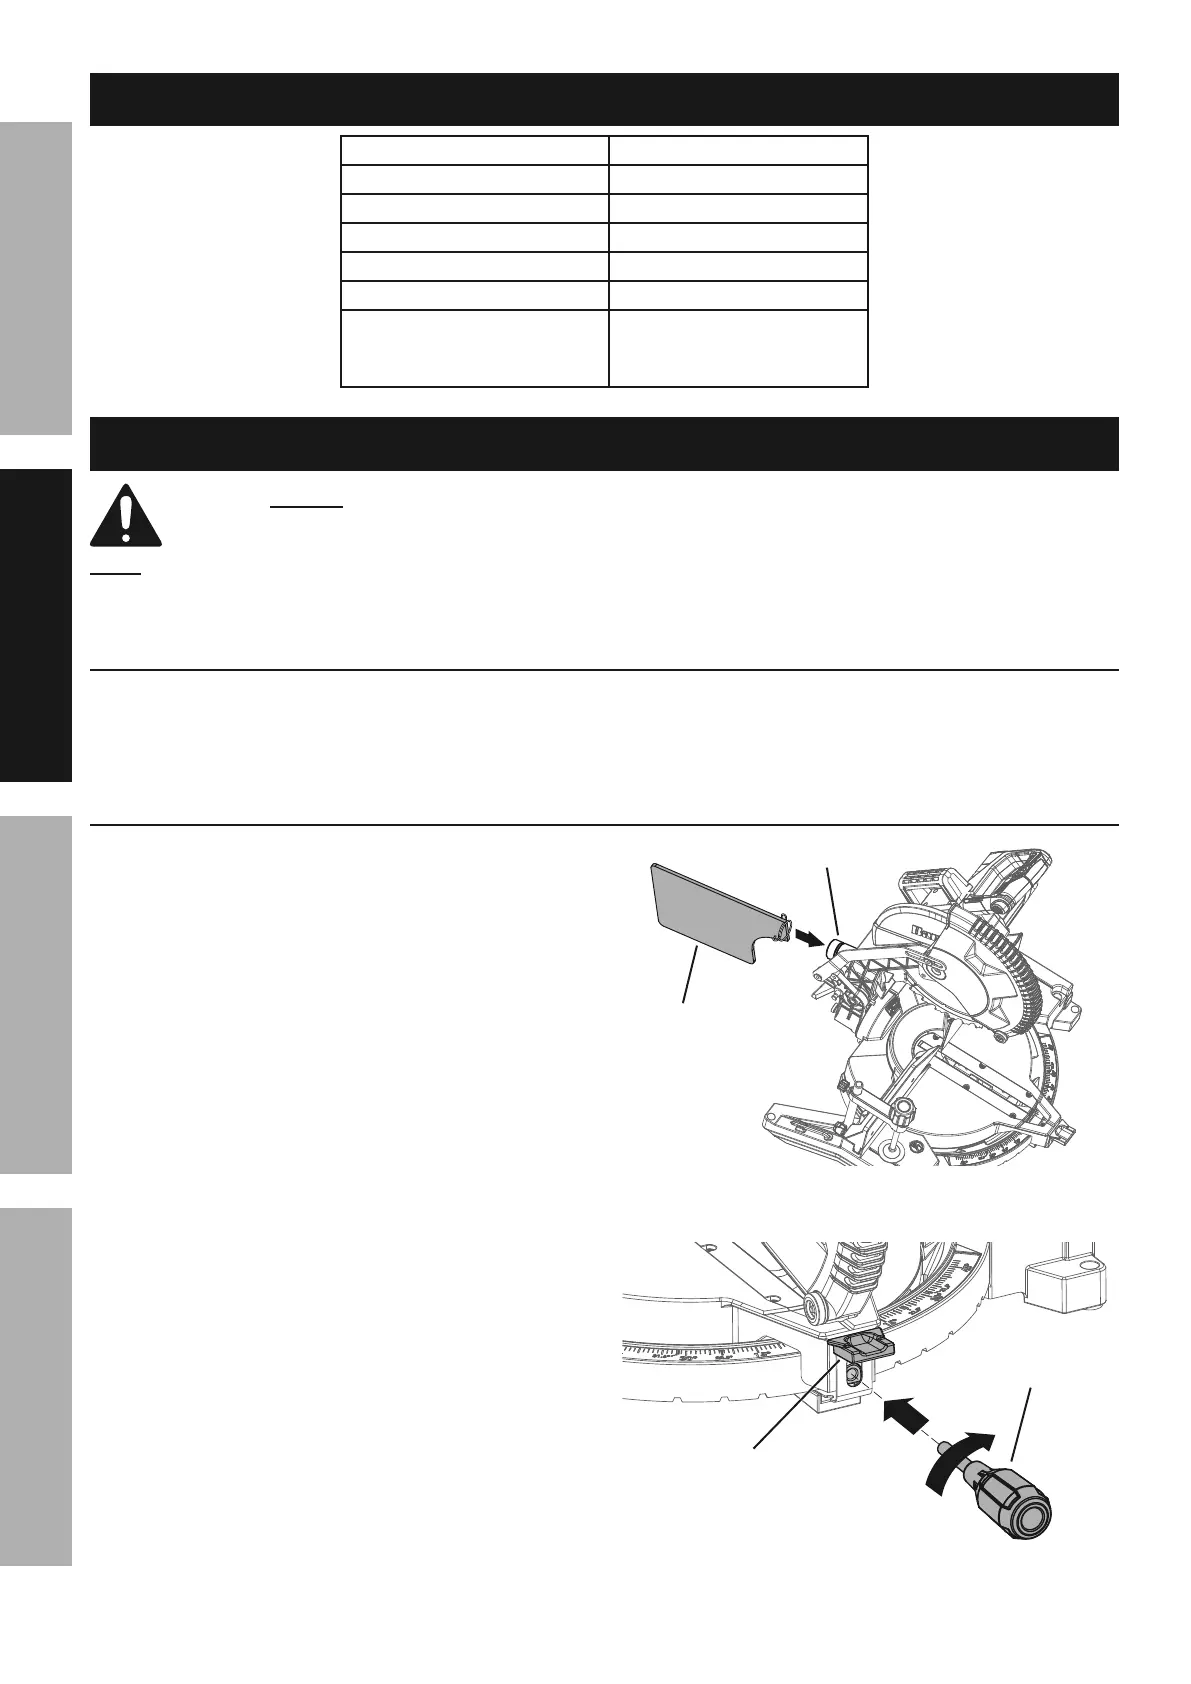
I++$:4(.
1. Squeeze the metal collar wings on the Dust
Collection Bag.
2. Slide the Dust Collection Bag over the
Dust Outlet at the rear of the Saw Head
Assembly and release the metal collar wings.
3. Screw the Miter Lock Knob into the threaded hole on
the end of the Table Arm below the Miter Detent
Lock Lever as shown until securely in place.
V2+#&
')8
V2+#&L2#($#
>182-$&I
>182-$&'&
P1#$-&U"9X&
Y<"4
P1#$-&V$#$<#&
U"9X&U$W$-