83
16. COME REGISTRARE L
FRIZIONE PowerSafe®
IT
La frizione PowerSafe® viene regolata in fase di montaggio e, salvo
smontaggi per riparazioni, di norma non richiede più alcuna registra-
zione. Tuttavia, nel caso fosse necessaria una nuova registrazione od
un controllo, procedere come segue:
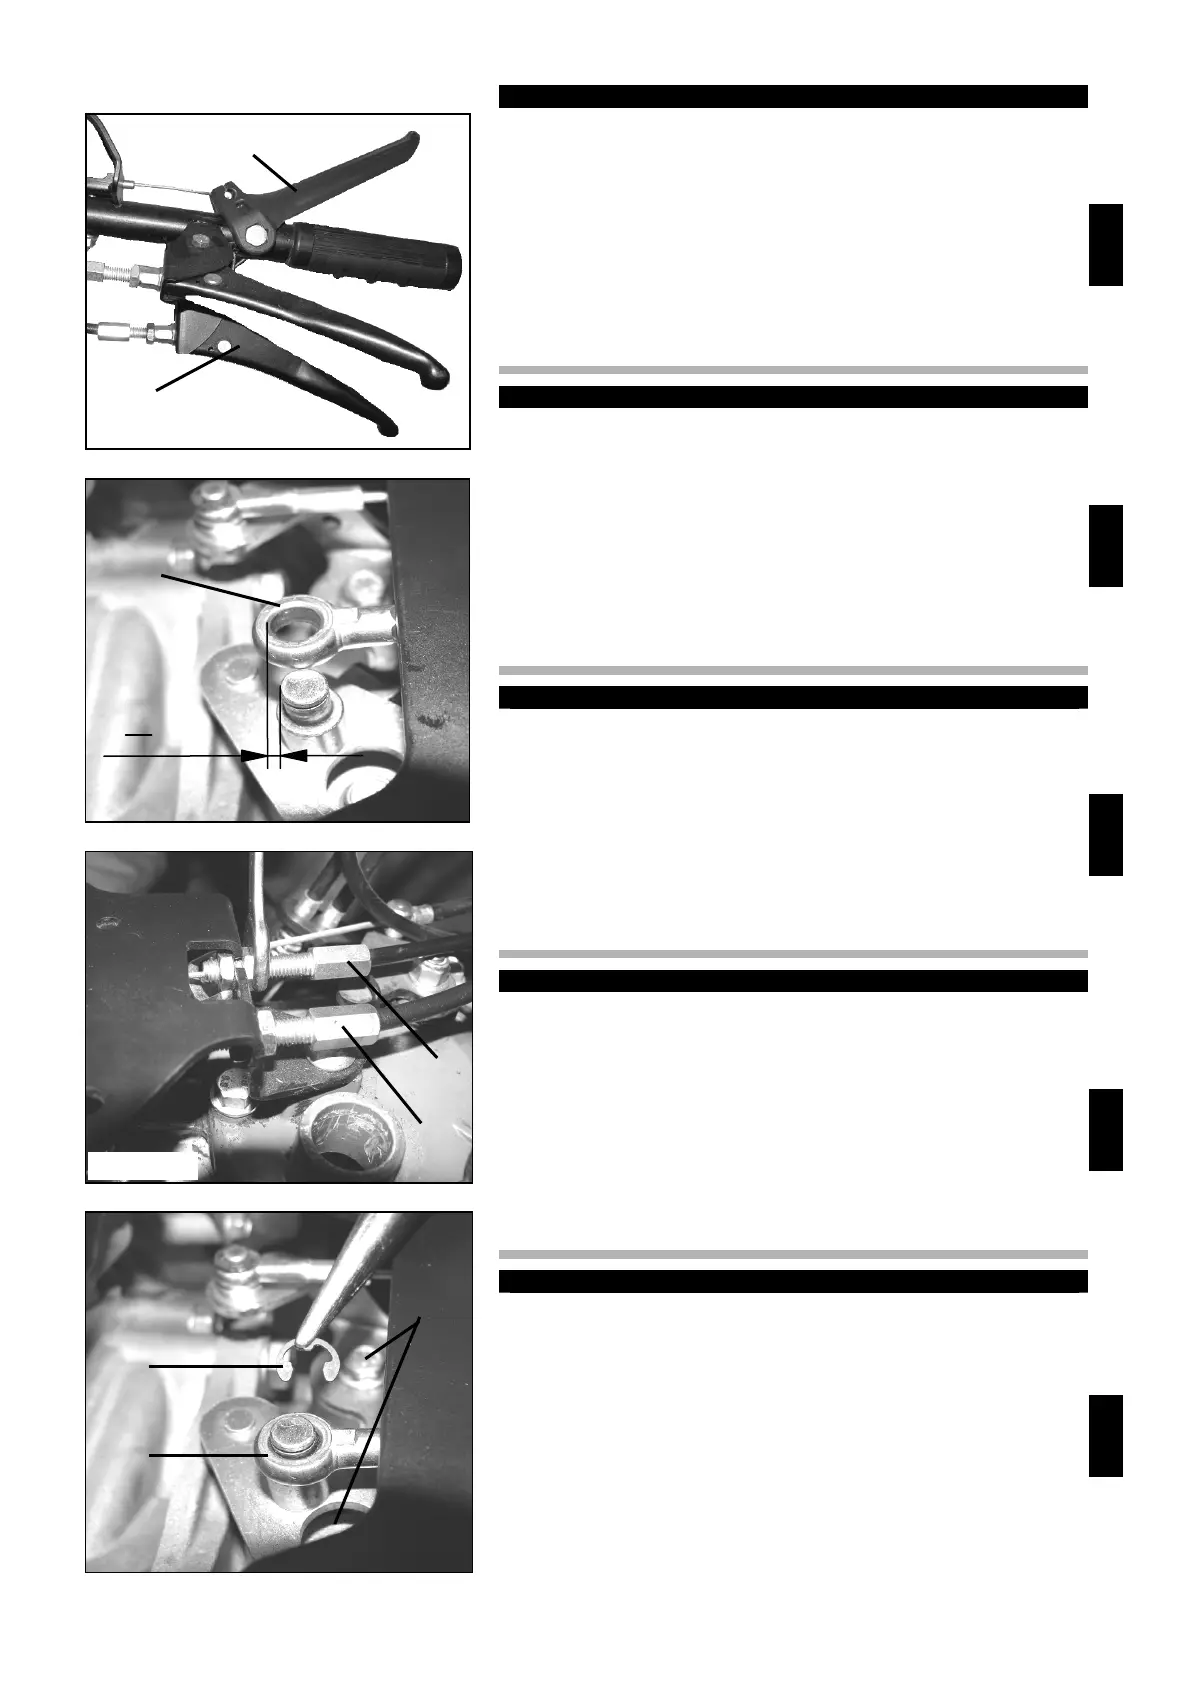
1. verificare che il terminale ad occhiello più grande A (fig.16/70 - ter-
minale della leva frizione B fig.16/69) sia almeno 1 o 2 mm più lungo
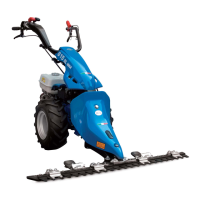
del perno di aggancio dell'occhiello. Registrare la vite di registro C (fig.
16/71) per ottenere la misura voluta, quindi serrare la vite di registro;
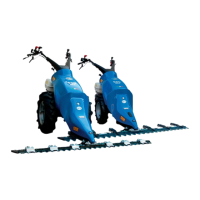
2. agganciare l'occhiello grande A al perno (fig.16/72), calzare il seeger
di fermo D;
16. HOW TO ADJUST THE PowerSafe® CLUTCH
EN
The PowerSafe® clutch is normally adjusted during assembly and
therefore requires no further adjustment, except in the event of repairs.
However, should a new adjustment or check be required, follow these
steps:
1. check that the largest eyelet terminal A (fig.16/70 - clutch lever ter-
minal B shown in fig.16/69) is at least 1 mm or 2 mm longer than the
eyelet's coupling pin. Adjust the adjusting screw C (fig.16/71) to obtain
the desired length, then tighten the adjusting screw;
2. hook the large eyelet A to the hinge (fig.16/72) and fit the snap ring
retainer D;
16. COMMENT REGLER L'EMBRAYAGE PowerSafe®
FR
L’embrayage PowerSafe® est normalement réglé en phase de monta-
ge et, sauf démontage pour réparations, ne nécessite plus aucun ré-
glage. Toutefois, si un nouveau réglage était nécessaire ou un contrô-
le, procéder comme suit:
1. vérifier que le terminal à œillet plus grand A (fig.16/70 - terminal du
levier de l’embrayage B fig.16/69) soit au moins 1 ou 2 mm plus long
que l’axe d’attache de l’œillet. Régler la vis de réglage C (fig.16/71)
pour obtenir la bonne dimension, donc serrer la vis de réglage;
2. attacher le grand œillet A à l’axe (fig.16/72), enfiler l’anneau seeger
d’arrêt D;
16. COMO REGISTRAR EL EMBRAGUE PowerSafe®
ES
El embrague PowerSafe® normalmente se regula en la fase de mon-
taje y, excepto en caso de desmontajes para reparaciones, no requiere
más registros. Sin embargo, en caso de que fuera necesario un nuevo
ajuste o un control, realizar lo siguiente:
1. comprobar que el terminal con ojal más grande (A fig.16/70 - termi-
nal de la palanca embrague B fig.16/69) sea por lo menos 1 o 2 mm
más largo que el perno de enganche del ojal. Ajustar el tornillo del
registro C (fig.16/71) para obtener la medida deseada; a continuación,
apretar el tornillo de ajuste;
2. enganchar el ojal grande A al perno (fig.16/72), montar el anillo de
retención D;
16. PowerSafe® KUPPLUNG EINSTELLEN
DE
Die PowerSafe® Kupplung wird normalerweise bei der Montage ein-
gestellt und sofern keine Demontagen zwecks Instandsetzung erfolg-
ten, bedarf diese keiner weiteren Nachstellungen. Sollte eine Nachstel-
lung oder Prüfung dennoch erforderlich sein, ist wie folgt beschrieben
vorzugehen:
1. Sicherstellen, dass der größere Seilschuh mit Öse (A Abb.16/70 -
Schuh des Kupplungsschalthebels B Abb. 16/69) um mindestens 1
oder 2 mm länger ist, als der Klemmbolzen der Öse. Die Stellschraube
C (Abb.16/71) auf das gewünschte Maß justieren. Die Stellschraube
daraufhin anziehen;
2. Die große Öse A am Bolzen (Abb.16/72) fixieren und den Seeger-
Ring D aufstecken;
D
fig.16/72
L
C
G
fig.16/71
fig.16/70
1 : 2 mm
F
B
fig.16/69