Do you have a question about the BDI cavo and is the answer not in the manual?
Unpack and identify all components. Use a non-marring surface for assembly.
Remove corner protectors and loosely attach stretcher to legs using screws.
Loosely install leg assembly to cabinet bottom using screws and hex driver.
Ensure legs are flush with cabinet sides and tighten all screws.
Place protectors under legs, then carefully tip cabinet upright with assistance.
Install door pulls using screws and a Phillips screwdriver.
Insert back panels into top and bottom channels on the cabinet backside.
Adjust integrated leg levelers to ensure a stable and level cabinet placement.
Make minor adjustments to European hinges for door alignment and smooth operation.
| Cable Management | Yes |
|---|---|
| Ventilation | Yes |
| Adjustable Shelves | Yes |
| Assembly Required | Yes |
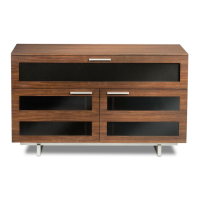
| Collection | Cavo |
| Materials | Hardwood Veneer, Powder Coated Steel |
| Material | Hardwood Veneer |
| Color | Natural Walnut |
| Dimensions | 70.25" x 21" x 27" |