UK UK
8 9
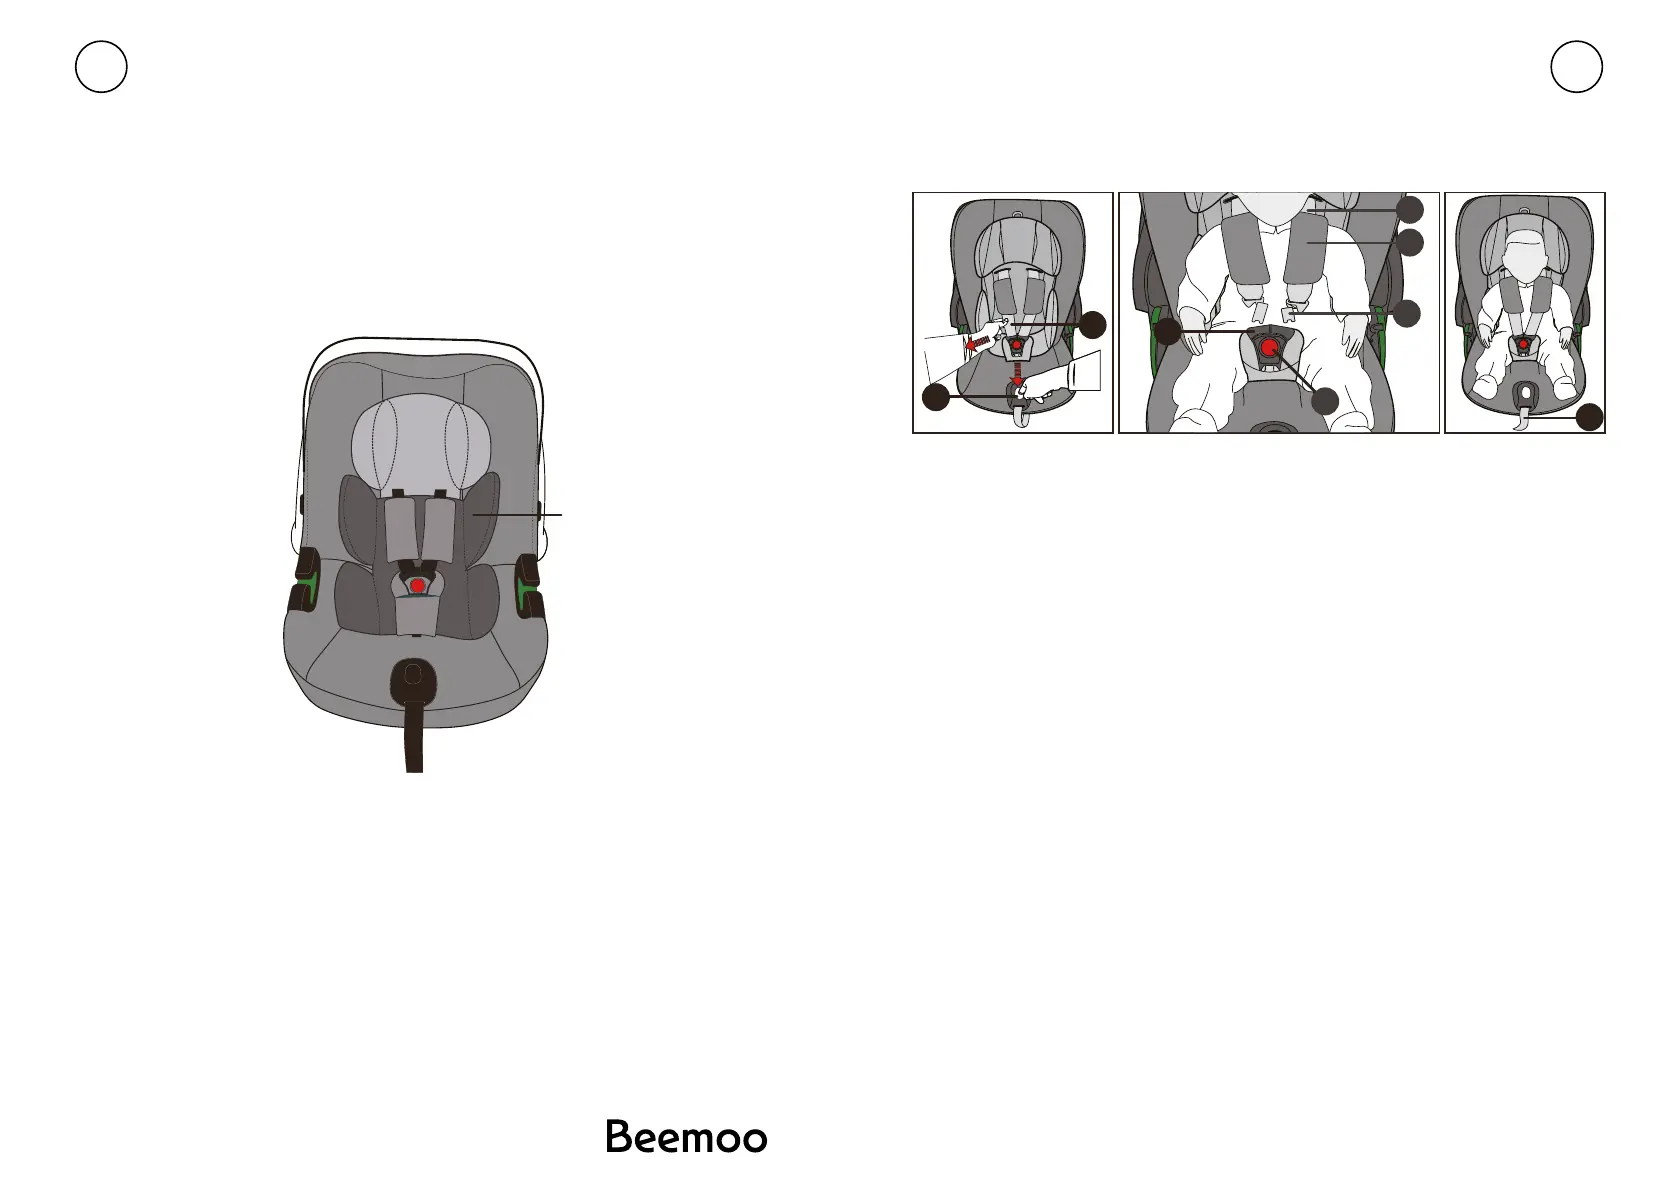
REMOVING THE NEWBORN INLAY
The newborn inlay (X) may be removed after the baby is 61 cm (approx. 3 months) to
provide more space for the child. To remove the newborn inlay (X) open and remove
the shoulder pads. Next remove the newborn inlay and place the shoulder pads back
on the shoulder belts.
STRAPPING WITH Y-SHAPED HARNESS SYSTEM
Note! Ensure that the infant car seat is free from loose objects and toys.
Note! Ensure that the headrest is correctly locked in place before using the seat.
• Loosen shoulder belts (e) by pressing the adjustment button on central adjuster (d)
and simultaneously pulling both shoulder belts up.
• Undo the belt buckle by pressing red button (h) rmly. Note! Always pull on the
shoulder belt (e) and not on belt pads (f).
• Place the child into the car seat.
• Place shoulder belt (e) directly over the child’s shoulders.
Note! Ensure that shoulder belts (e) are not twisted.
• Place both buckle tongues (g) together and lock them in place in belt buckle (i) with
an audible “CLICK”.
• Pull cautiously on central adjustment belt (j) in order to tighten shoulder belts (e)
until they t your child’s body.
To ensure your baby’s safety, check that:
• The infant car seat is secured with the child facing the rear of the car (the child’s feet
point towards the backrest of the vehicles seat).
• The infant car seat may ONLY be used in the front passenger seat if the vehicles
airbag has been deactivated.
The newborn inlay (x) may be removed
after the baby is 76 cm (approx. 3 months)
to provide more space for the child. To
remove the newborninlay (x) open and
remove the shoulder pads. Then remove the
newborn inlay and place the shoulder pads
back on the shoulder belts.
Note! Ensure that the headrest is correctly locked in place before
using the seat.
09
10
To ensure your baby’s safety, check that:
• Loosen shoulder belts (e) by pressing the adjustment button on
central adjuster (d) and simultaneously pulling both shoulder belts up.
• Undo the belt buckle by pressing red button (h) firmly.
• the infant car seat is secured with the child facing the rear of the car
(the child’s feet point towards the backrest of the infant car seat).
• the infant car seat is only used on the front passenger seat if there is
no front airbag that can impact on the infant car seat.
STRAPPING WITH Y-SHAPED BELT SYSTEM
Note! Ensure that the infant car seat is free from toys and hard objects.
• Loosen shoulder belts (e) by pressing the adjustment button on
central adjuster (d) and simultaneously pulling both shoulder belts up.
• Undo the belt buckle by pressing red button (h) firmly.
Note! Please always pull on shoulder belt (e) and not on belt pads (f).
• Put your child into the child seat.
• Place shoulder belt (e) directly over your child’s shoulders.
Note! Ensure that the infant car seat is free from toys and hard objects.
Note! Please always pull on shoulder belt (e) and not on belt pads (f).
• Put your child into the child seat.
• Place shoulder belt (e) directly over your child’s shoulders.
Note! Ensure that shoulder belts (e) are not twisted.
• Place both buckle tongues together and lock them in place in belt
buckle (i) with an audible “CLICK”.
• Pull cautiously on central adjustment belt (j) in order to tighten
shoulder belts (e) until they fit your child’s body.
CONNECTING THE INFANT CAR SEAT WITH BASE
Before first use
STRAPPING WITH Y-SHAPED BELT SYSTEM
40-87cm Rearward facing ISOFIX+Support leg+shaped belt.
Remove the leg support first, when the base is green, it means the
installation is correct
(x)
Removing the Newborn Inlay
d
e
g
f
e
h
i
j
 Loading...