UK UK
96 97
DE DE
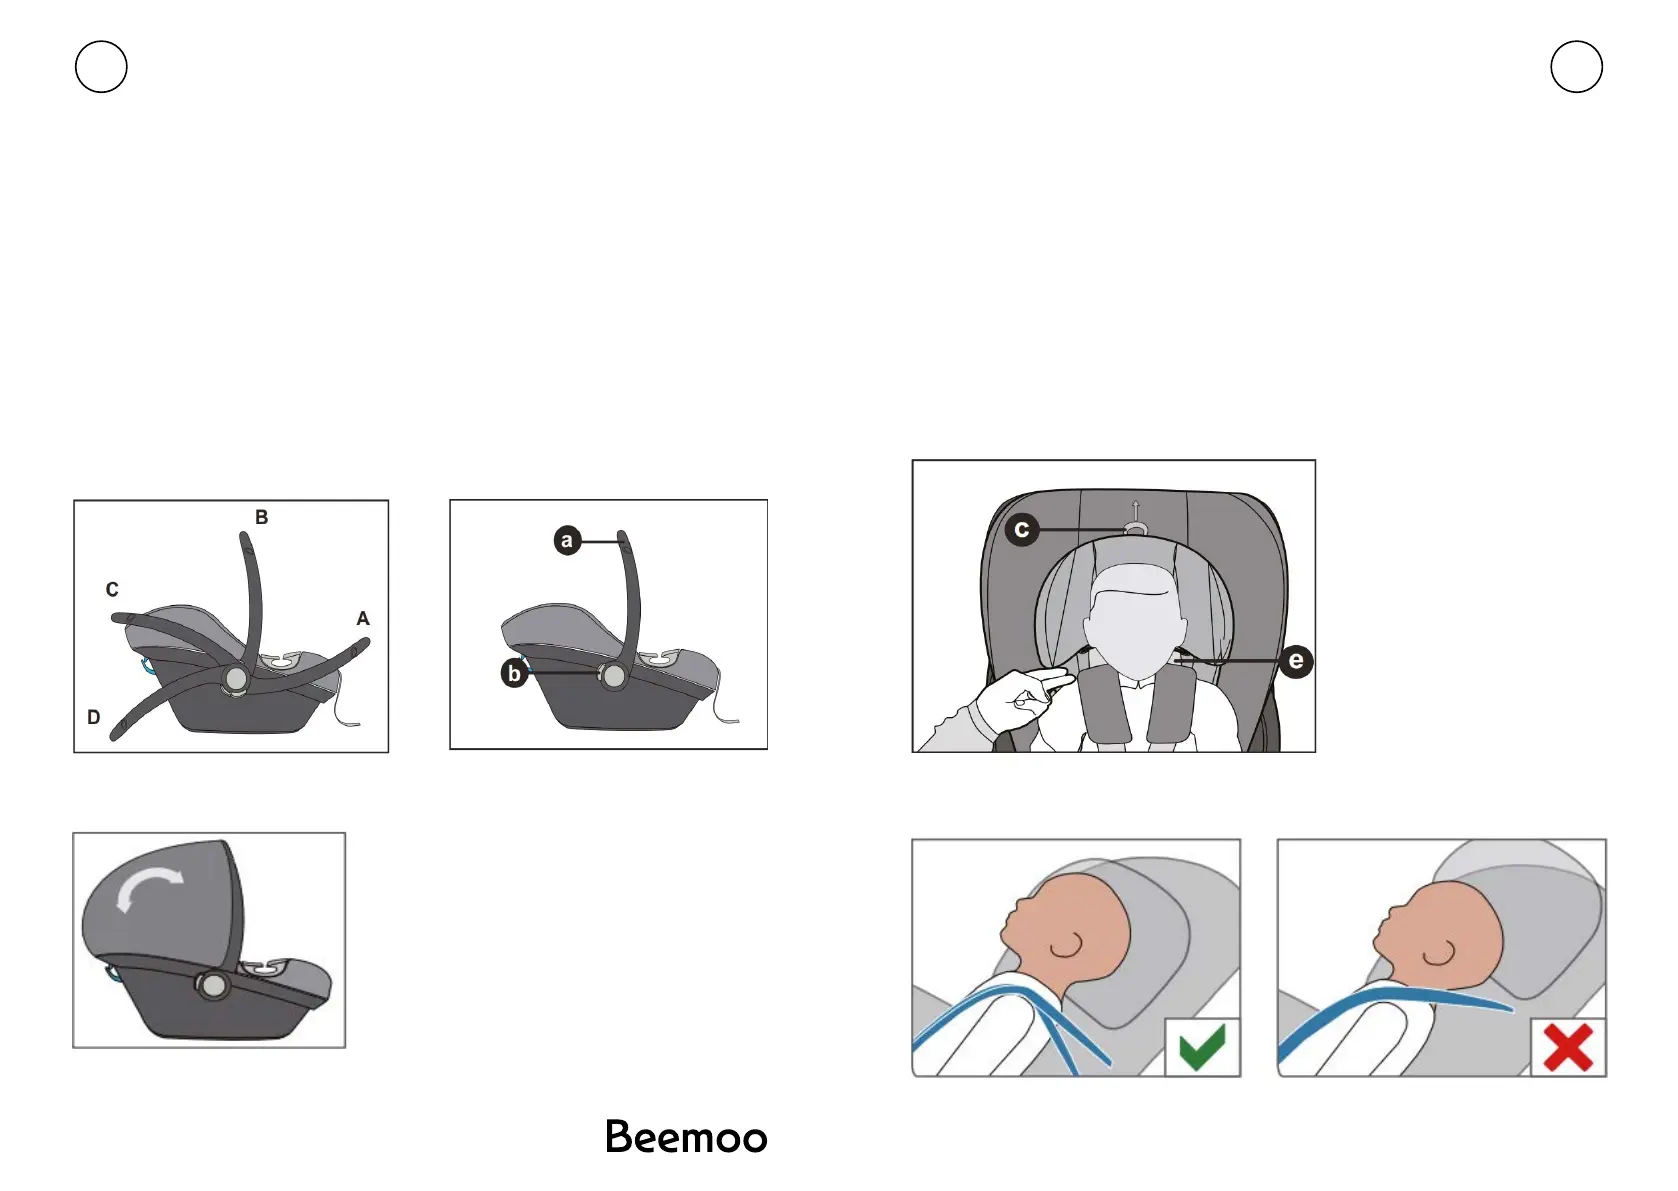
EINSTELLEN DES TRAGEGRIFFS
Sie können den Tragegri in vier Positionen arretieren:
A) Fahrposition
B) Trageposition
C) Zum Platzieren des Babys im Sitz
D) Für einen sicheren Stand auf einer ebenen Fläche außerhalb des Fahrzeugs
ACHTUNG!
Um ein Umkippen des Sitzes beim Tragen zu verhindern, prüfen Sie, ob der Tragegri
a in der Trageposition B eingerastet ist.
• Um den Tragegri zu verstellen, drücken Sie gleichzeitig die rechte und linke Taste
(b).
• Anschließend schwenken Sie den Tragegri bei gedrückter Taste (b) nach vorne
oder hinten, bis er automatisch in der gewünschten Position einrastet
EINSTELLEN DES VERDECKS
• Klappen Sie das Verdeck auf, indem Sie
schrittweise an der Kunststoabdeckung
ziehen.
• Um das Verdeck zusammenzuklappen,
schieben Sie das Verdeck zurück in seine
Ausgangsposition.
EINSTELLEN DER KOPFSTÜTZE
HINWEIS: Die Neugeboreneneinlage schützt Ihr Kind. Sie muss bis zu einer Größe
von 60 cm verwendet werden.
Die Kopfstütze sorgt bei optimaler Einstellung für den bestmöglichen Schutz Ihres
Kindes. Es stehen sechs Positionen zur Verfügung, die eingestellt werden können.
Die Kopfstütze muss so eingestellt werden, dass der Abstand zwischen den Schultern
des Kindes und der Kopfstütze 2 cm (ca. 2 Finger breit) nicht überschreitet.
• Überprüfen Sie die Höhe der Gurte: Positionieren Sie die Gurte bei
rückwärtsgerichteter Verwendung an oder direkt unter den Schultern des Kindes.
• Ziehen Sie den Einstellgri (c) nach oben, um die Kopfstütze zu entriegeln.
Jetzt können Sie die Kopfstütze verstellen.
HINWEIS: Die Schultergurte (e) sind fest mit der Kopfstütze verbunden und dürfen
nicht separat verstellt werden.
You can lock the carrying handle in place in four positions:
A: Driving position.
B: Carrying Position.
C: For placing the baby in the seat.
D: For a safe stand on a level surface outside the vehicle..
WARNING! In order to prevent the seat from tipping over during carrying,
check whether the carrying handle a is locked in place in carrying
position B.
• To adjust the carrying handle, simultaneously press the left and right
buttons (b).
• Then pivot carrying handle a forwards or backwards while pressing
button (b), until it automatically locks in place in the desired position.
.
07
08
Adjusting the Headrest
The headrest only ensures the best possible protection for your child if it is
adjusted to the optimum height. There are six positions that can be set.
The headrest has to be adjusted in a way that the distance between
the child‘s shoulders and the headrest doesn‘t exceed 2 cm
(approx. 2 fingers width).
• Check the height of the Harness Straps: Position the Harness
Straps at or just below the child‘s shoulders for rear-facing use.
• Pull the adjustment handle © upwards to unlock the headrest .
Now you can adjust the headrest.
NOTE !
The newborn inlay protects your child. It must be used up to size of 60 cm
ADJUSTING THE CARRYING HANDLE
ADJUSTING THE SUN CANOPY
Unfold the sun canopy by pulling
gradually on the plastic cover.
To fold up, push the sun canopy
back to its starting position.
ADJUSTING TO BODY SIZE
Note! The shoulder belts (e)
are firmly connected to the
headrest and must not be
adjusted separately.
 Loading...