OPTION : RX-ECX2412
Transformer 24V -> 12V • 5 amp.
Supplied in pack RWEC99X/24
4. CONNECTION • RWEC99X • RWEC99X/24
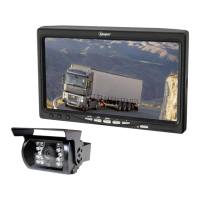
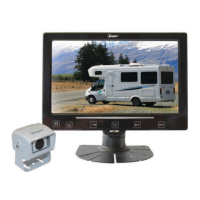
1 • Connect the 15 m. extension cable between monitor and camera.
2 • Plug the wireharness (5 wires) on the monitor
3 • Connect the BLACK wire to the original GROUND of the vehicle
4 • Connect the RED wire to +12V after ignition of the vehicle
5 • Connect the GREEN wire to the +12V Reversing light of the vehicle
15 meters
extension
cable
VIDEO IN 1 Input
Optional camera connection (not supplied)
VIDEO IN 1 Input
Camera connection
Camera
LCD monitor 7"
INPUT • +24 Volts
AFTER IGNITION vehicle
INPUT
Ground Vehicle
INPUT • + 24 Volts
REVERSING LIGHT Vehicle
For a 24V vehicle, you need to :
- either chose the pack RWEC99X/24 suplied with the
24/12 Volts transformer
- either buy separately in option the 24 volts transformer
item ref = RX-EC2412.
See how to connect the transformer below
GREEN • + 12 Volts
Reverse light
Camera activation when reversing
RED • + 12 V after ignition
Monitor activation
BLACK • Ground
Power (-)
Red
Black
Yellow
Red
Black
Yellow
Loop for LIMIT LINES
• Green loop uncut :
Limit lines appear on the monitor
• Green loop cut :
No limit lines on the monitor
16
S-video plug
to 6 pin
4 pins
connector
to screw
4 pins
connector
to screw