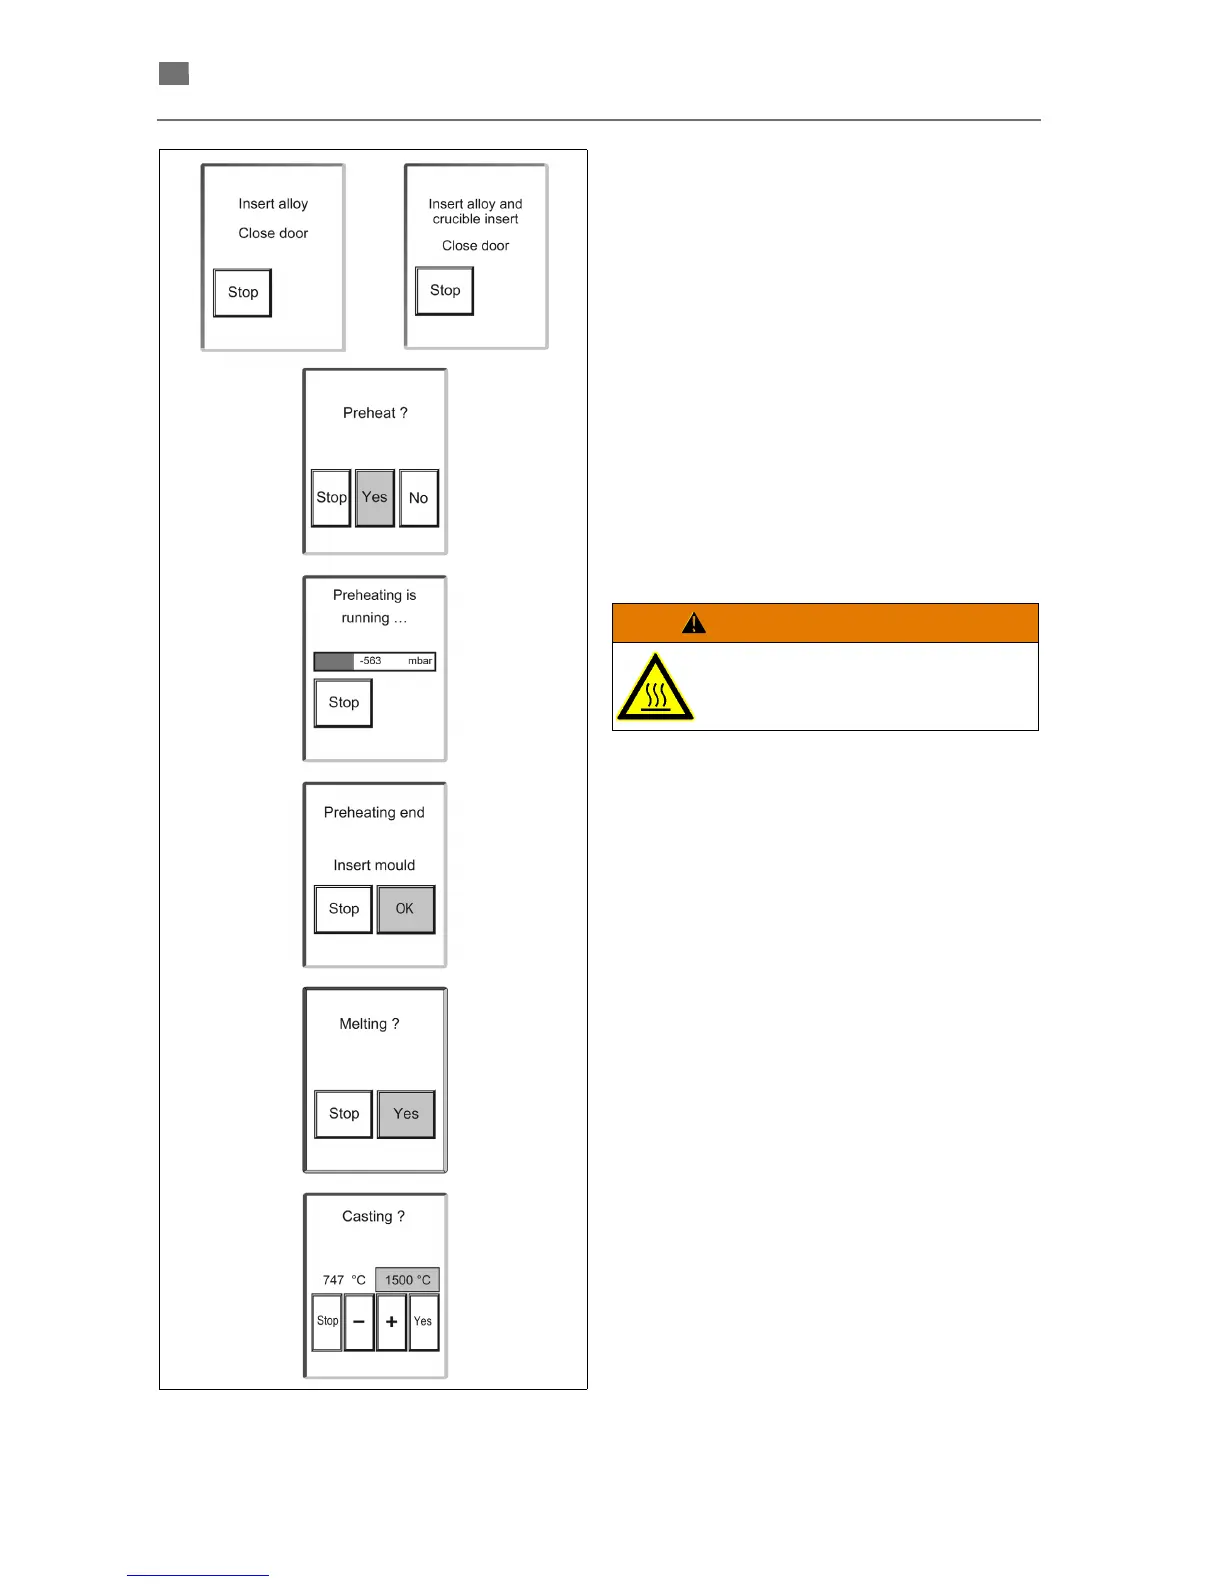
(The display on the right only appears for alloys that
require a crucible insert, see program table.)
When the crucible door is closed, the next display is
shown.
6. Confirm the preheating with „Yes“, or skip with
„No“.
In the case of crucible inserts, preheating must
be carried out:
"No" is missing on the display.
7. The chamber is evacuated during preheating.
8. The preheating may last for up to 60 seconds.
A signal sounds at the end.
9. If desired, it can be ended prematurely.
10. To prevent the alloy from cooling down unnec-
essarily: Get the moulds first, then press „OK“!
The preheating temperature and partial vac-
uum are maintained until then.
11. The next display is shown when the mould
door is closed.
12. The melting must now be confirmed with „Yes“.
The actual temperature and casting tempera-
ture are displayed.
(Only actual temperatures above 700 °C.)
13. Observe the melt and compare with the specifi-
cations on the display:
• If the ideal casting temperature is higher
than the one displayed, it must be
increased: First press the number field, then
the "+" key (10°C steps).
• If the ideal casting temperature is lower than
the one displayed, trigger the casting with
the "Yes" key and manually cast again at a
lower casting temperature (approx. -50 °C).
14. If the melt appears to be ready to cast, press
the "Yes" key to cast after observing the follow-
ing information.
 Loading...