42
When automation is activated, even though no automation data
have been recorded (automation is used for the first time, or
after AUTOMATION CLEAR), the console takes a snapshot of
the current mixer state and uses this snapshot as a starting
point for the dynamic automation. At this point, the timecode
format for the automation is set, and can then no longer be edited
on the AUTOM. or MIDI SETUP pages, without clearing the entire
dynamic automation before (AUTOMATION CLEAR on SETUP
page in DYNAMIC AUTOMATION menu).
RECORD SWITCH
Master controller 2 determines how the various switches work
in dynamic automation mode, as long as they are activated.
NORMAL: The switches perform their “normal” function.
Pressing the control once sets it to RECORD and activates its
function.
2 x CLICK: Pressing a switch once (also on the display) sets it
to RECORD, but does not activate its function. Once set to
RECORD, it works as usual. The 2 x CLICK function will be
required only if a switch press shall not be recorded (or deleted)
as part of a dynamic automation.
RELEASE mode
Master controller 3 determines which mode a control element
enters after leaving RECORD mode. Three options are available:
In FADEBACK mode, the control element is gradually reset to
its previous automation value, depending on the adjusted
FADEBACK time and once it leaves RECORD mode (either by
stopping the machine providing timecode information, or pressing
the AUTO/REC switch of a channel in RECORD mode).
In OFFSET mode an offset is added to the previous automation
data, which corresponds to the difference between the
previously recorded position of the control element and its current
position when leaving RECORD mode.
In WRITE TO END mode, the last value adjusted for the controller
in question will be used for the entire automation process.
+ RELEASE mode can be changed at any time during a
mix.
UNDO
Undoes the last pass of automation record (a “pass” refers to
the passage between the start and stop of timecode). The
currently selected UNDO level (one of two) is shown in the
display. When you activate RECORD after UNDO, the REDO option
will no longer be available, i. e. the UNDO level is set back to “0”.
REDO
Repeats the last pass of automation record. Two REDO levels
are available, however, only if the UNDO function has been
used since the last automation record. The current REDO level is
shown in the display. When you activate RECORD after UNDO,
the REDO option will no longer be available, i. e. the UNDO level
is set back to level “0”.
FADEBACK
This option causes all channels in RECORD mode to fade back
to their positions in the previous automation pass, and enter
RECORD READY. The FADEBACK time is shown above the master
controller and can be edited by turning the knob.
TIMECODE display
Reads the current timecode and informs you whether or not
the unit is receiving timecode that matches the frame rate of the
automation file (LOCK, if yes; NO LOCK, if no). The timecode
source can be selected on the SETUP page in the MIDI menu, or
the SETUP page in the DYNAMIC AUTOMATION menu.
MEMORY USAGE
This display shows you how much of the internal memory of
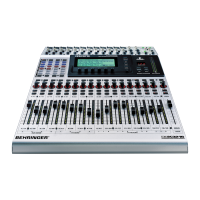
your DDX3216 is being used.
11.3.2 SETUP page
Fig. 11.3: SETUP page in the DYNAMIC AUTOMATION menu
AUTOMATION ON/OFF
Master controller 1 turns the dynamic automation on or off.
This function is the same as the AUTOMATION ON/OFF function
on the AUTOM. page (see chapter 11.3.1 “AUTOM. page”).
AUTOMATION CLEAR
Clears all dynamic automation files in the DDX3216. The flash
memory of the console stores one automation file. In order to
start a new automation, this file must be deleted with
AUTOMATION CLEAR. Multiple automation files can be saved to
a PC card or Personal Computer. AUTOMATION CLEAR has no
effect on these files.
SOURCE
This control selects the timecode source. Available options
are OFF (no timecode displayed), SMPTE (SMPTE timecode via
XLR timecode input on the rear panel), MIDI (MTC timecode via
MIDI IN on the rear panel), or CLOCK (internally generated timecode
as set on the MIDI MACHINE CONTROL page in the MIDI menu).
TIMECODE RATE
The TIMECODE RATE control displays the incoming timecode
format and allows you to select the timecode format when CLOCK
is used as the timecode source. Once the dynamic automation
has been activated, this control is locked to the timecode rate of
the corresponding automation file. Erasing this file with
AUTOMATION CLEAR allows you to select a new timecode rate.
AUTO SAVE
When the AUTO SAVE function is on, it will store the dynamic
automation file on a PC card, as soon as the timecode source
connected to the console stops. Use the NAME control to enter
a name for this AUTO SAVE file.
11.3.3 RECORD page
The RECORD page in the AUTOMATION menu allows you to
select the various parameter to be recorded as part of the dynamic
automation.
Fig. 11.4: RECORD page in the DYNAMIC AUTOMATION
menu
You can also record all parameters of the built-in effects
processors, for example, to realize filter sweeps or timecode-
related modulation effects.
11.4 Dynamic automation in practice
11.4.1 Starting a project
Save a backup copy of all automation files to a PC card or
Personal Computer. Then, select the AUTOMATION CLEAR option
on the SETUP page in the DYNAMIC AUTOMATION menu to clear
the current automation file and disable the dynamic automation.
Check the timecode settings on the SETUP page. If necessary,
connect the timecode source to the DDX3216, select the
appropriate input, and start the timecode source. The appropriate
timecode format will be selected and displayed automatically.
Setup the console as desired for the beginning of the mix.
11. DYNAMIC AUTOMATION
 Loading...
